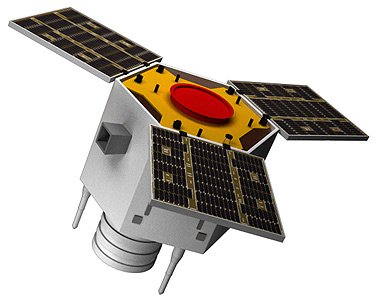
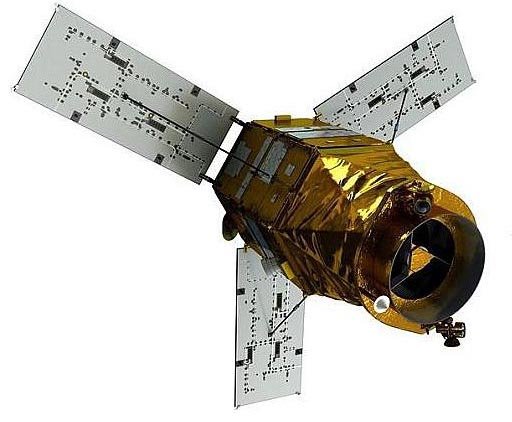
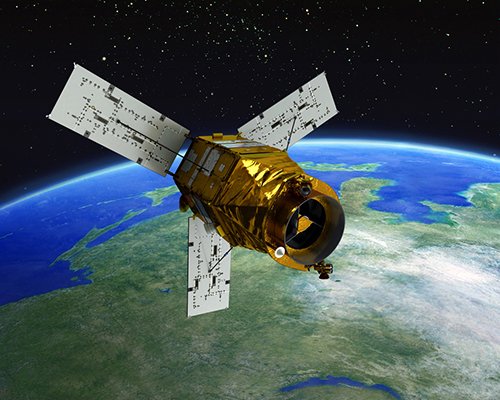
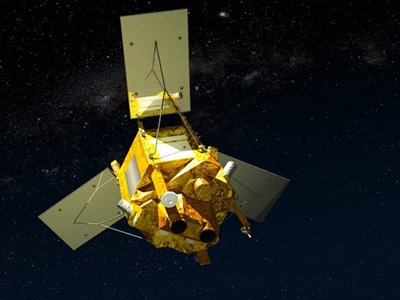
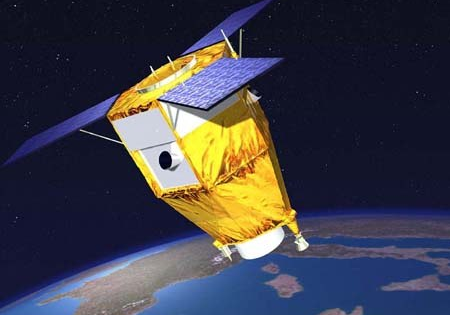
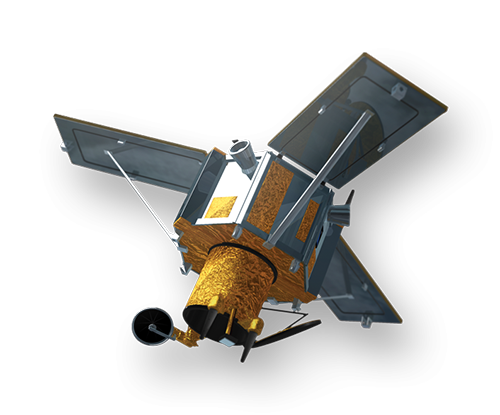
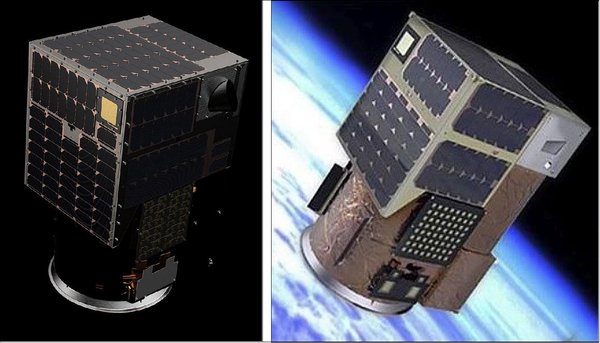
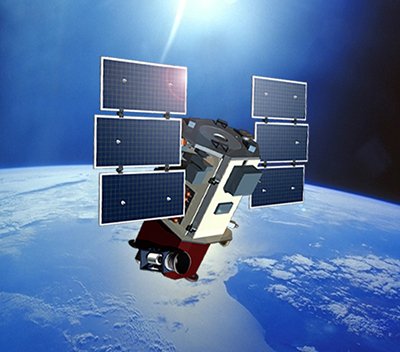
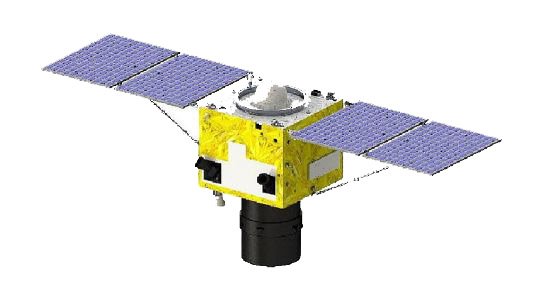
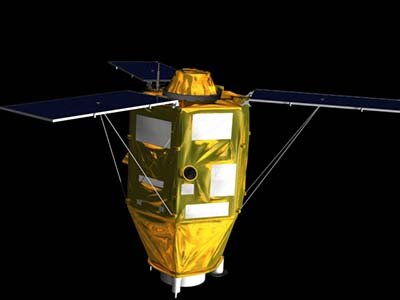
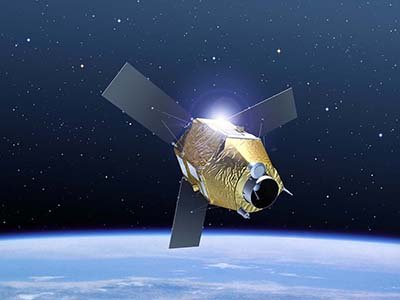
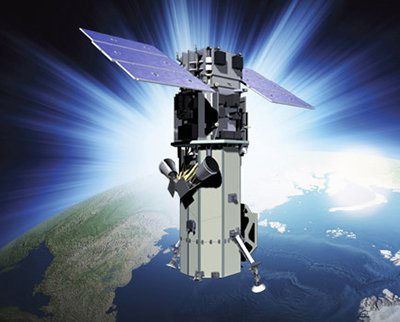
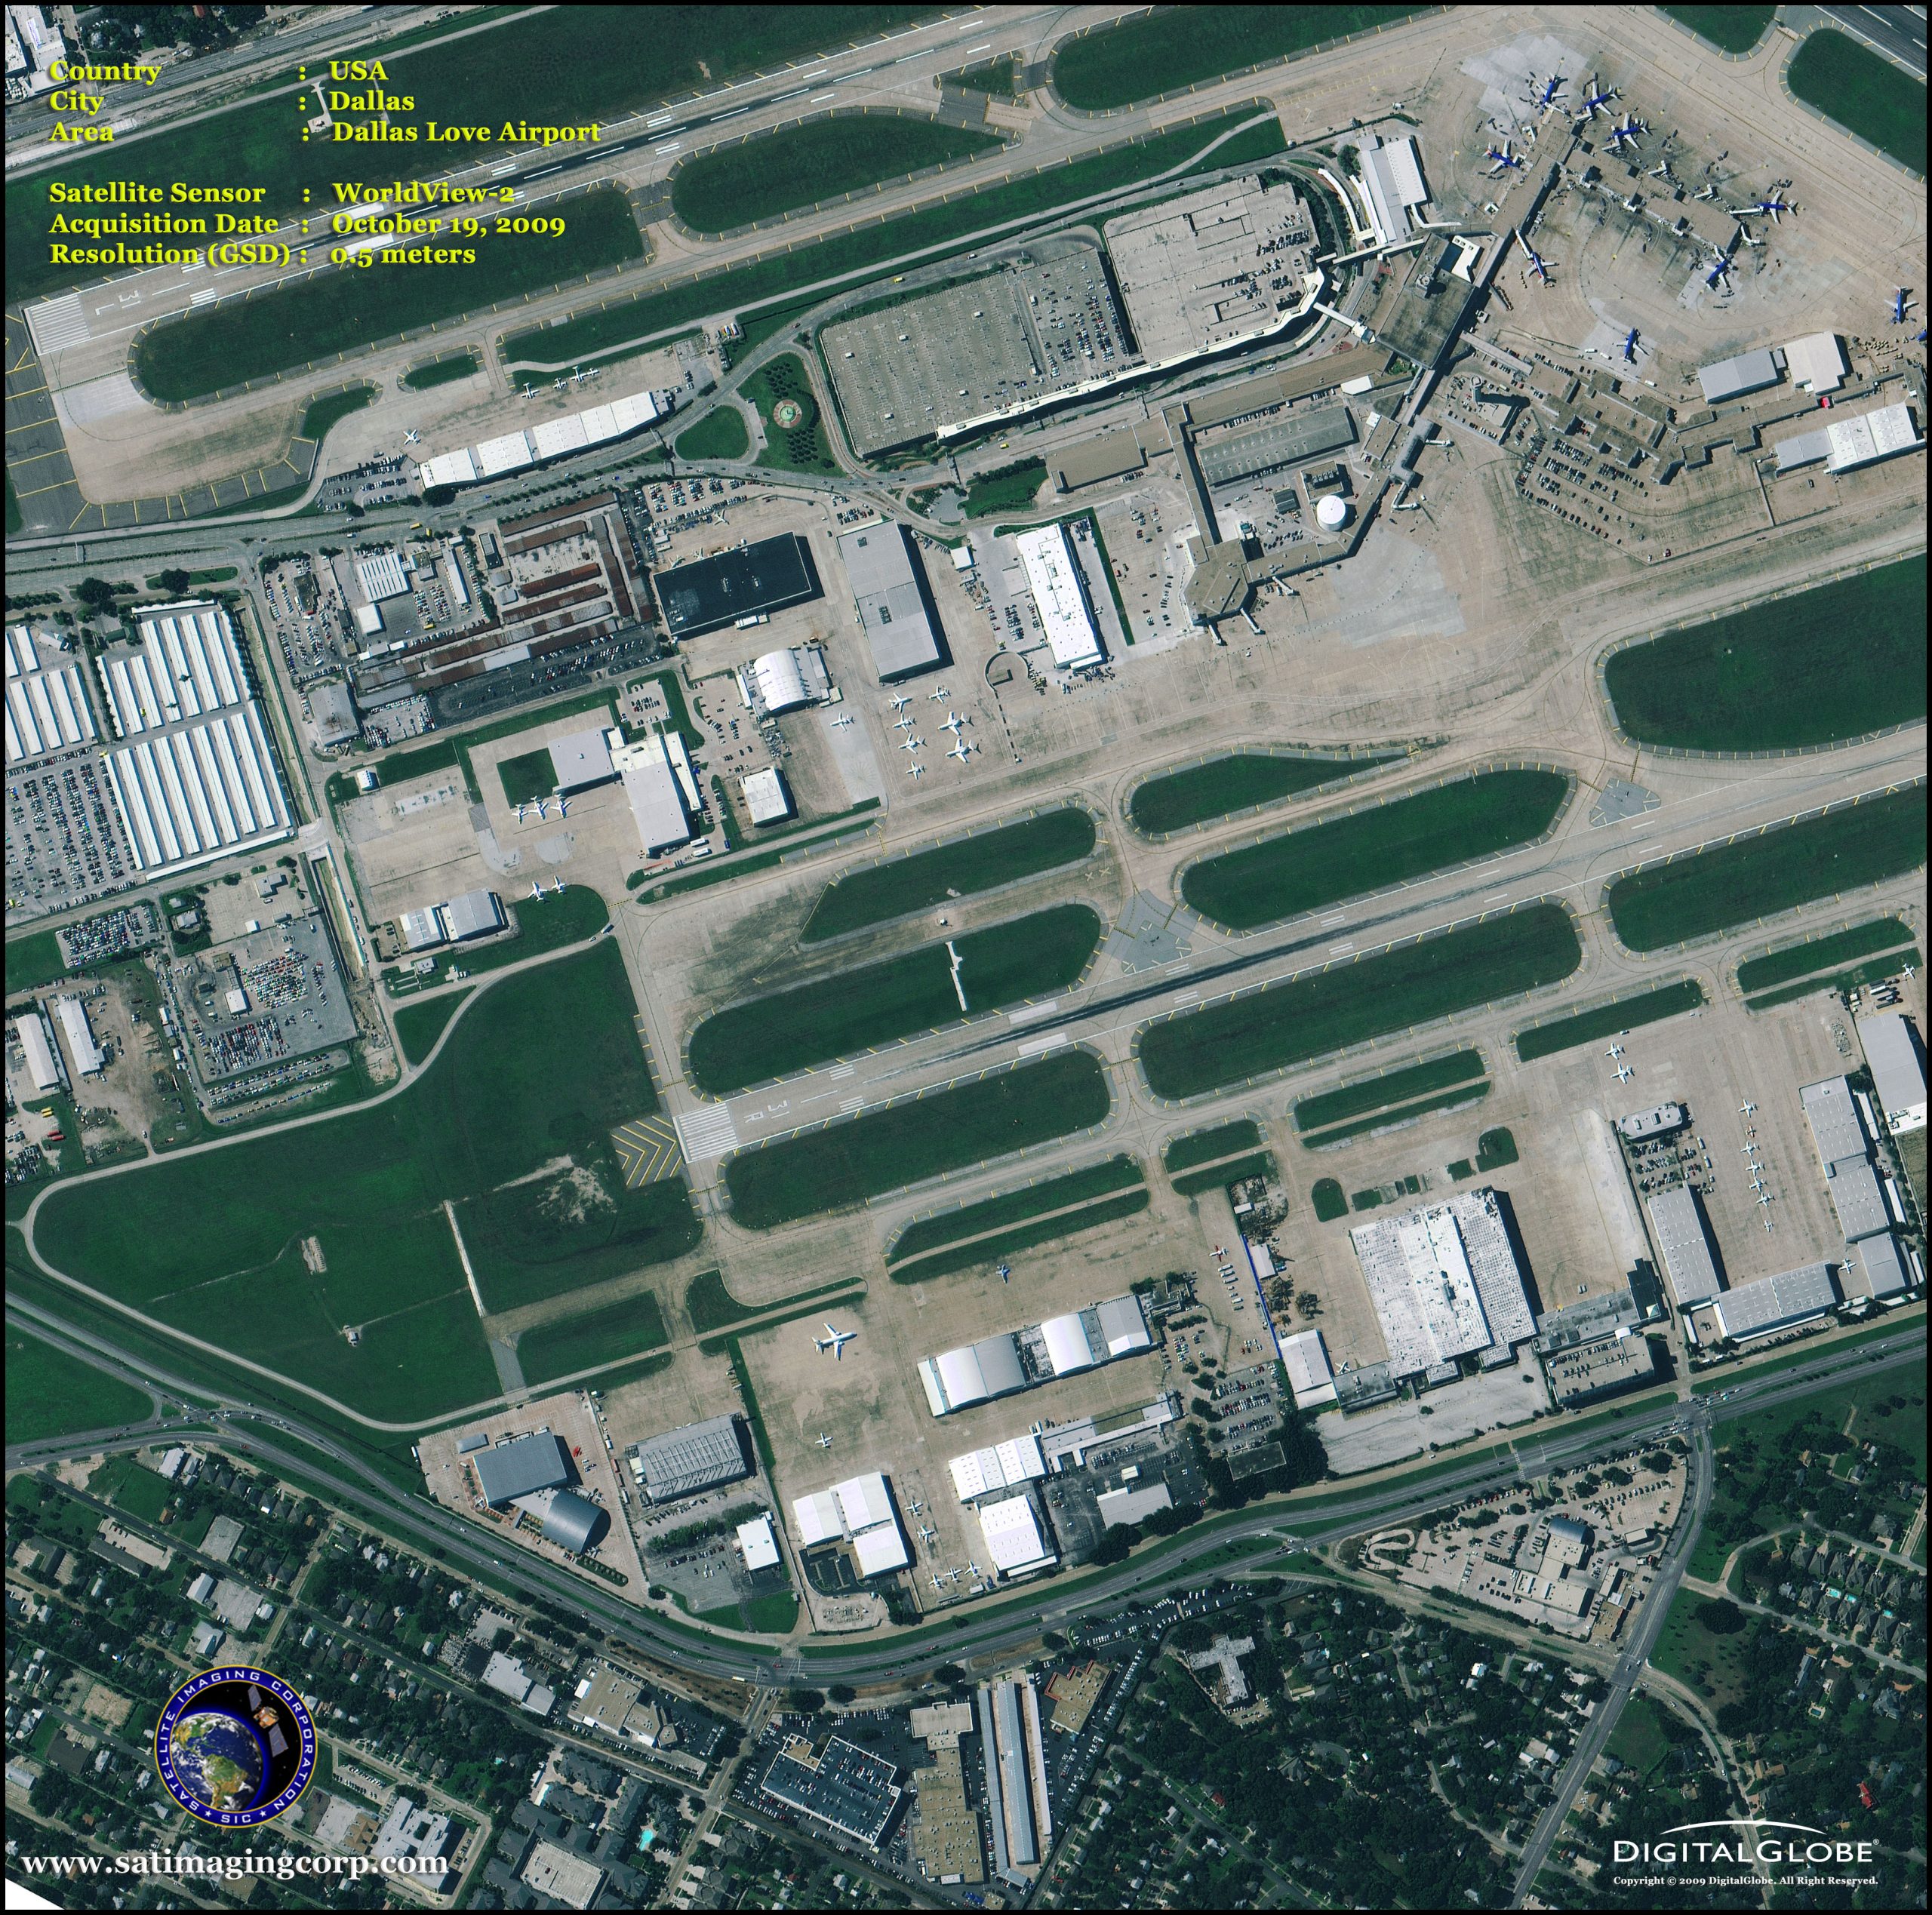
WorldView-2 Satellite Sensor
(0.50m)
MAXAR’s WorldView-2 satellite sensor, launched October 8, 2009, provides 0.46m panchromatic (B&W) mono and stereo satellite image data.
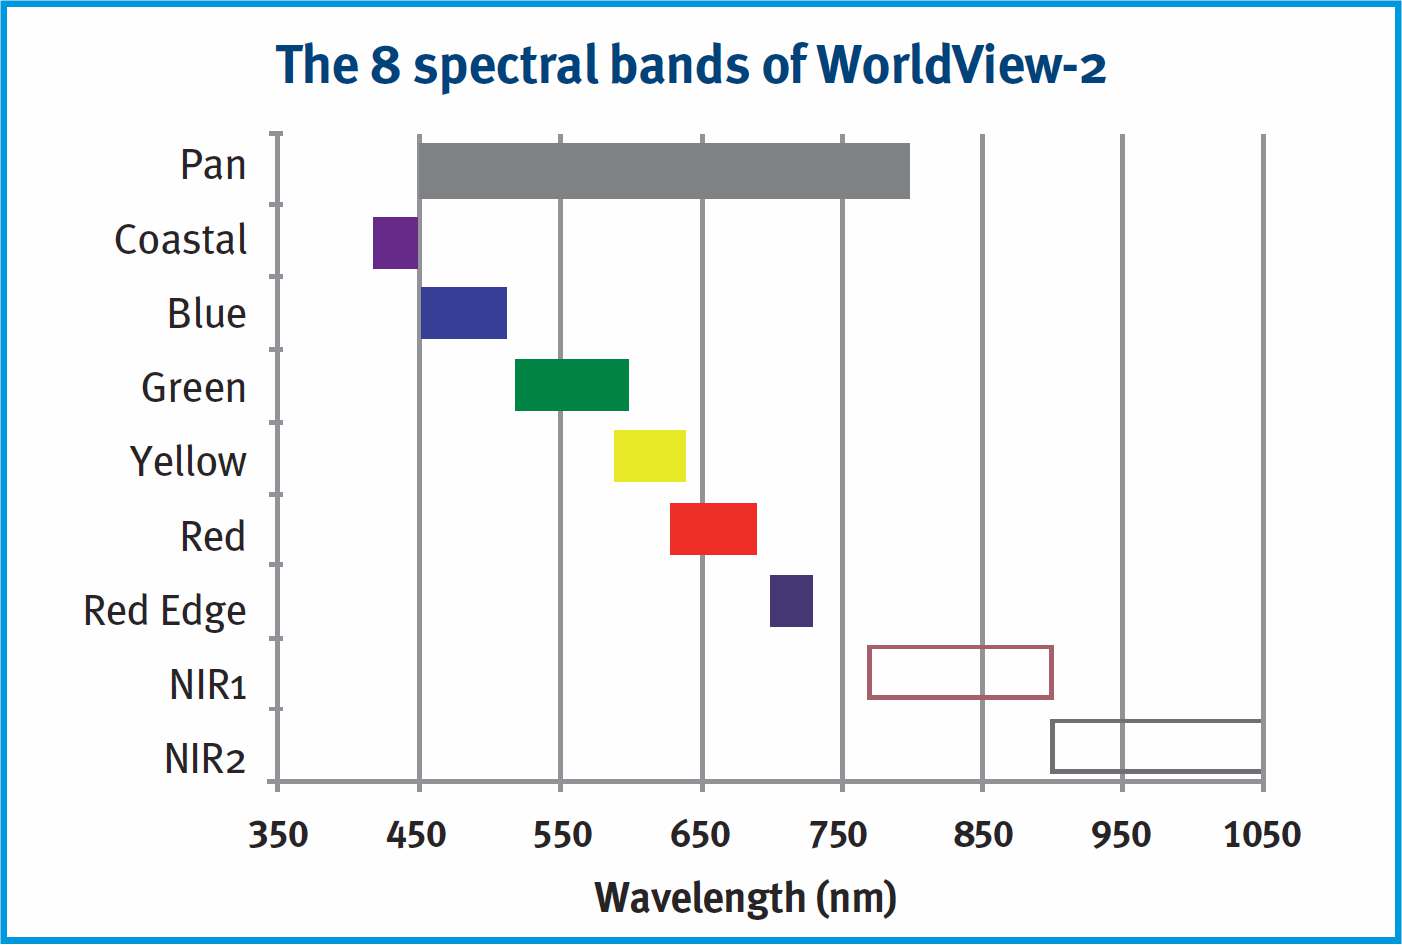
The WorldView-2 sensor provides a high-resolution panchromatic band and eight (8) multispectral bands; four (4) standard colors (red, green, blue, and near-infrared 1) and four (4) new bands (coastal, yellow, red edge, and near-infrared 2), full-color images for enhanced spectral analysis, mineral mapping, wildlife monitoring, land-use planning, disaster relief, defense, and climate change.
WorldView-2 Satellite Sensor (0.50m)
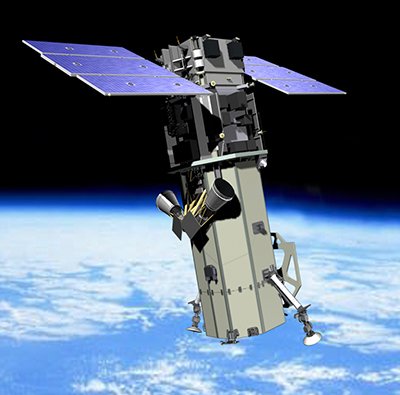
Copyright © MAXAR. All rights reserved.
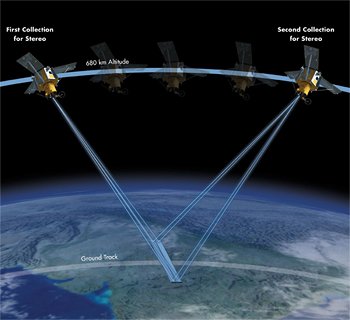
With its improved agility, WorldView-2 can act like a paintbrush, sweeping back and forth to collect very large areas of multispectral imagery in a single pass. WorldView-2 alone can collect nearly 1 million km2 every day, doubling the collection capacity of our constellation to nearly 2 million km2 per day. The combination of WorldView-2’s increased agility and high altitude enables it to typically revisit any place on earth in 1.1 days, revisit time drops below one day and never exceeds two days, providing the most same-day passes of any commercial high resolution satellite.
The WorldView-2 imaging payload is the second such system engineered and manufactured by ITT Space Systems Division for MAXAR. WorldView-2 operates at an altitude of 770 kilometers, and the advanced on-board imaging system can capture pan-sharpened, multispectral images (with better than 0.46-meter resolution) from almost 500 miles above the earth. These images supply unprecedented detail and geospatial accuracy, further expanding the applications for satellite imagery in both commercial and government markets. Added spectral diversity provides the ability to perform precise change detection and mapping.
In addition to numerous other technical improvements, WorldView-2 can accommodate direct tasking, which will allow select customers around the world to load imaging profiles directly up to the spacecraft and execute delivery of the data directly down to their ground stations.
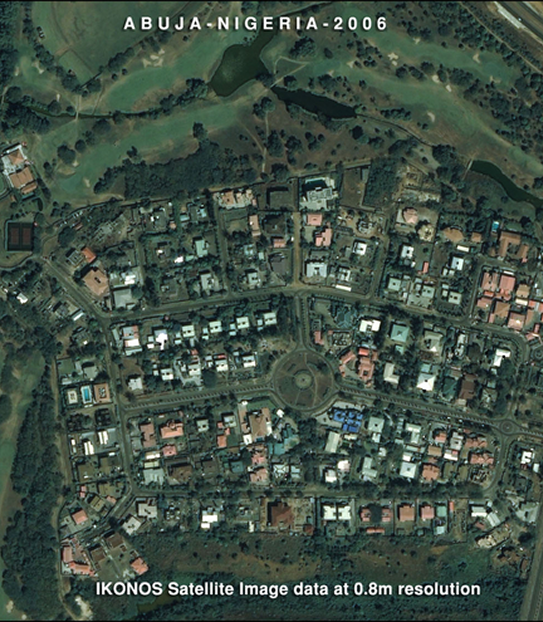
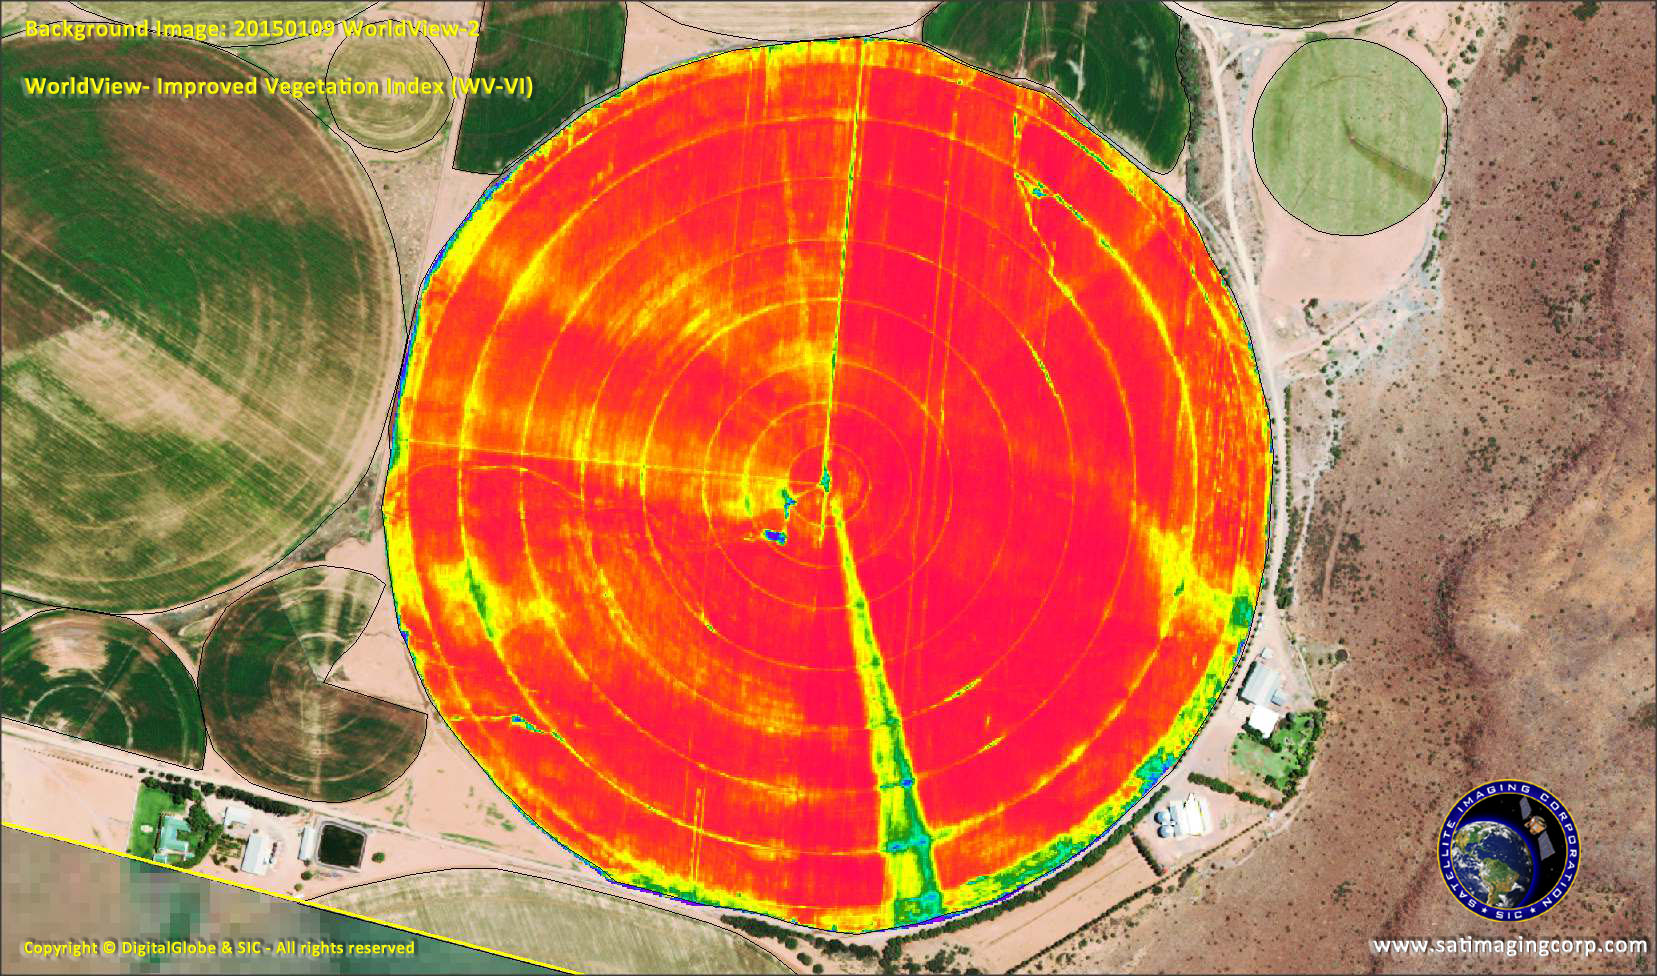
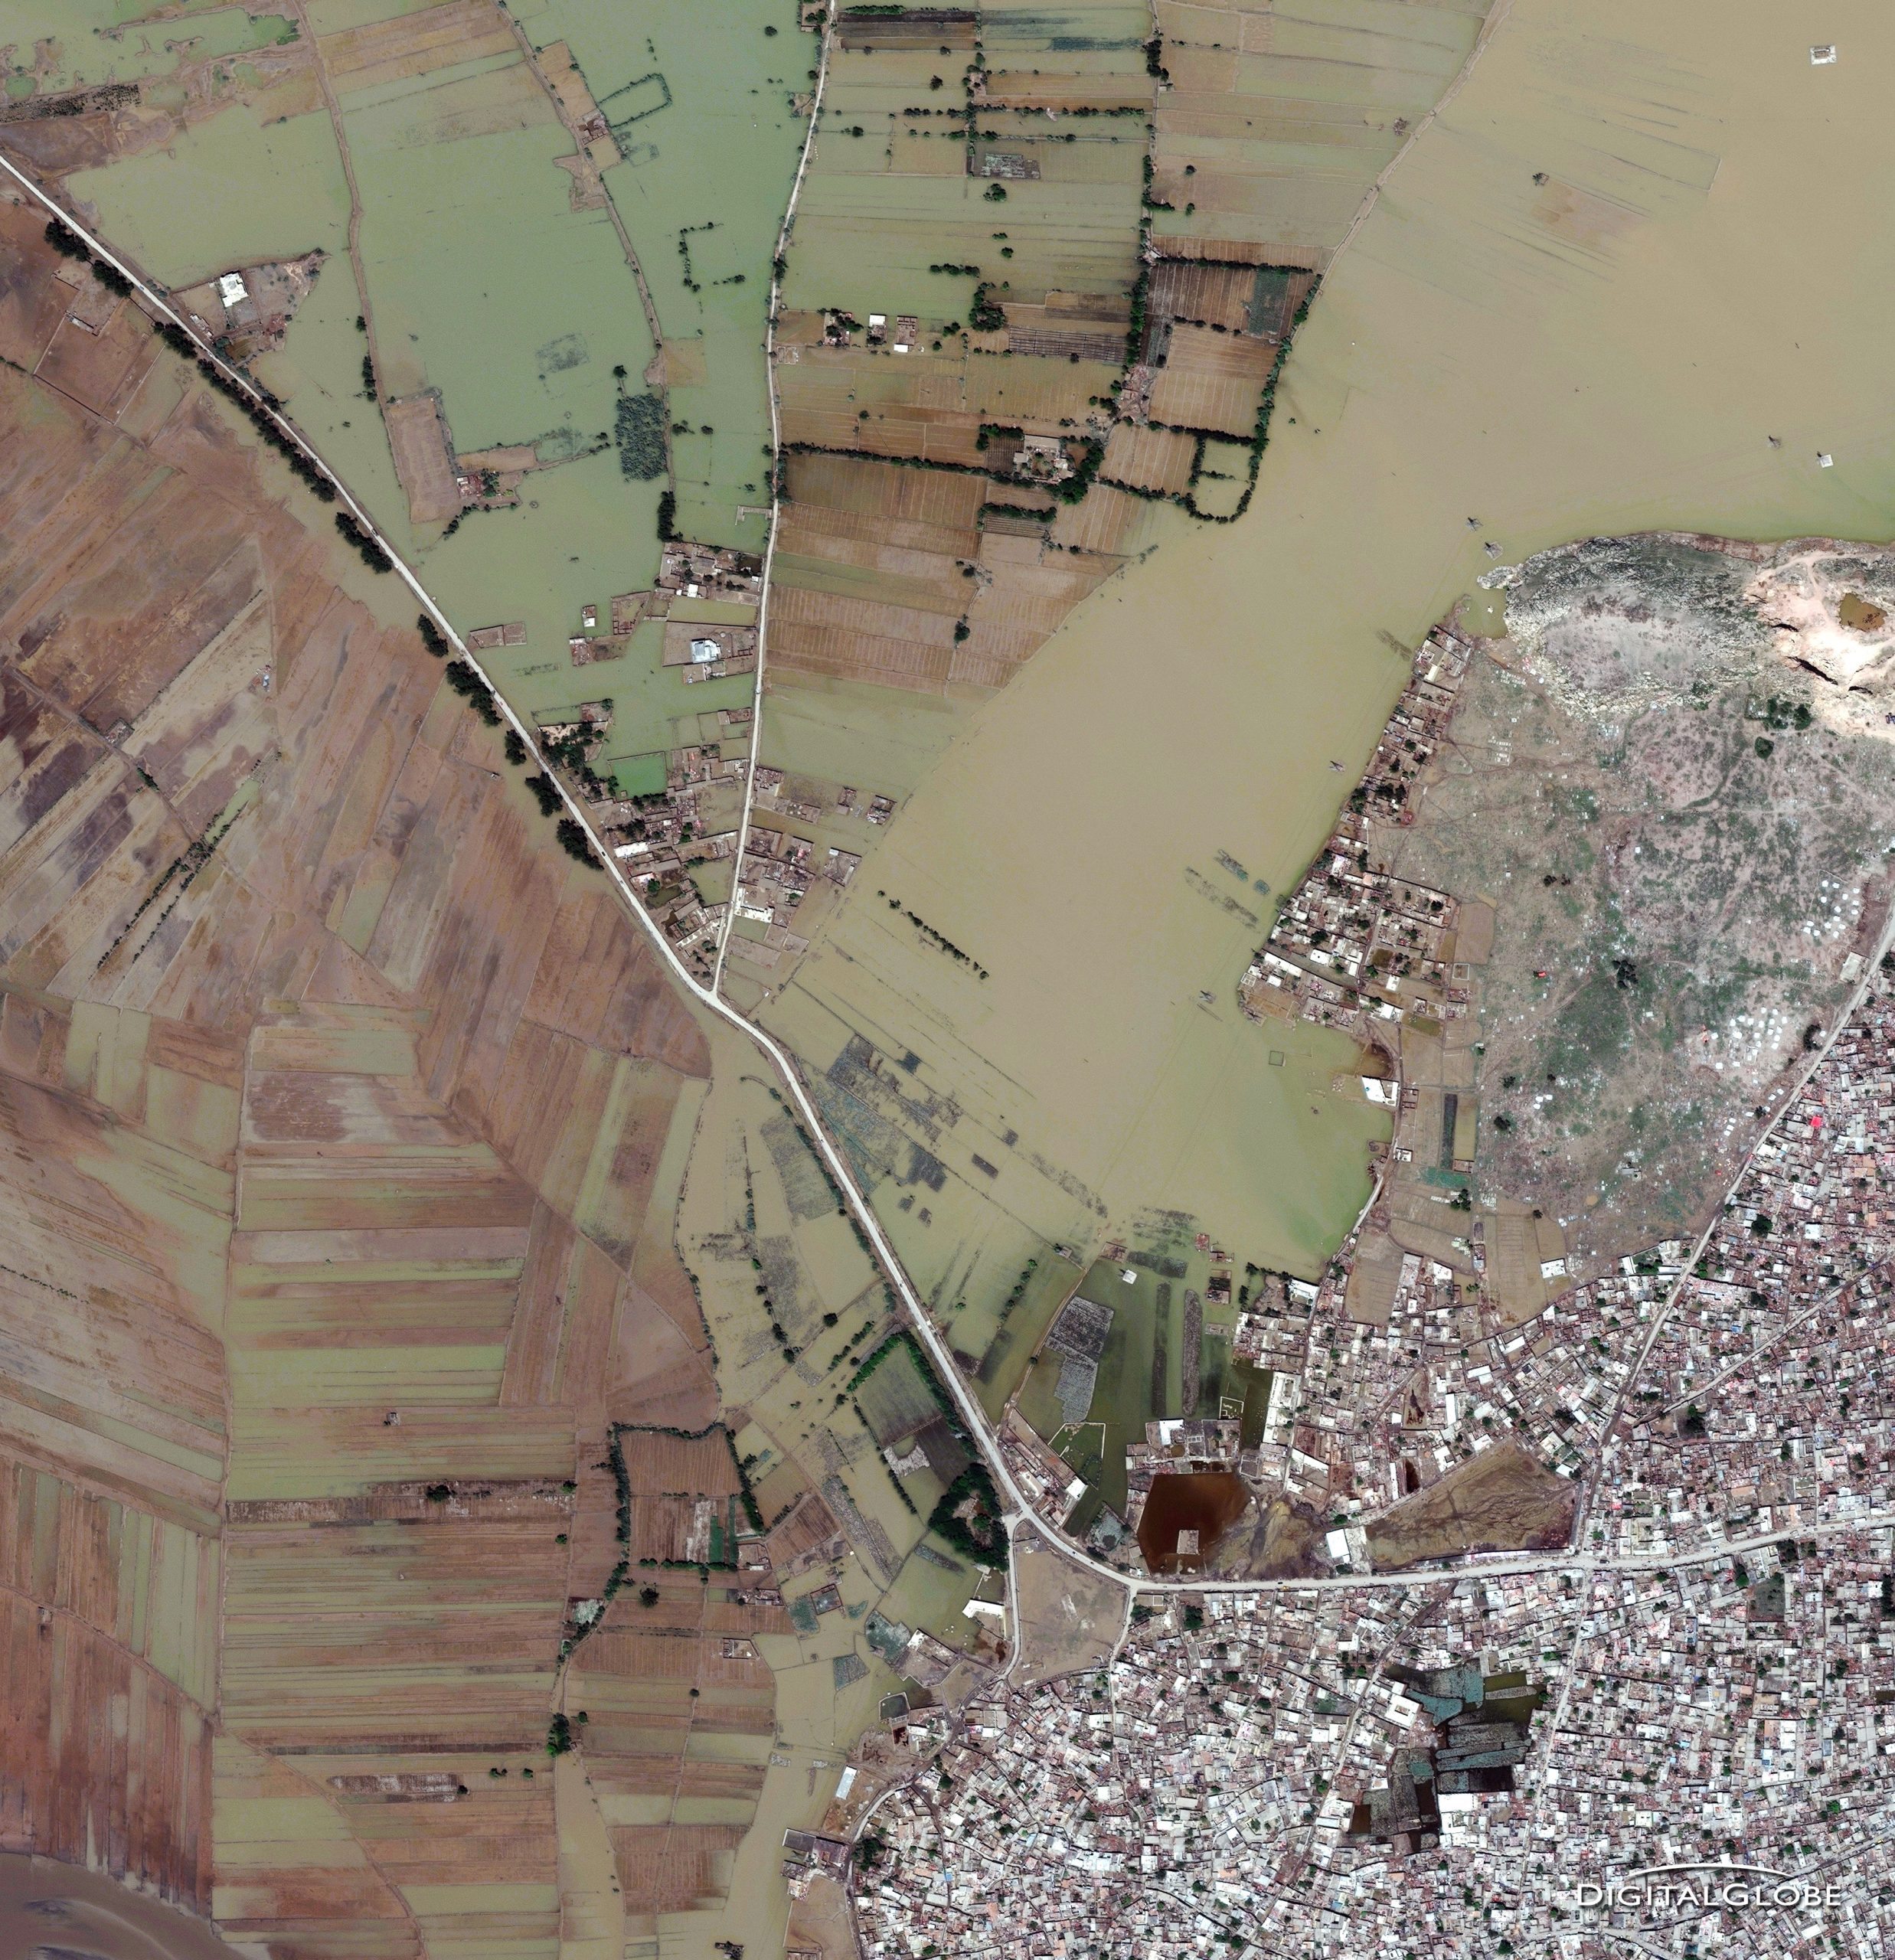
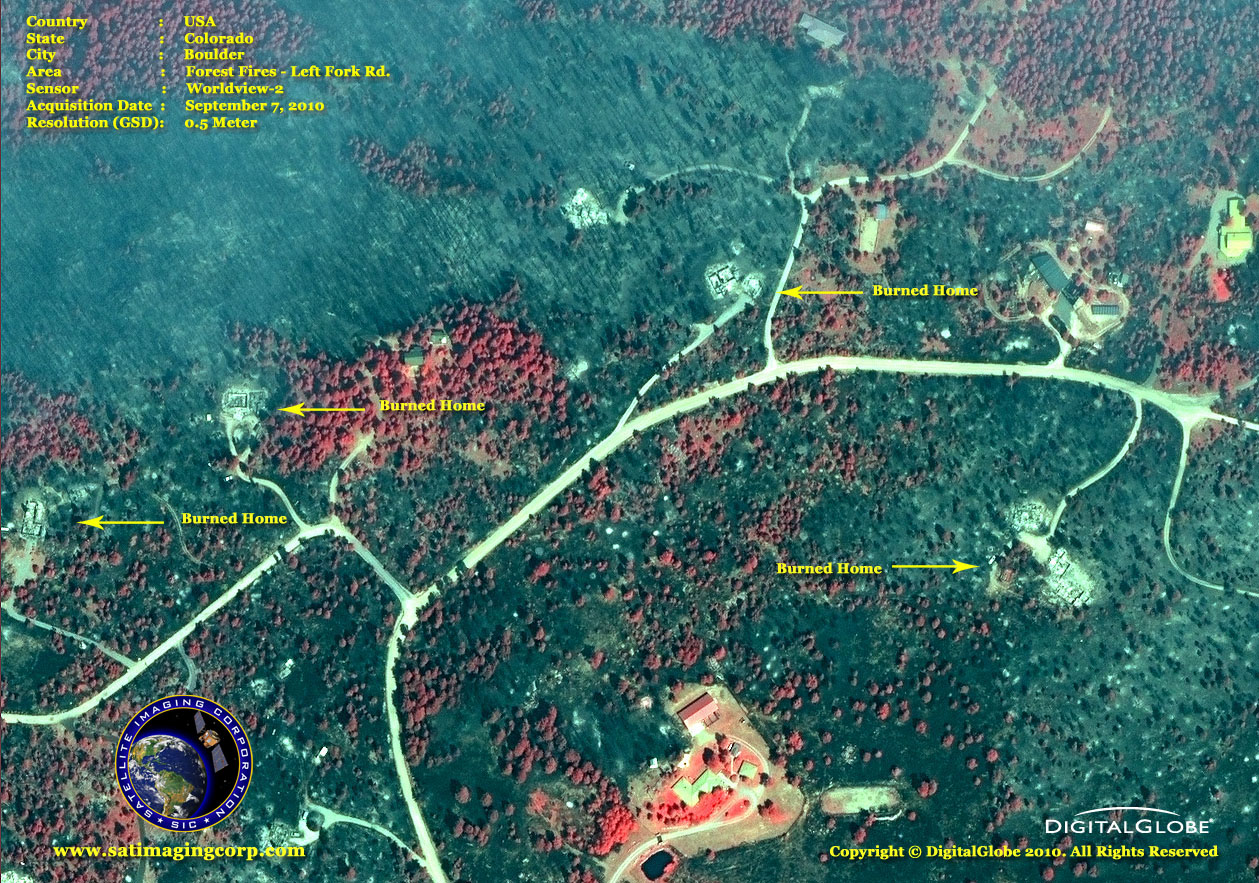
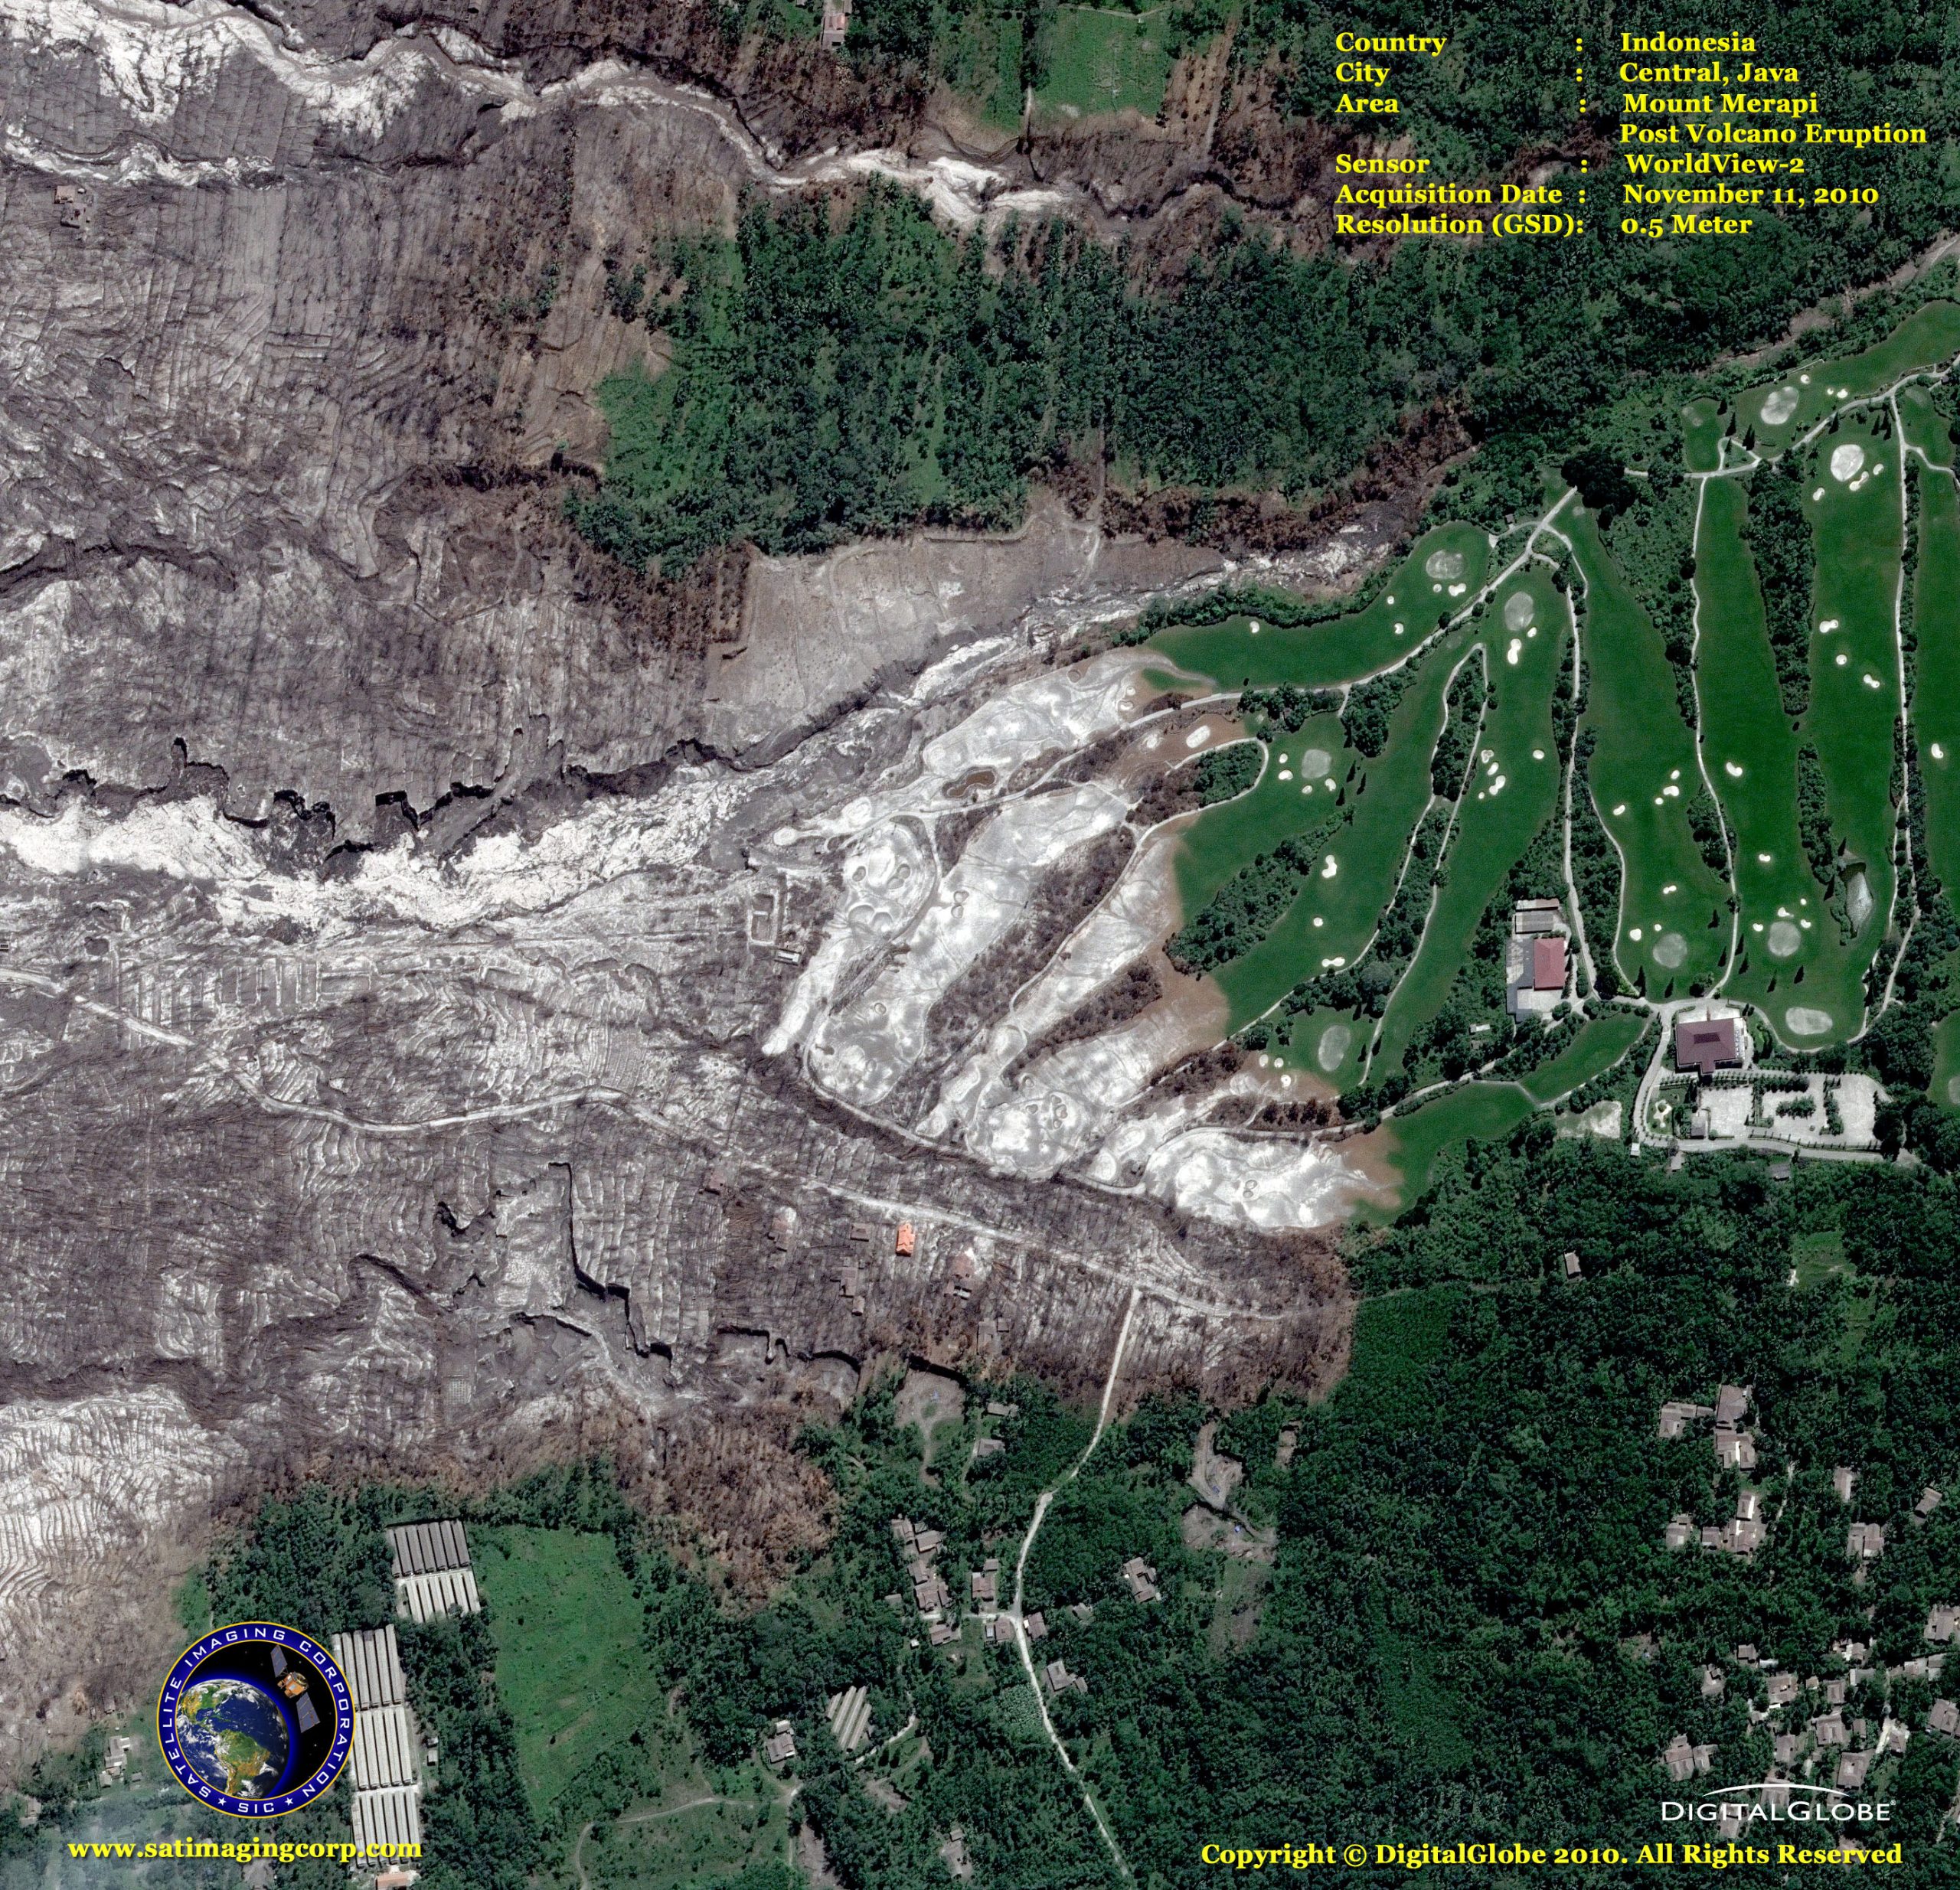
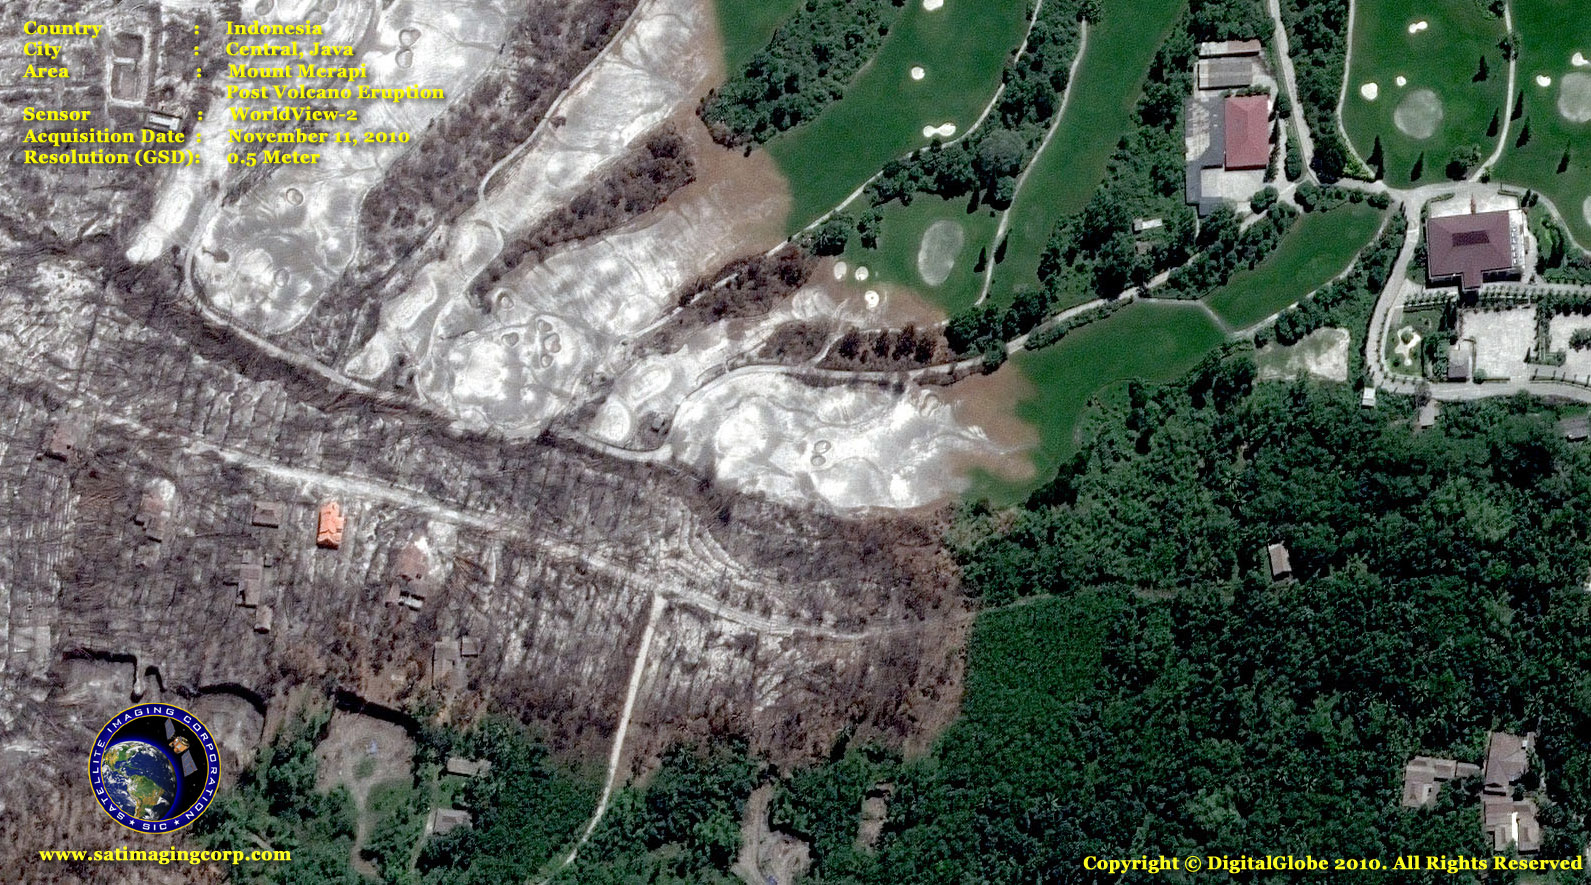
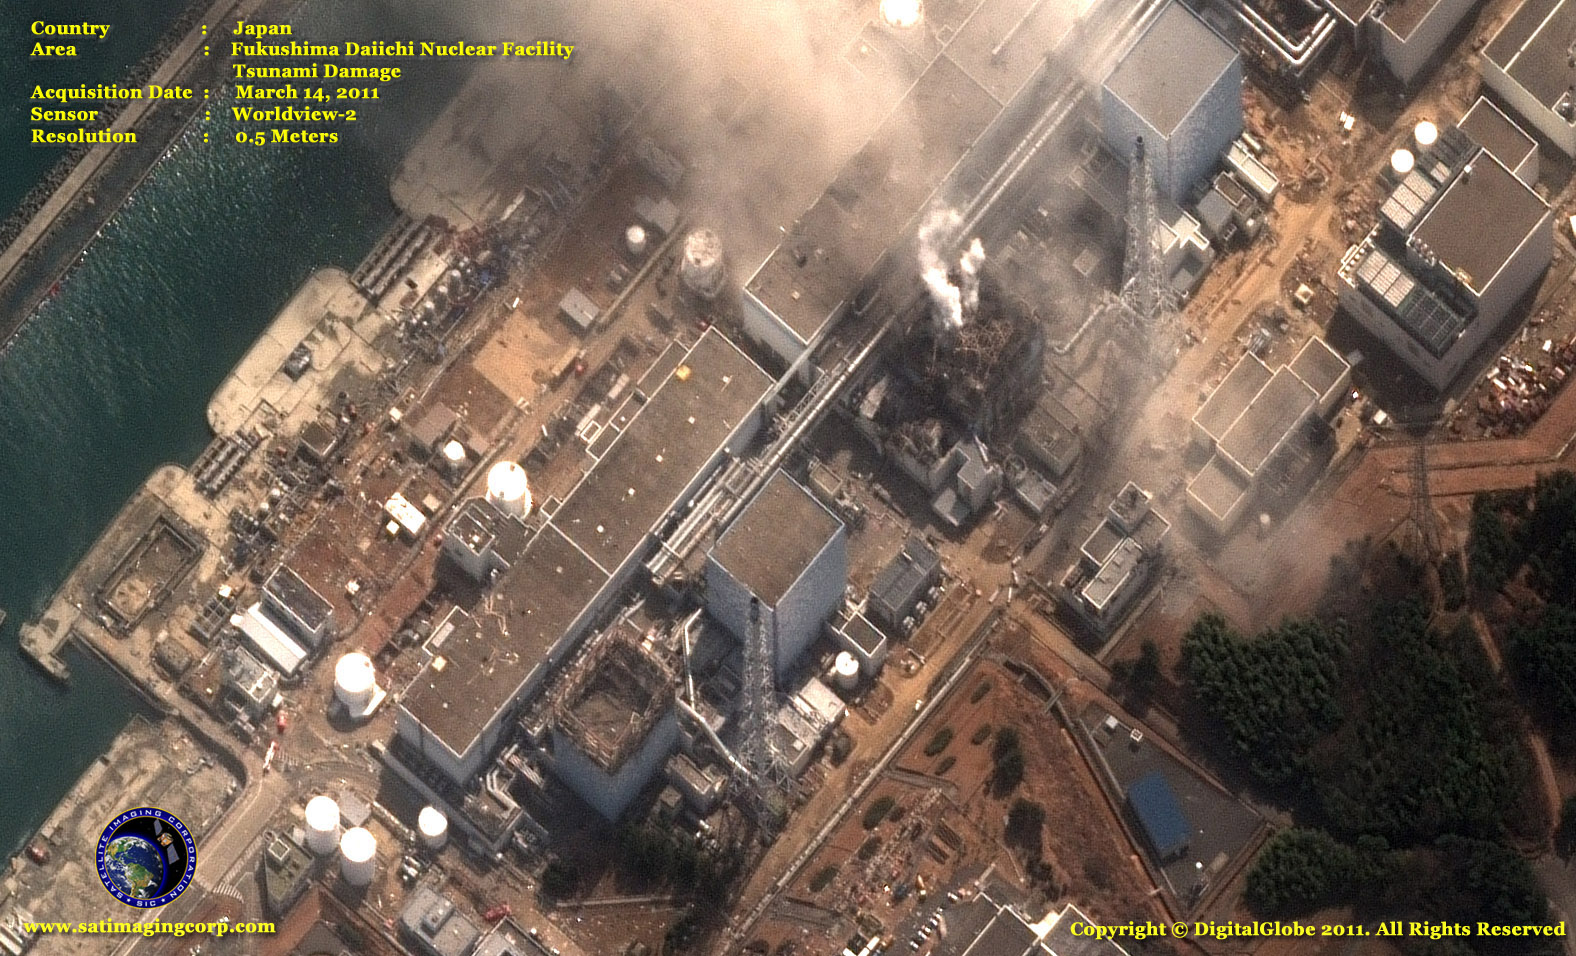
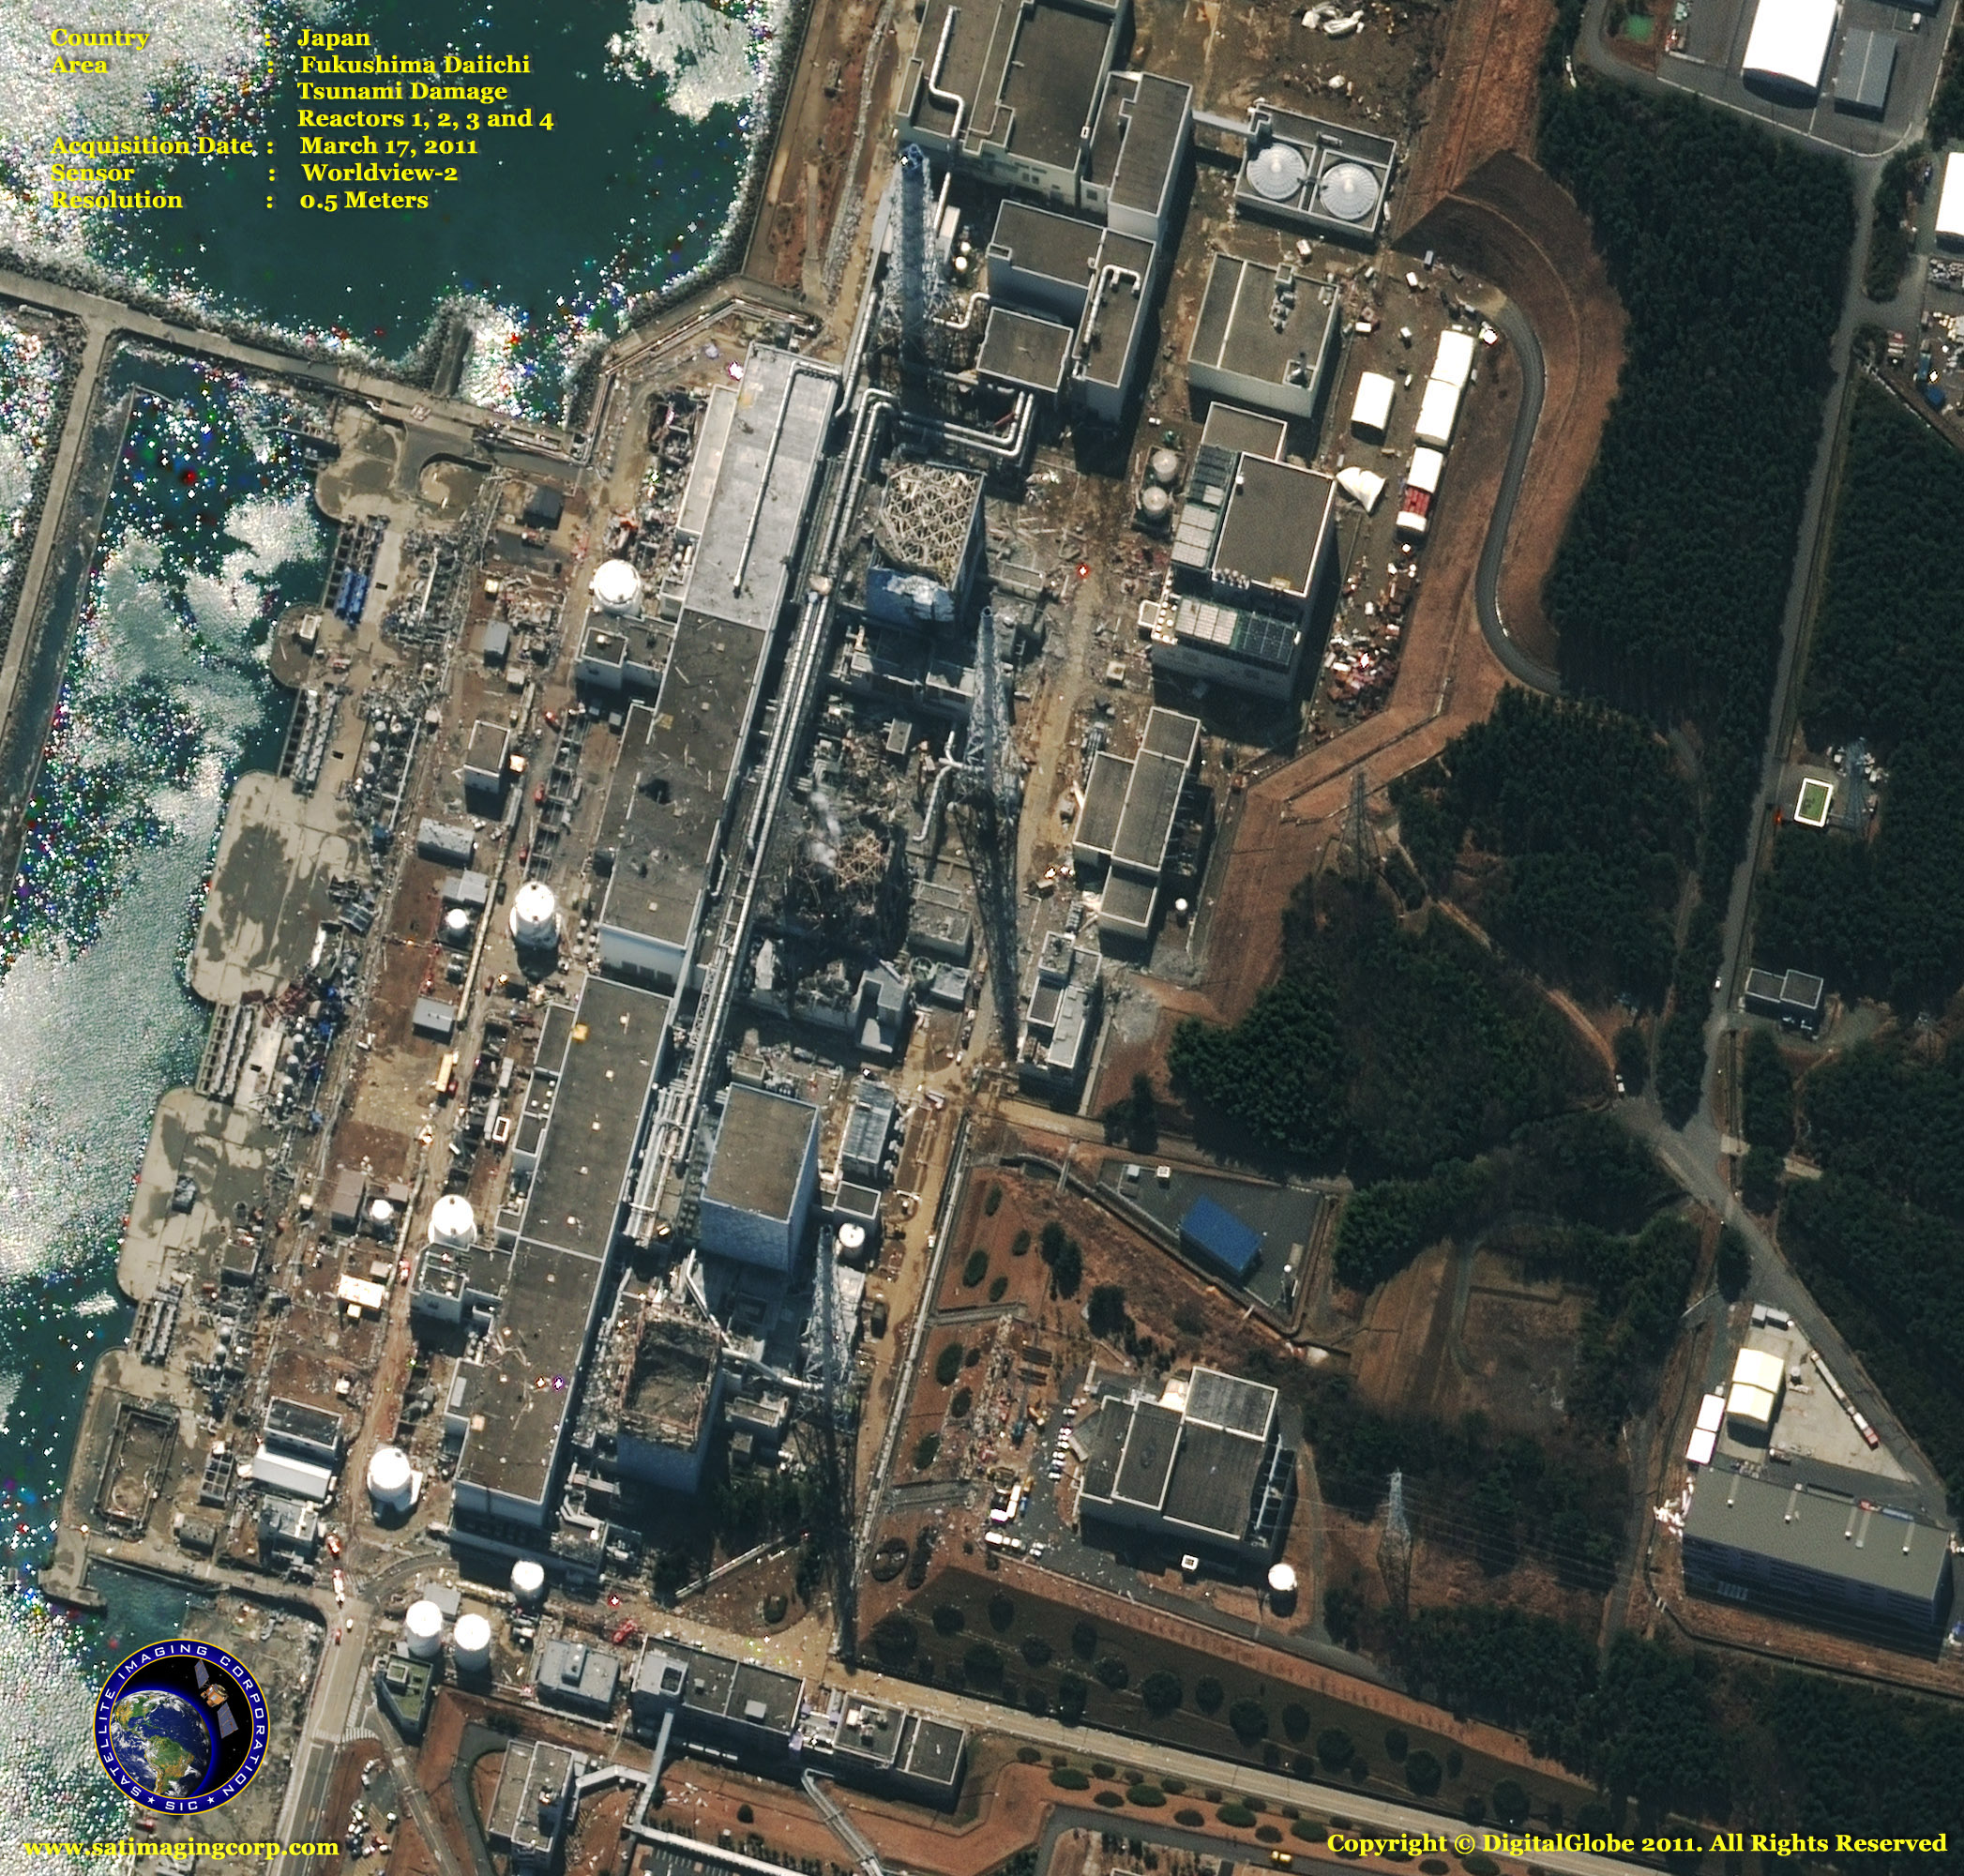
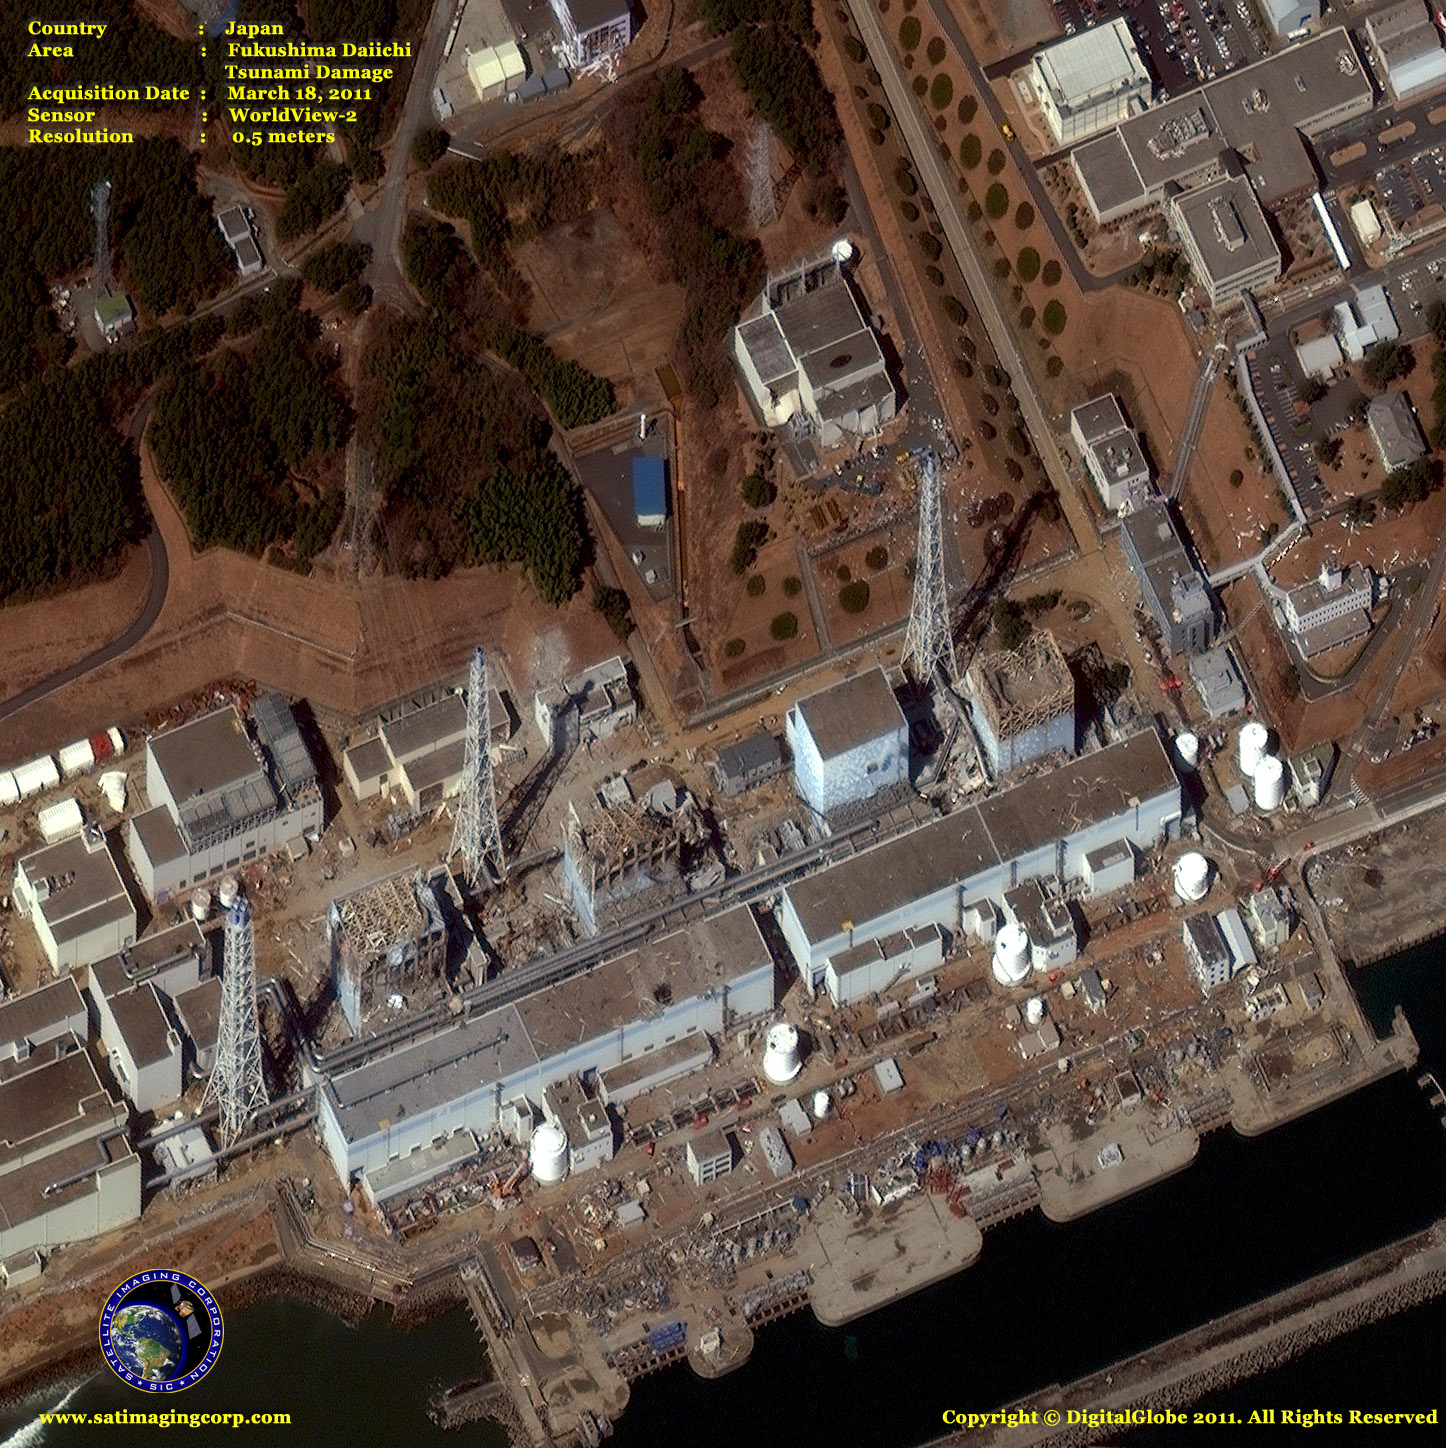
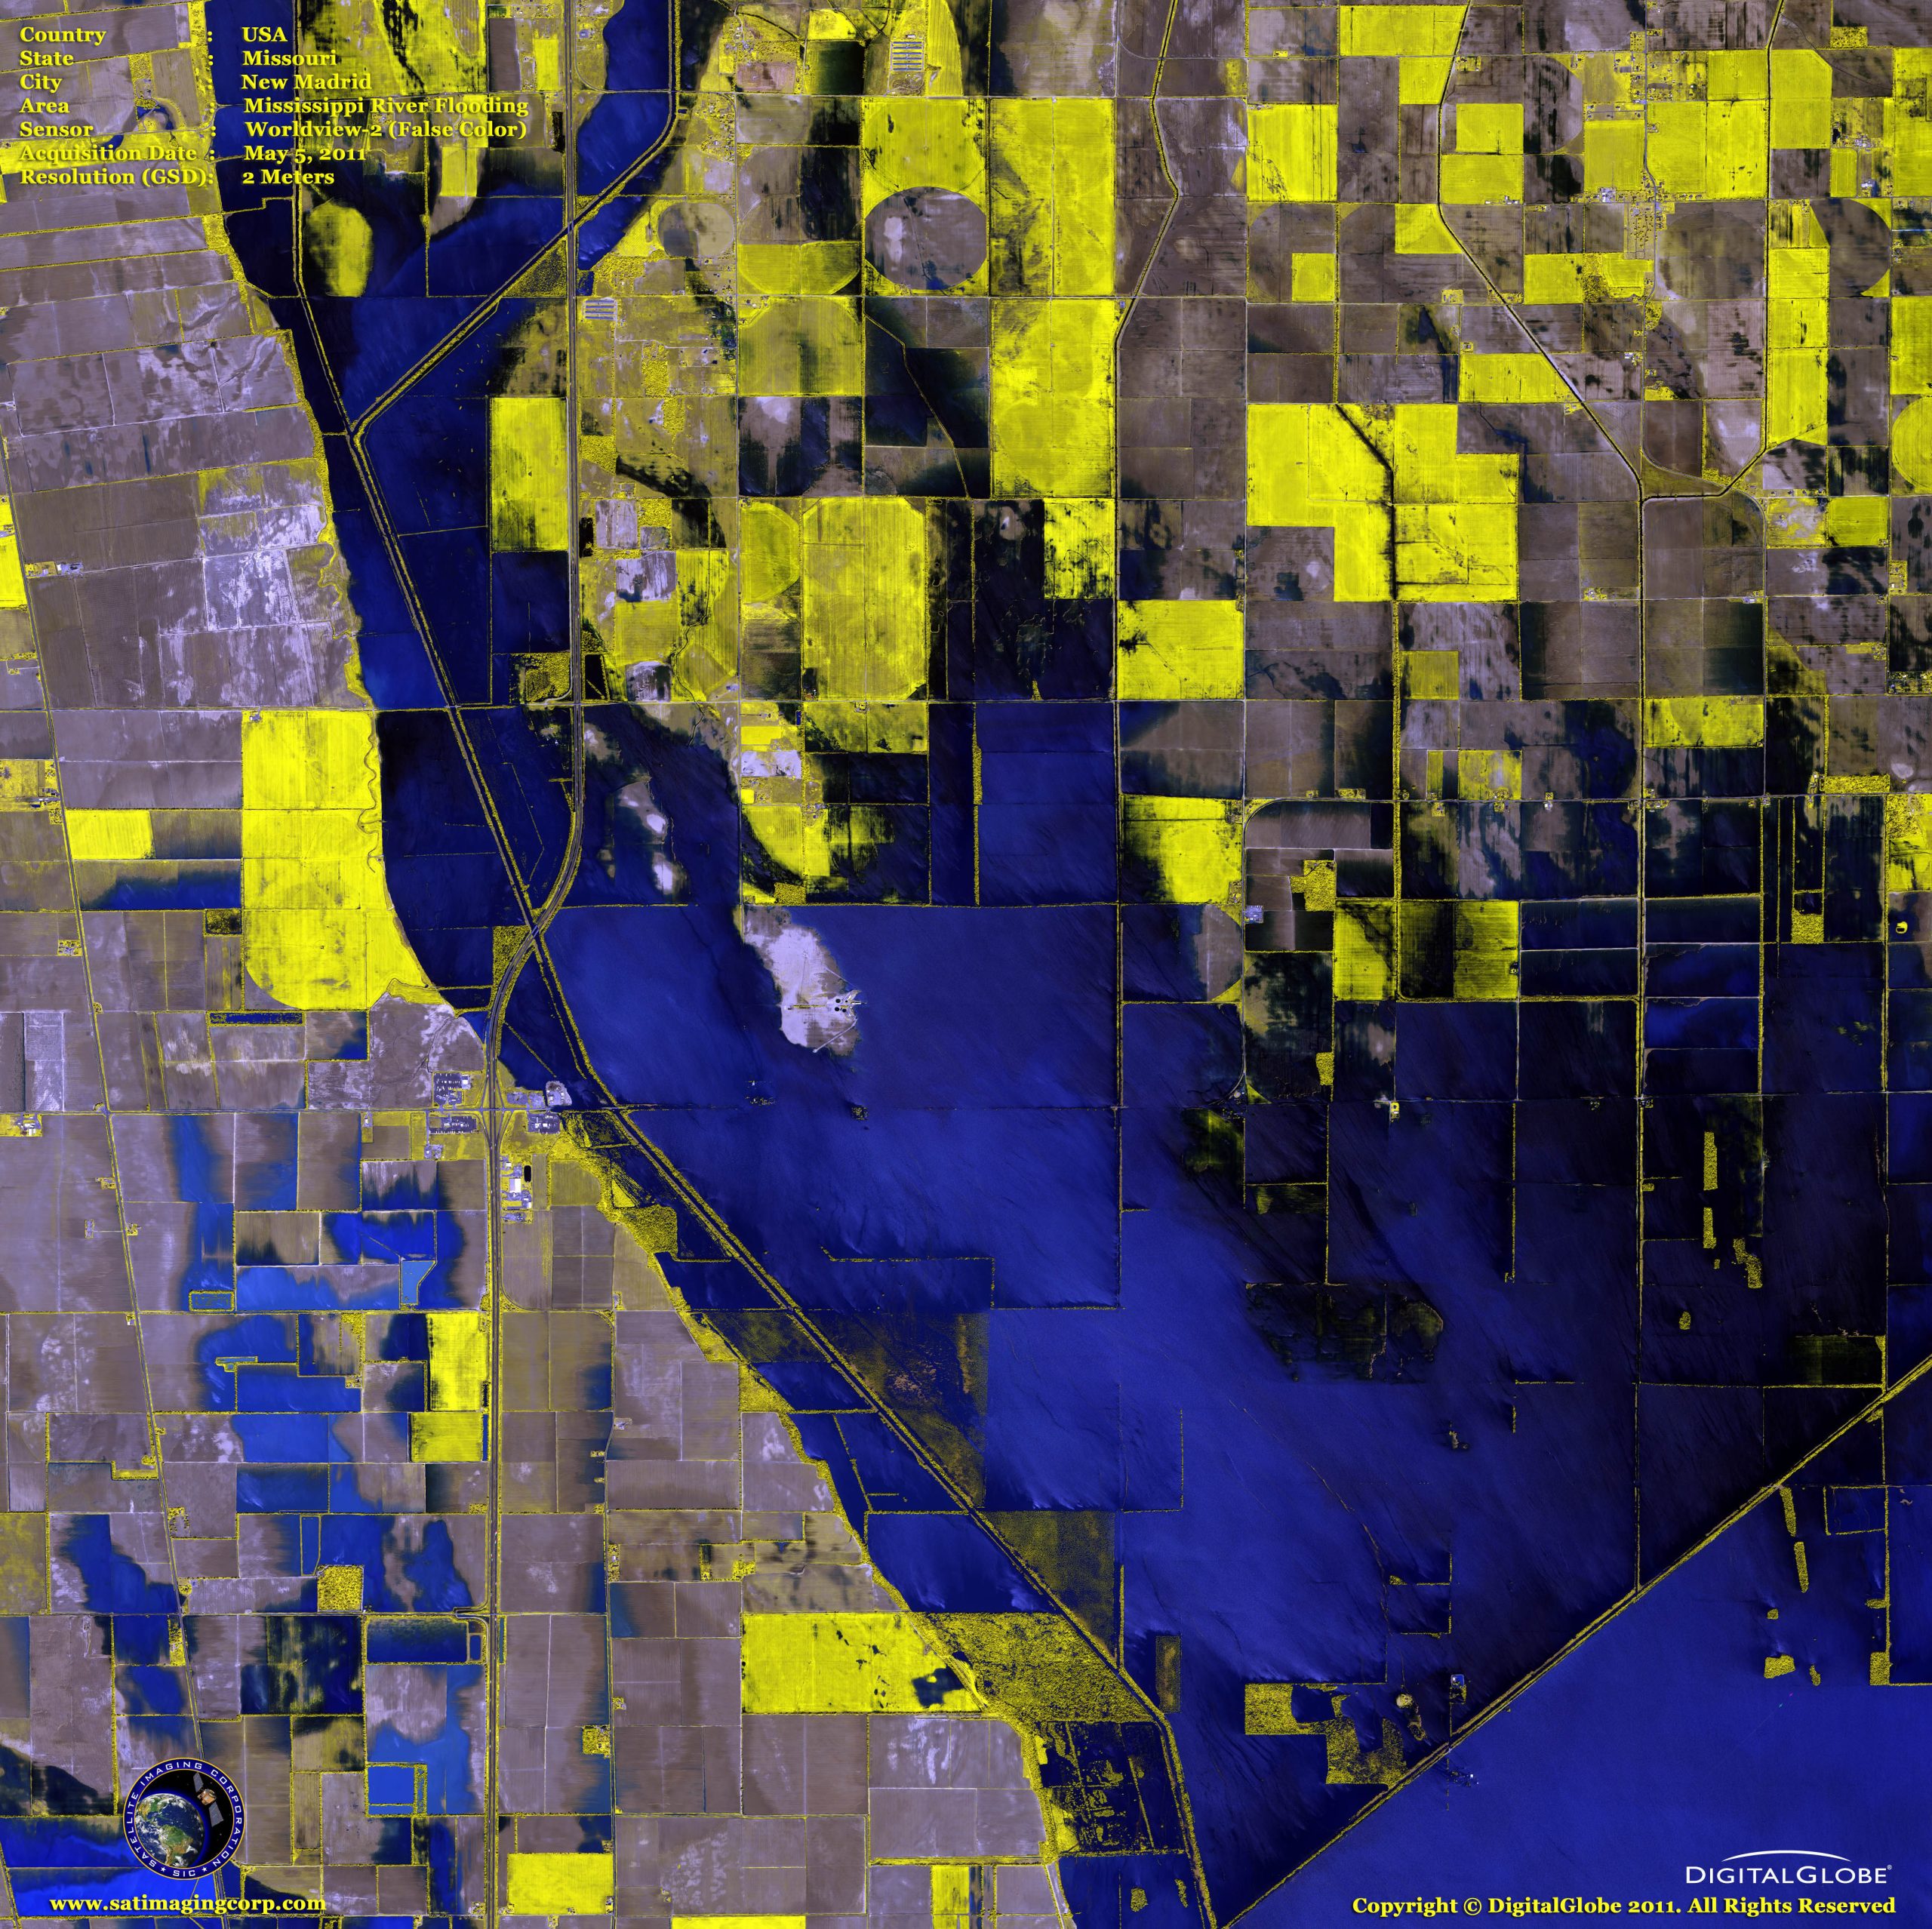
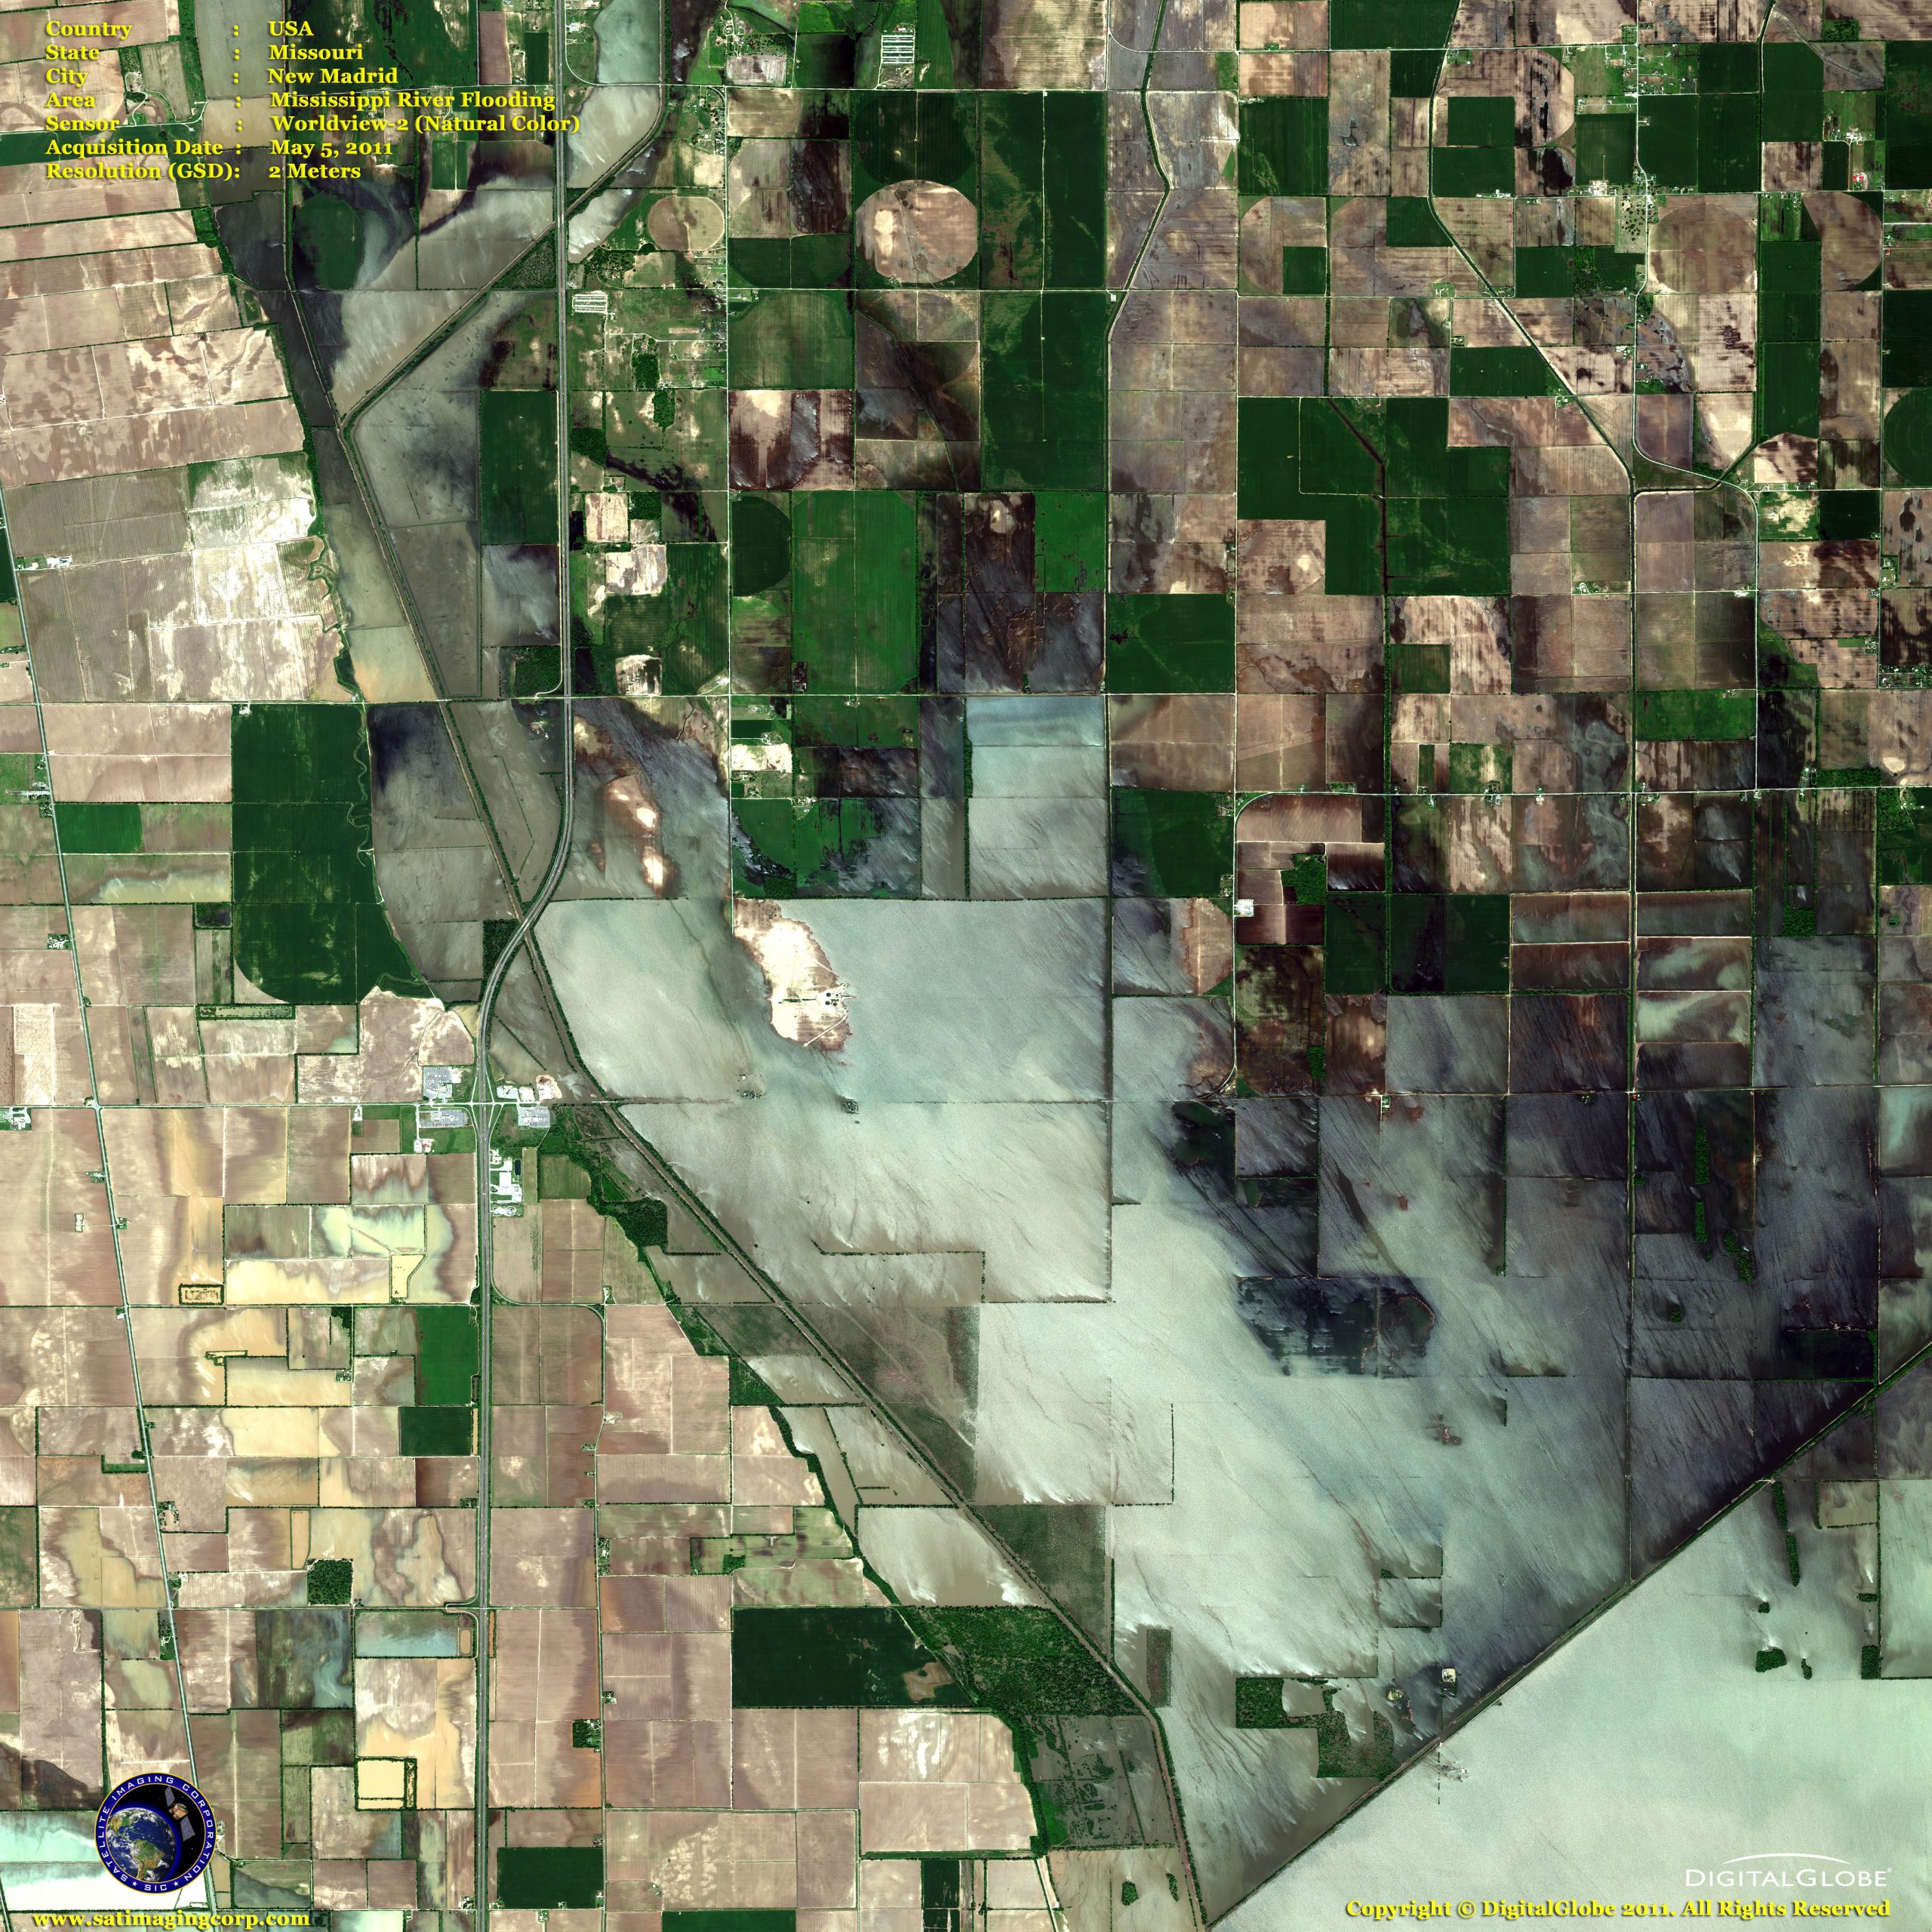
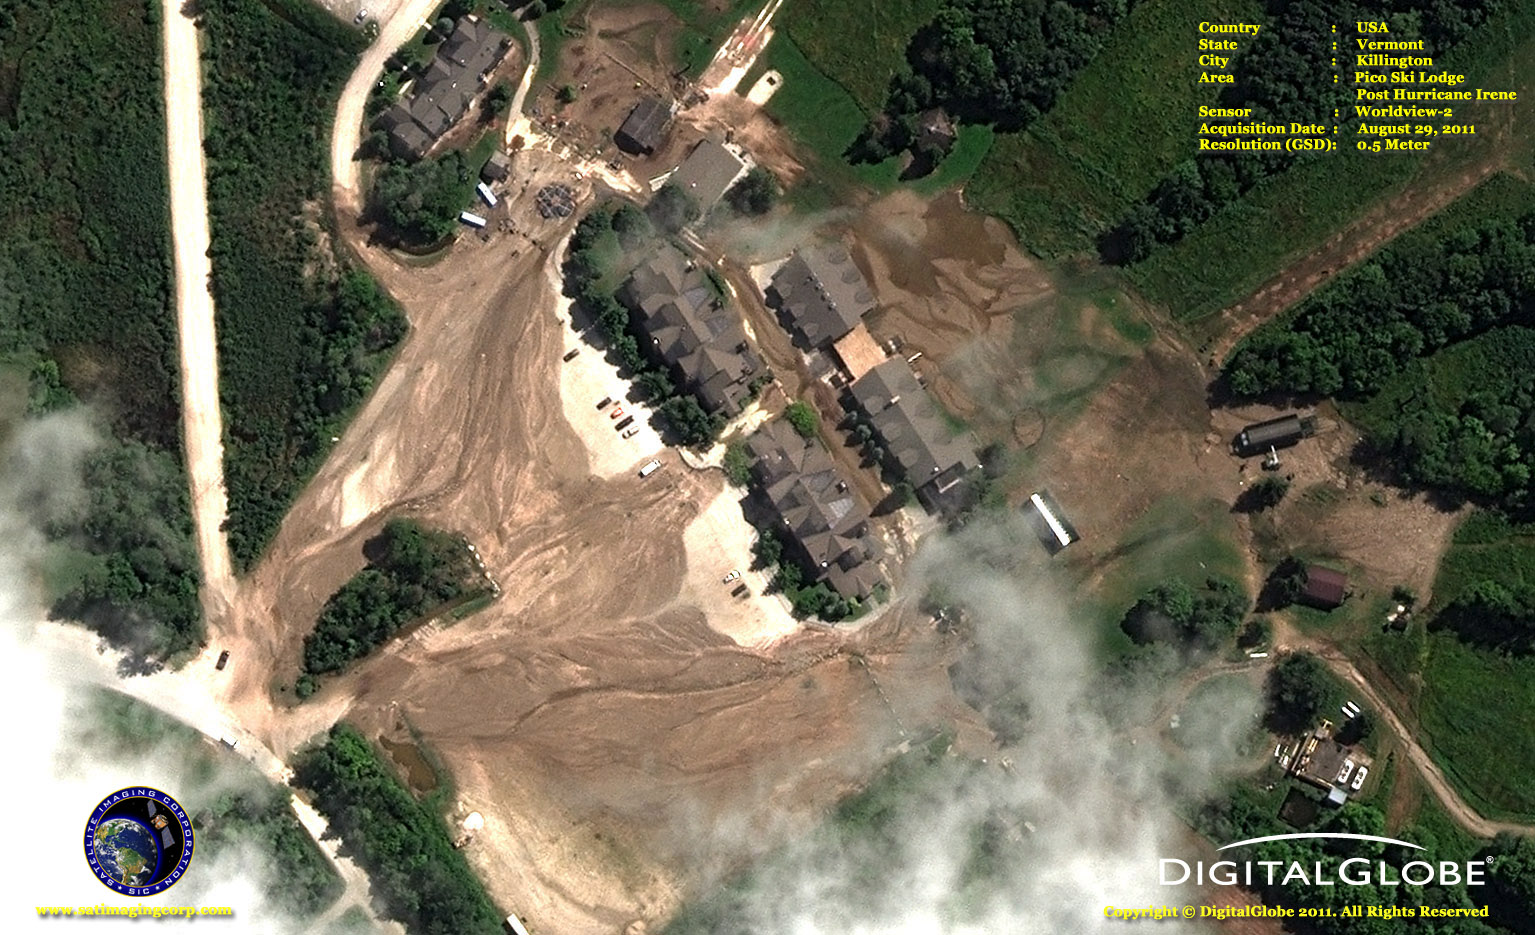
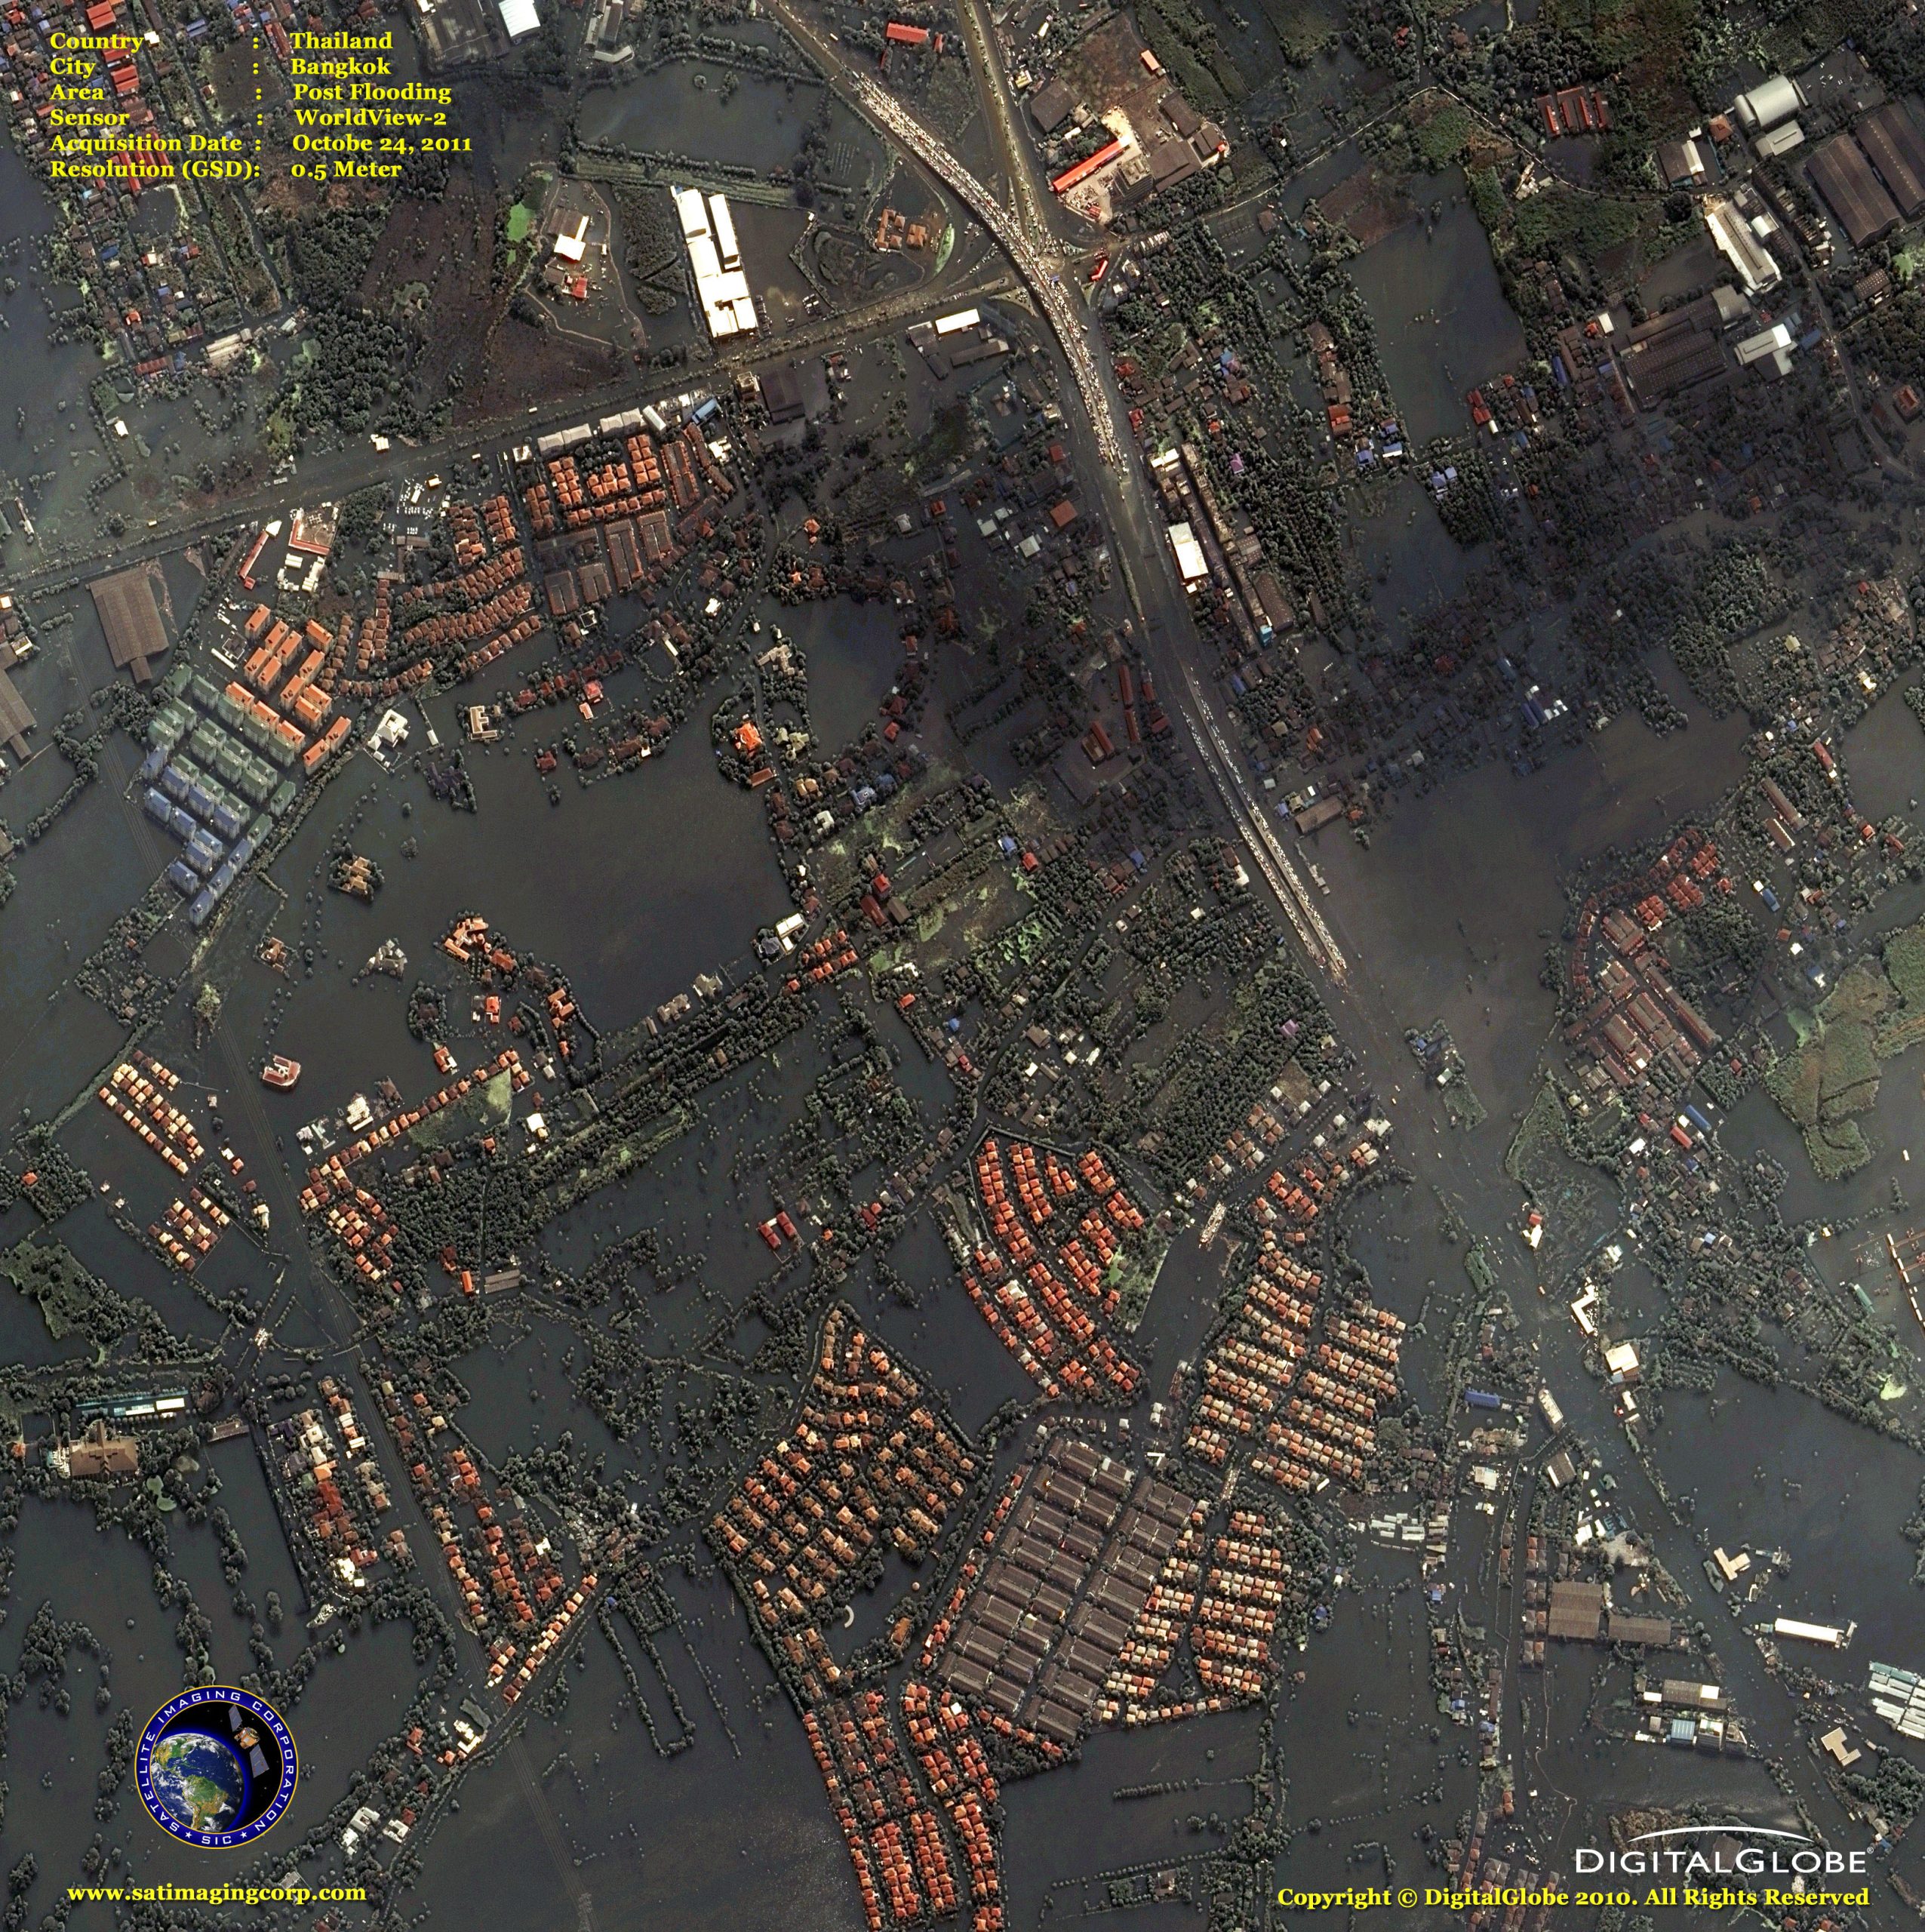
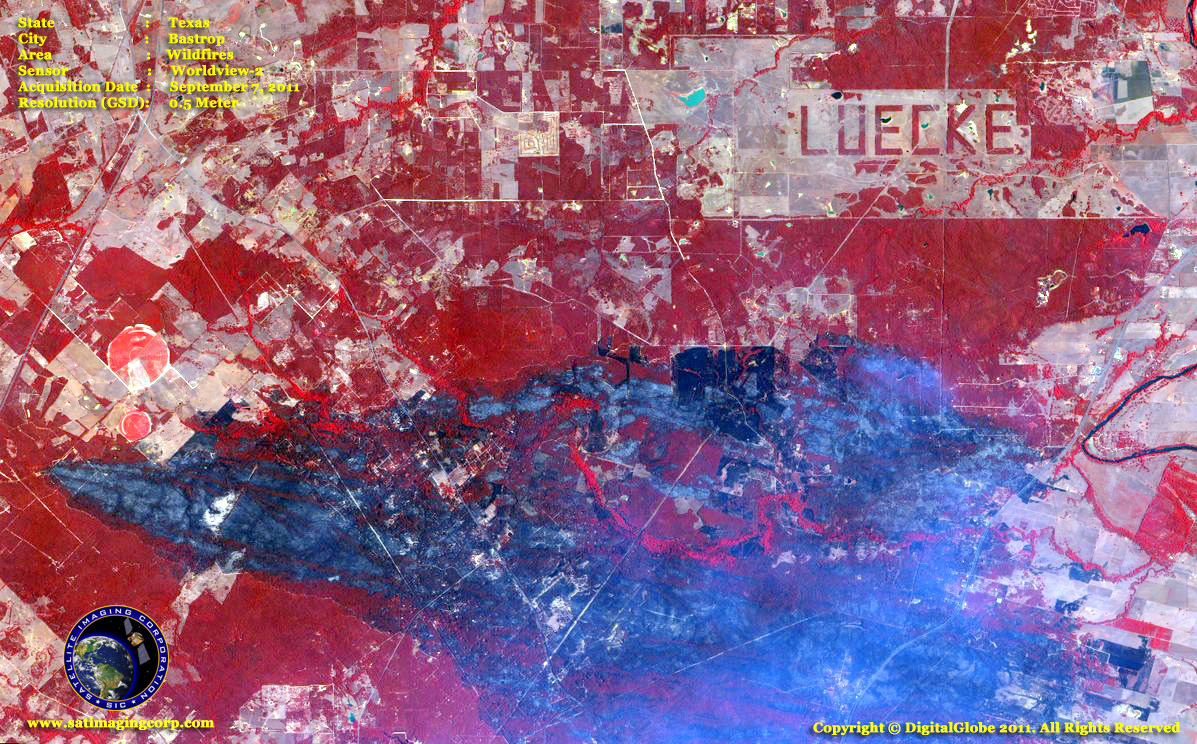
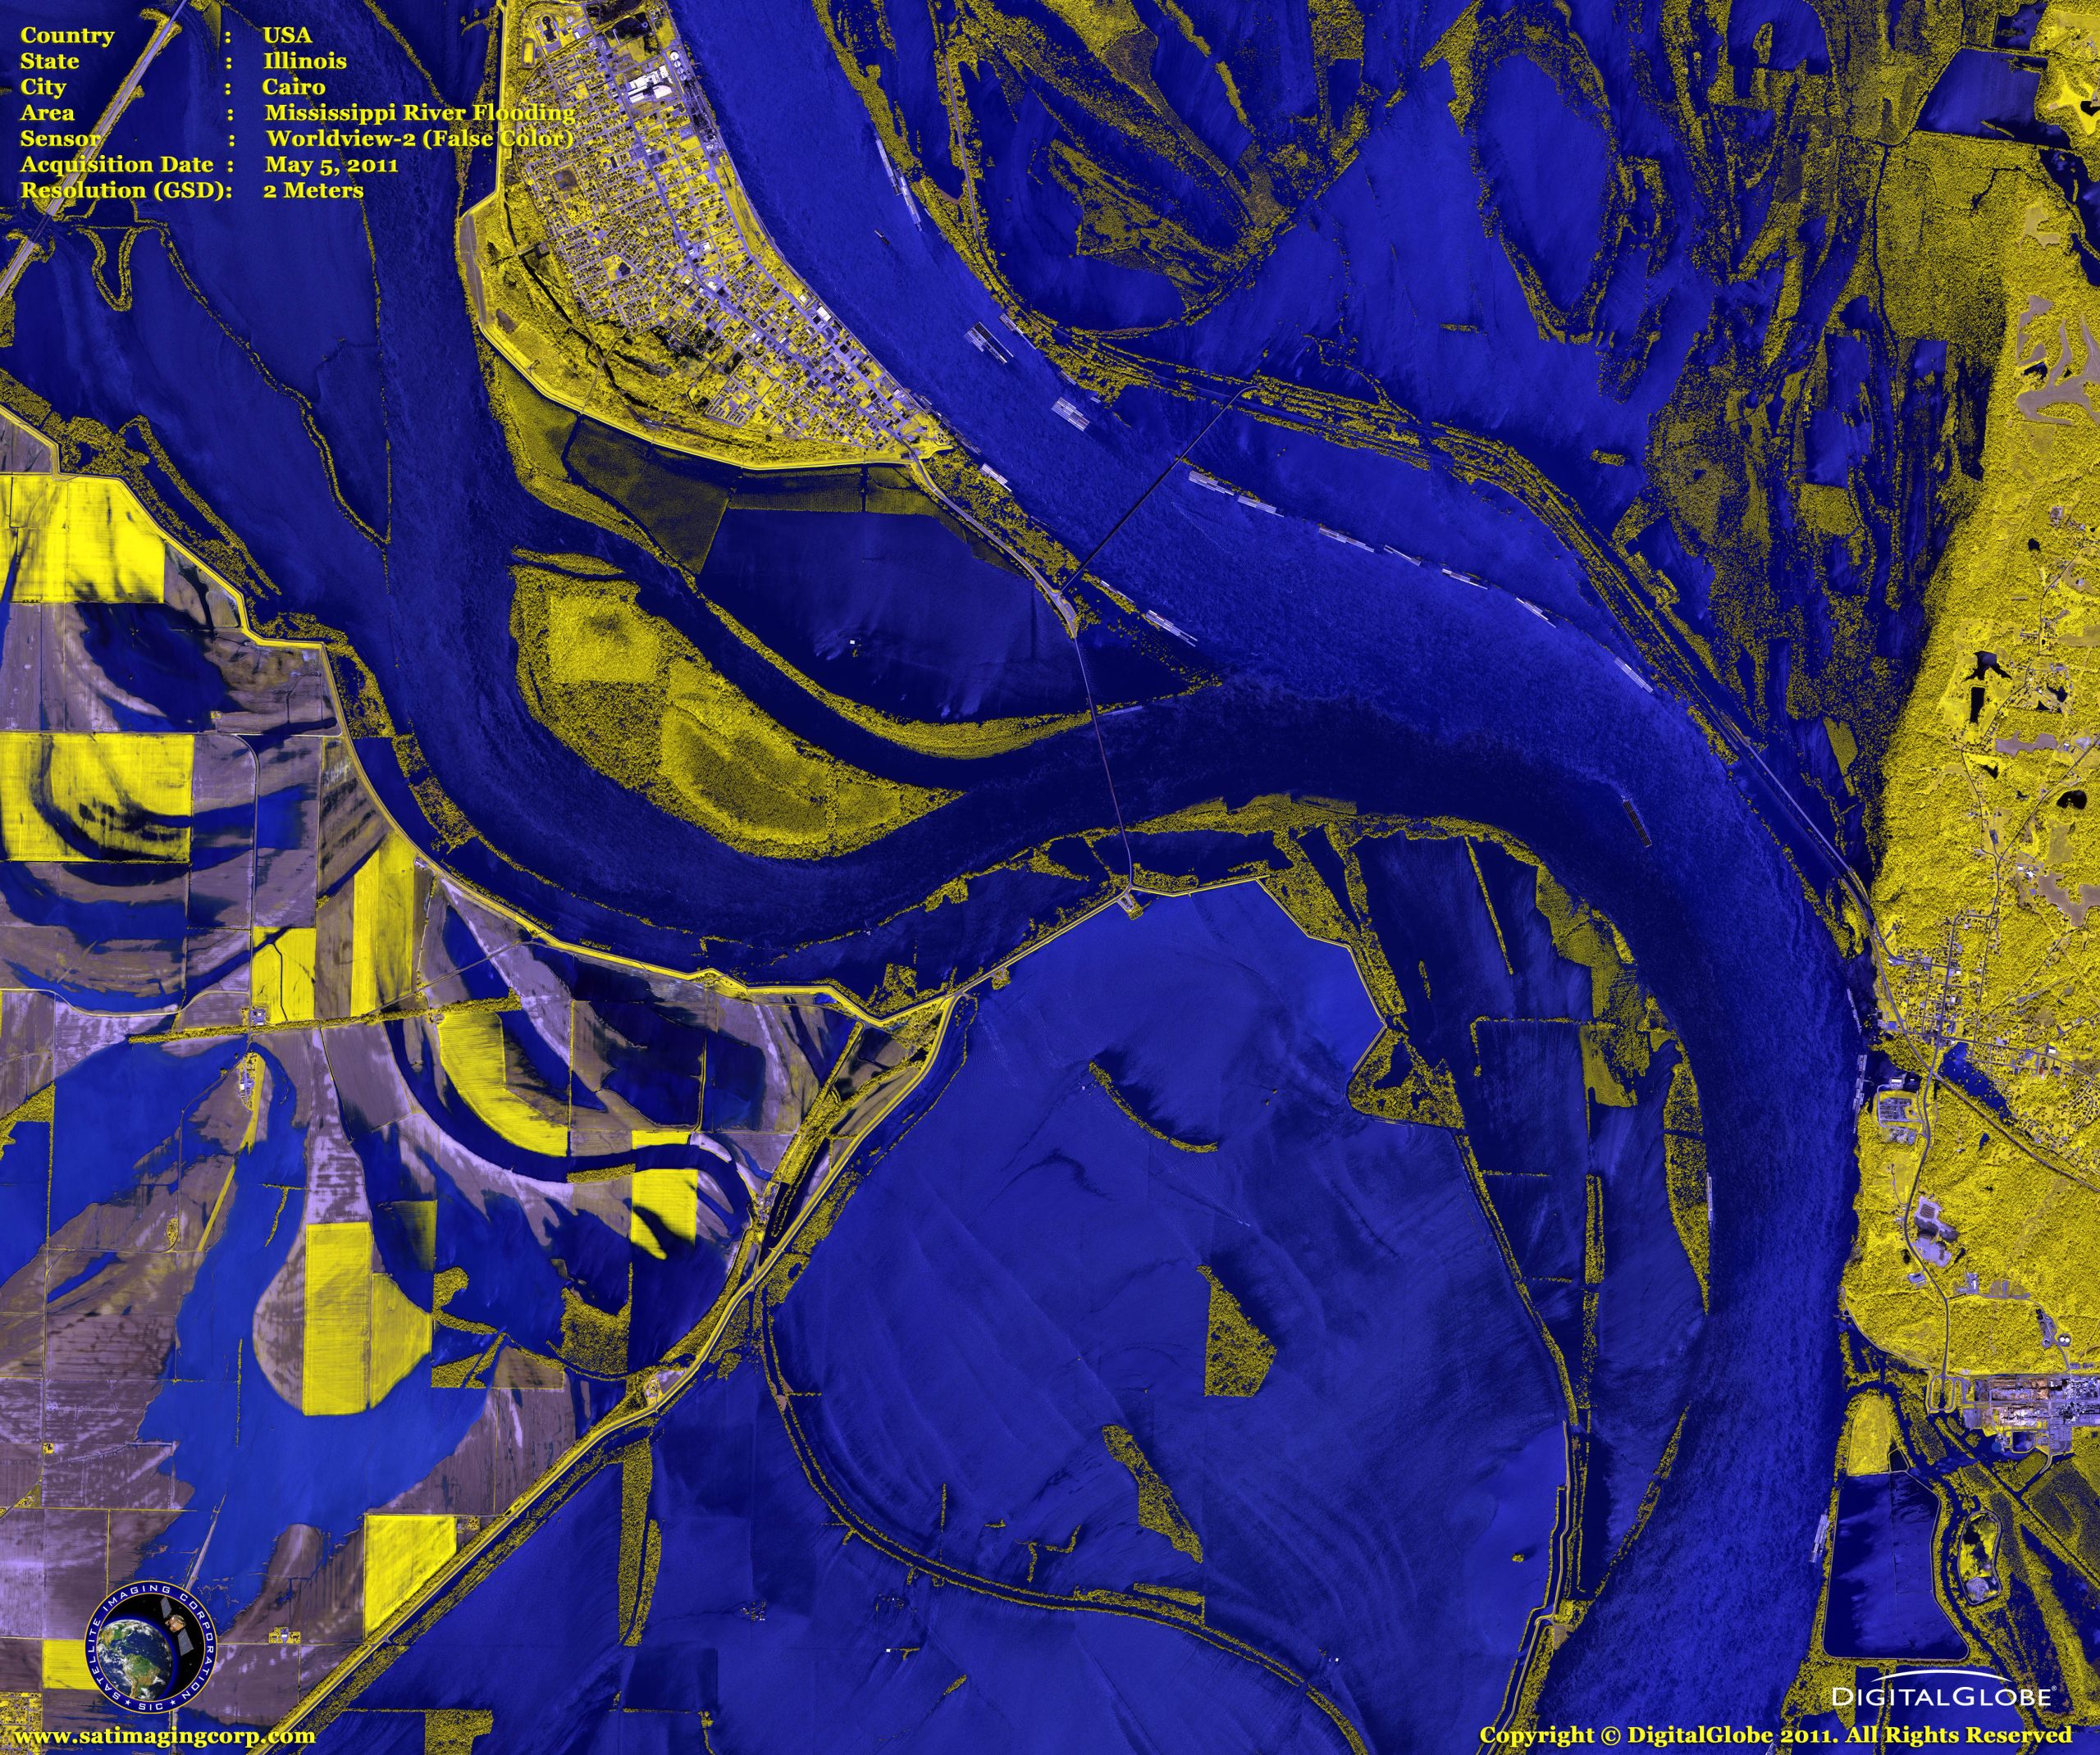
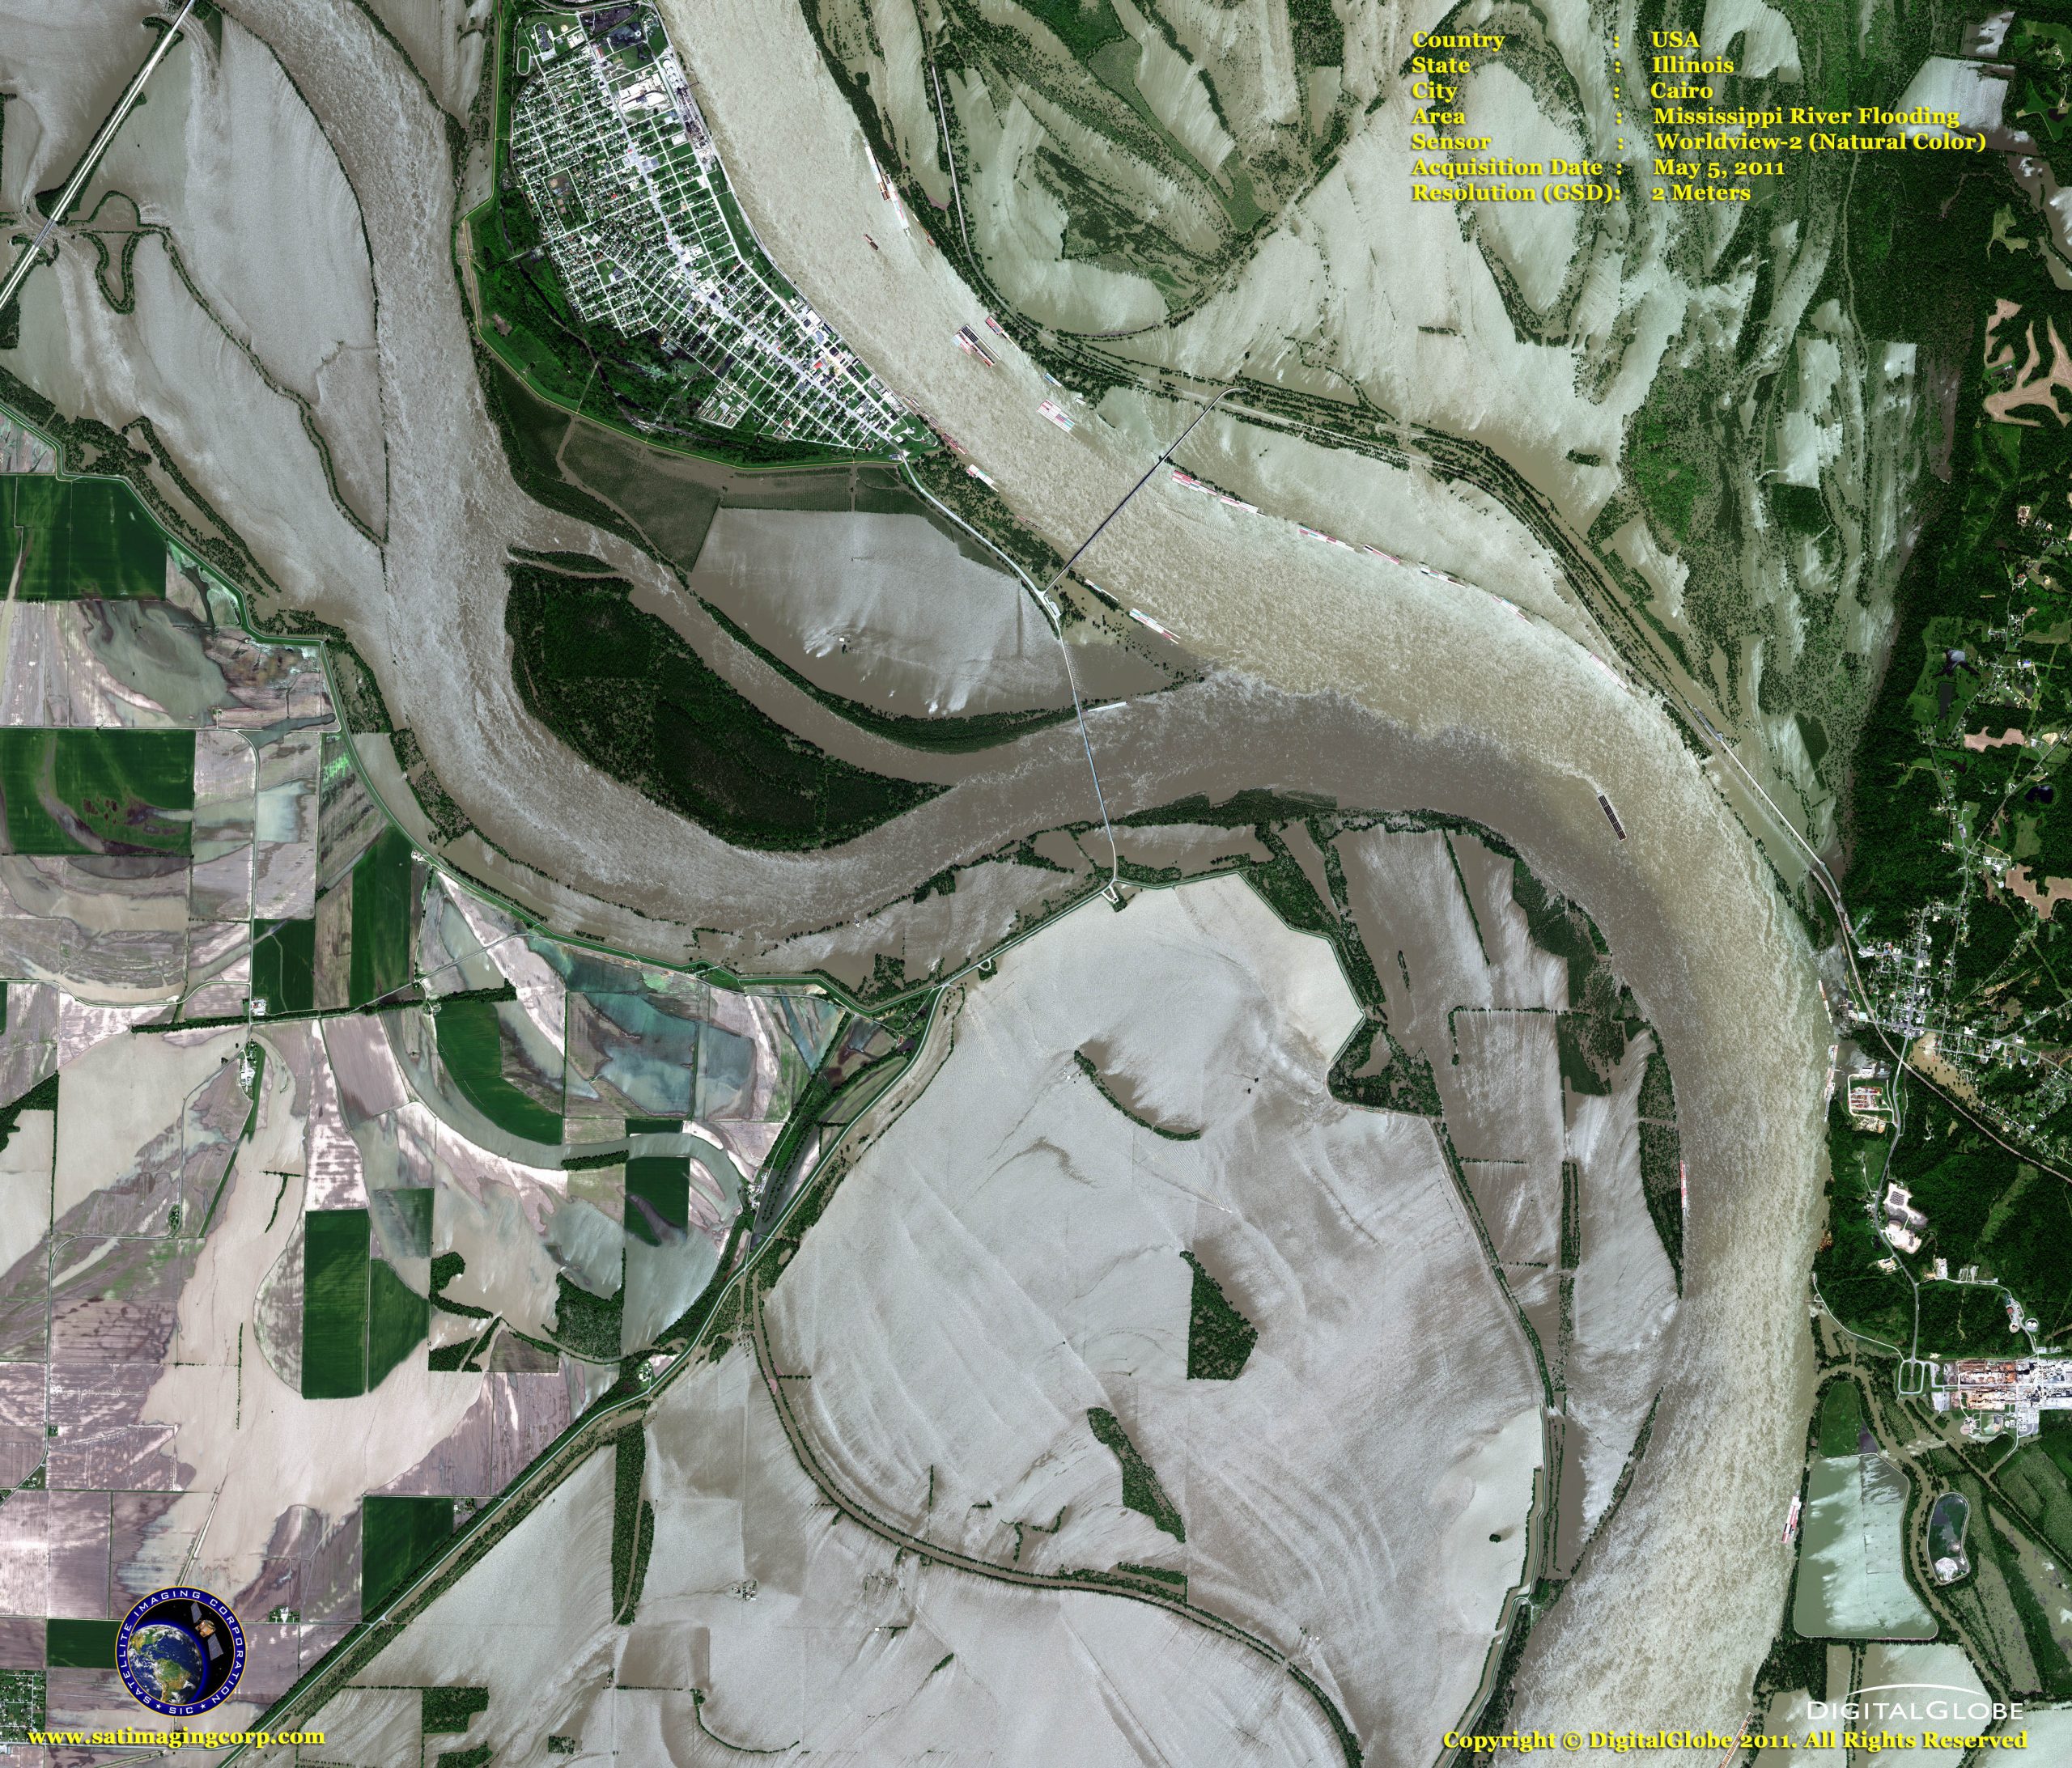
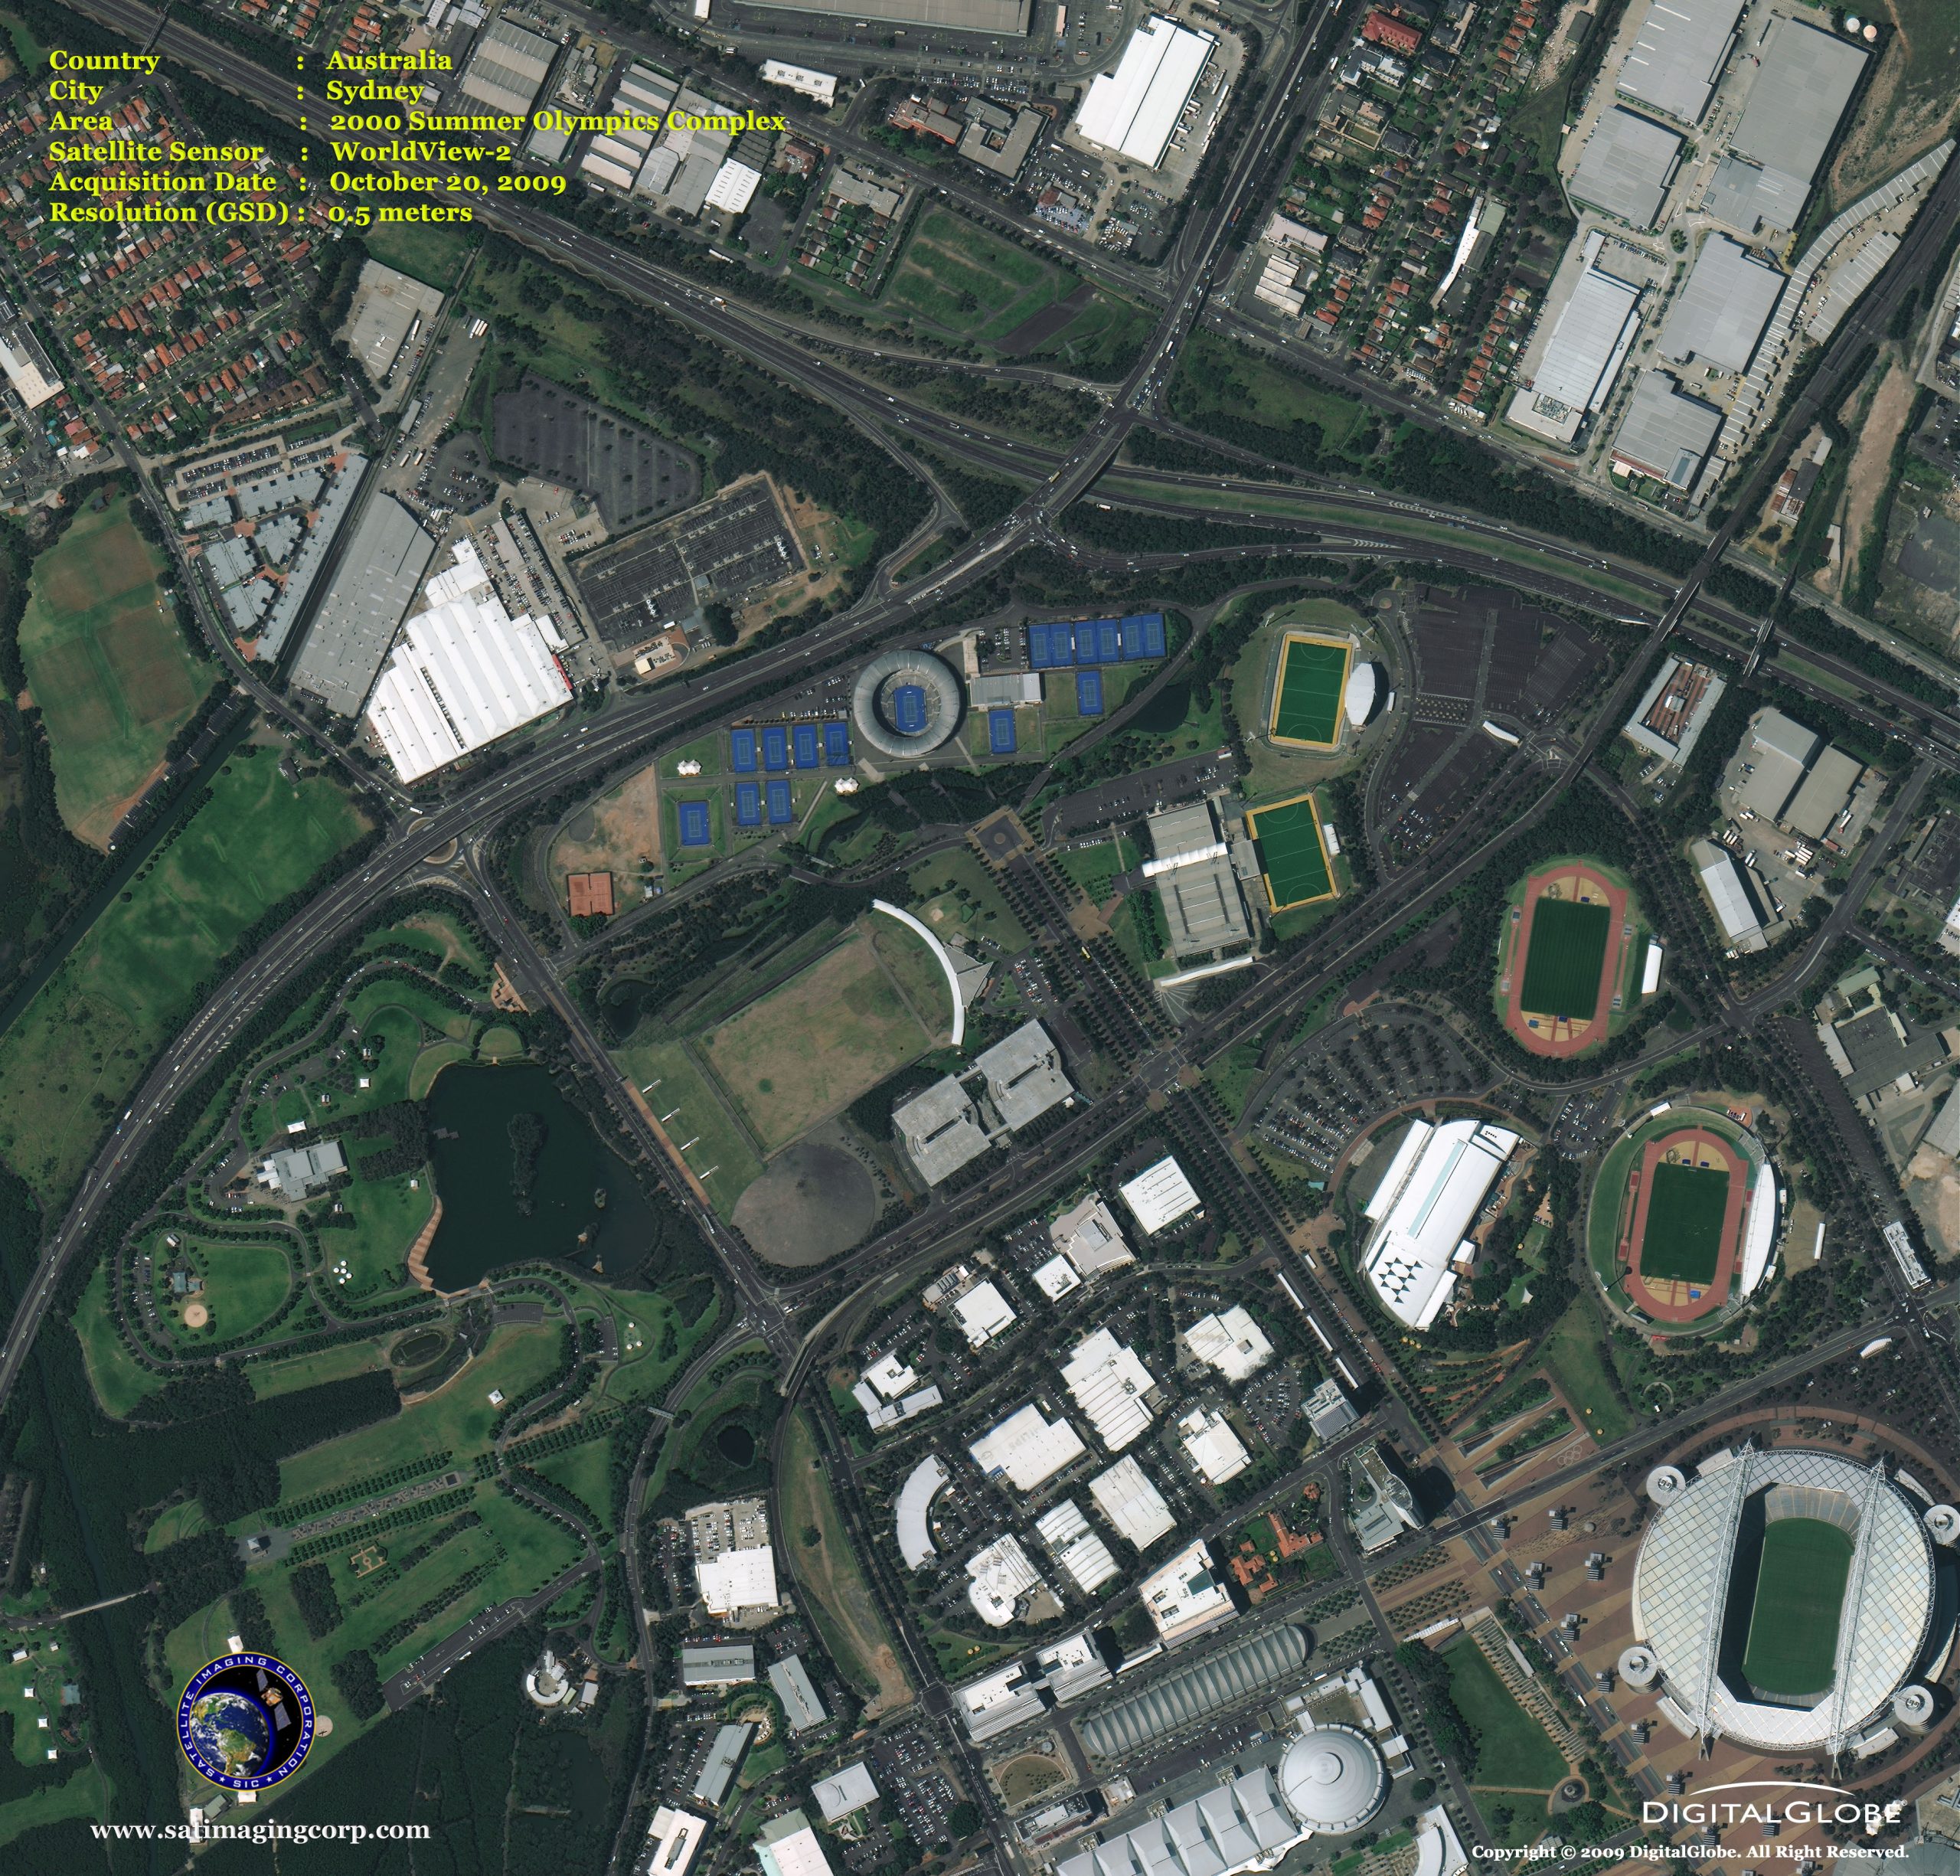
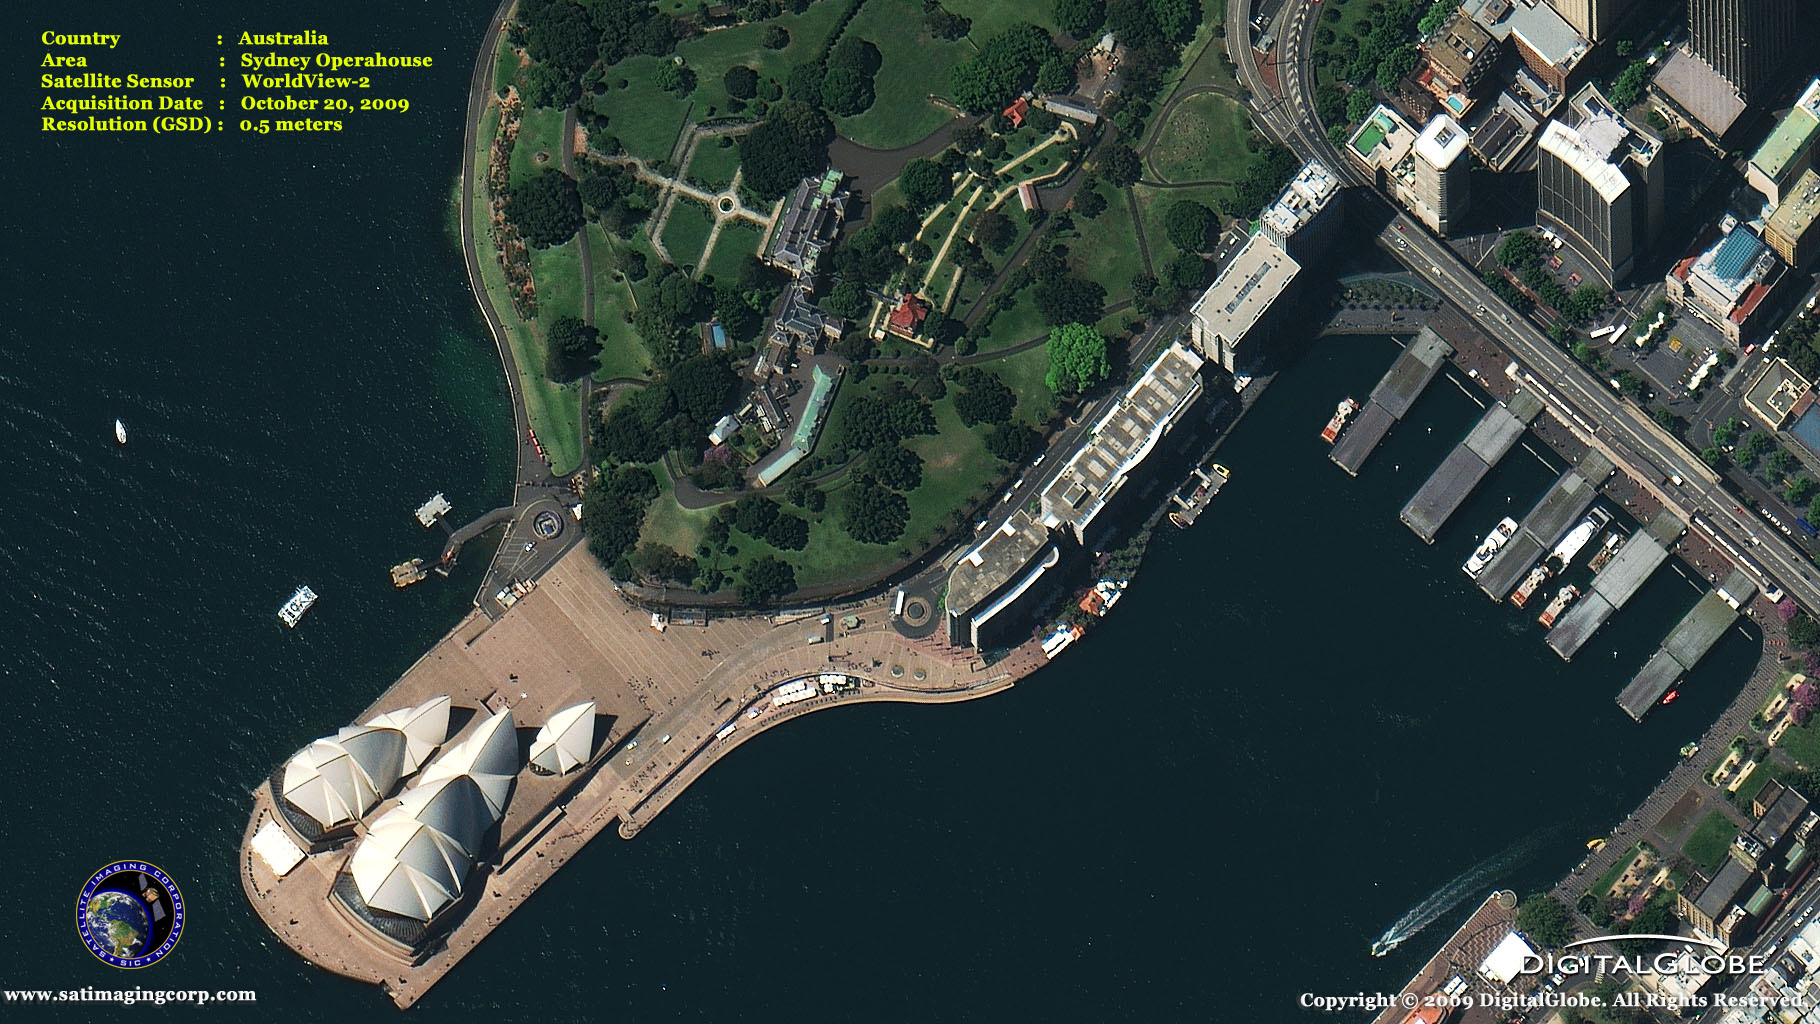
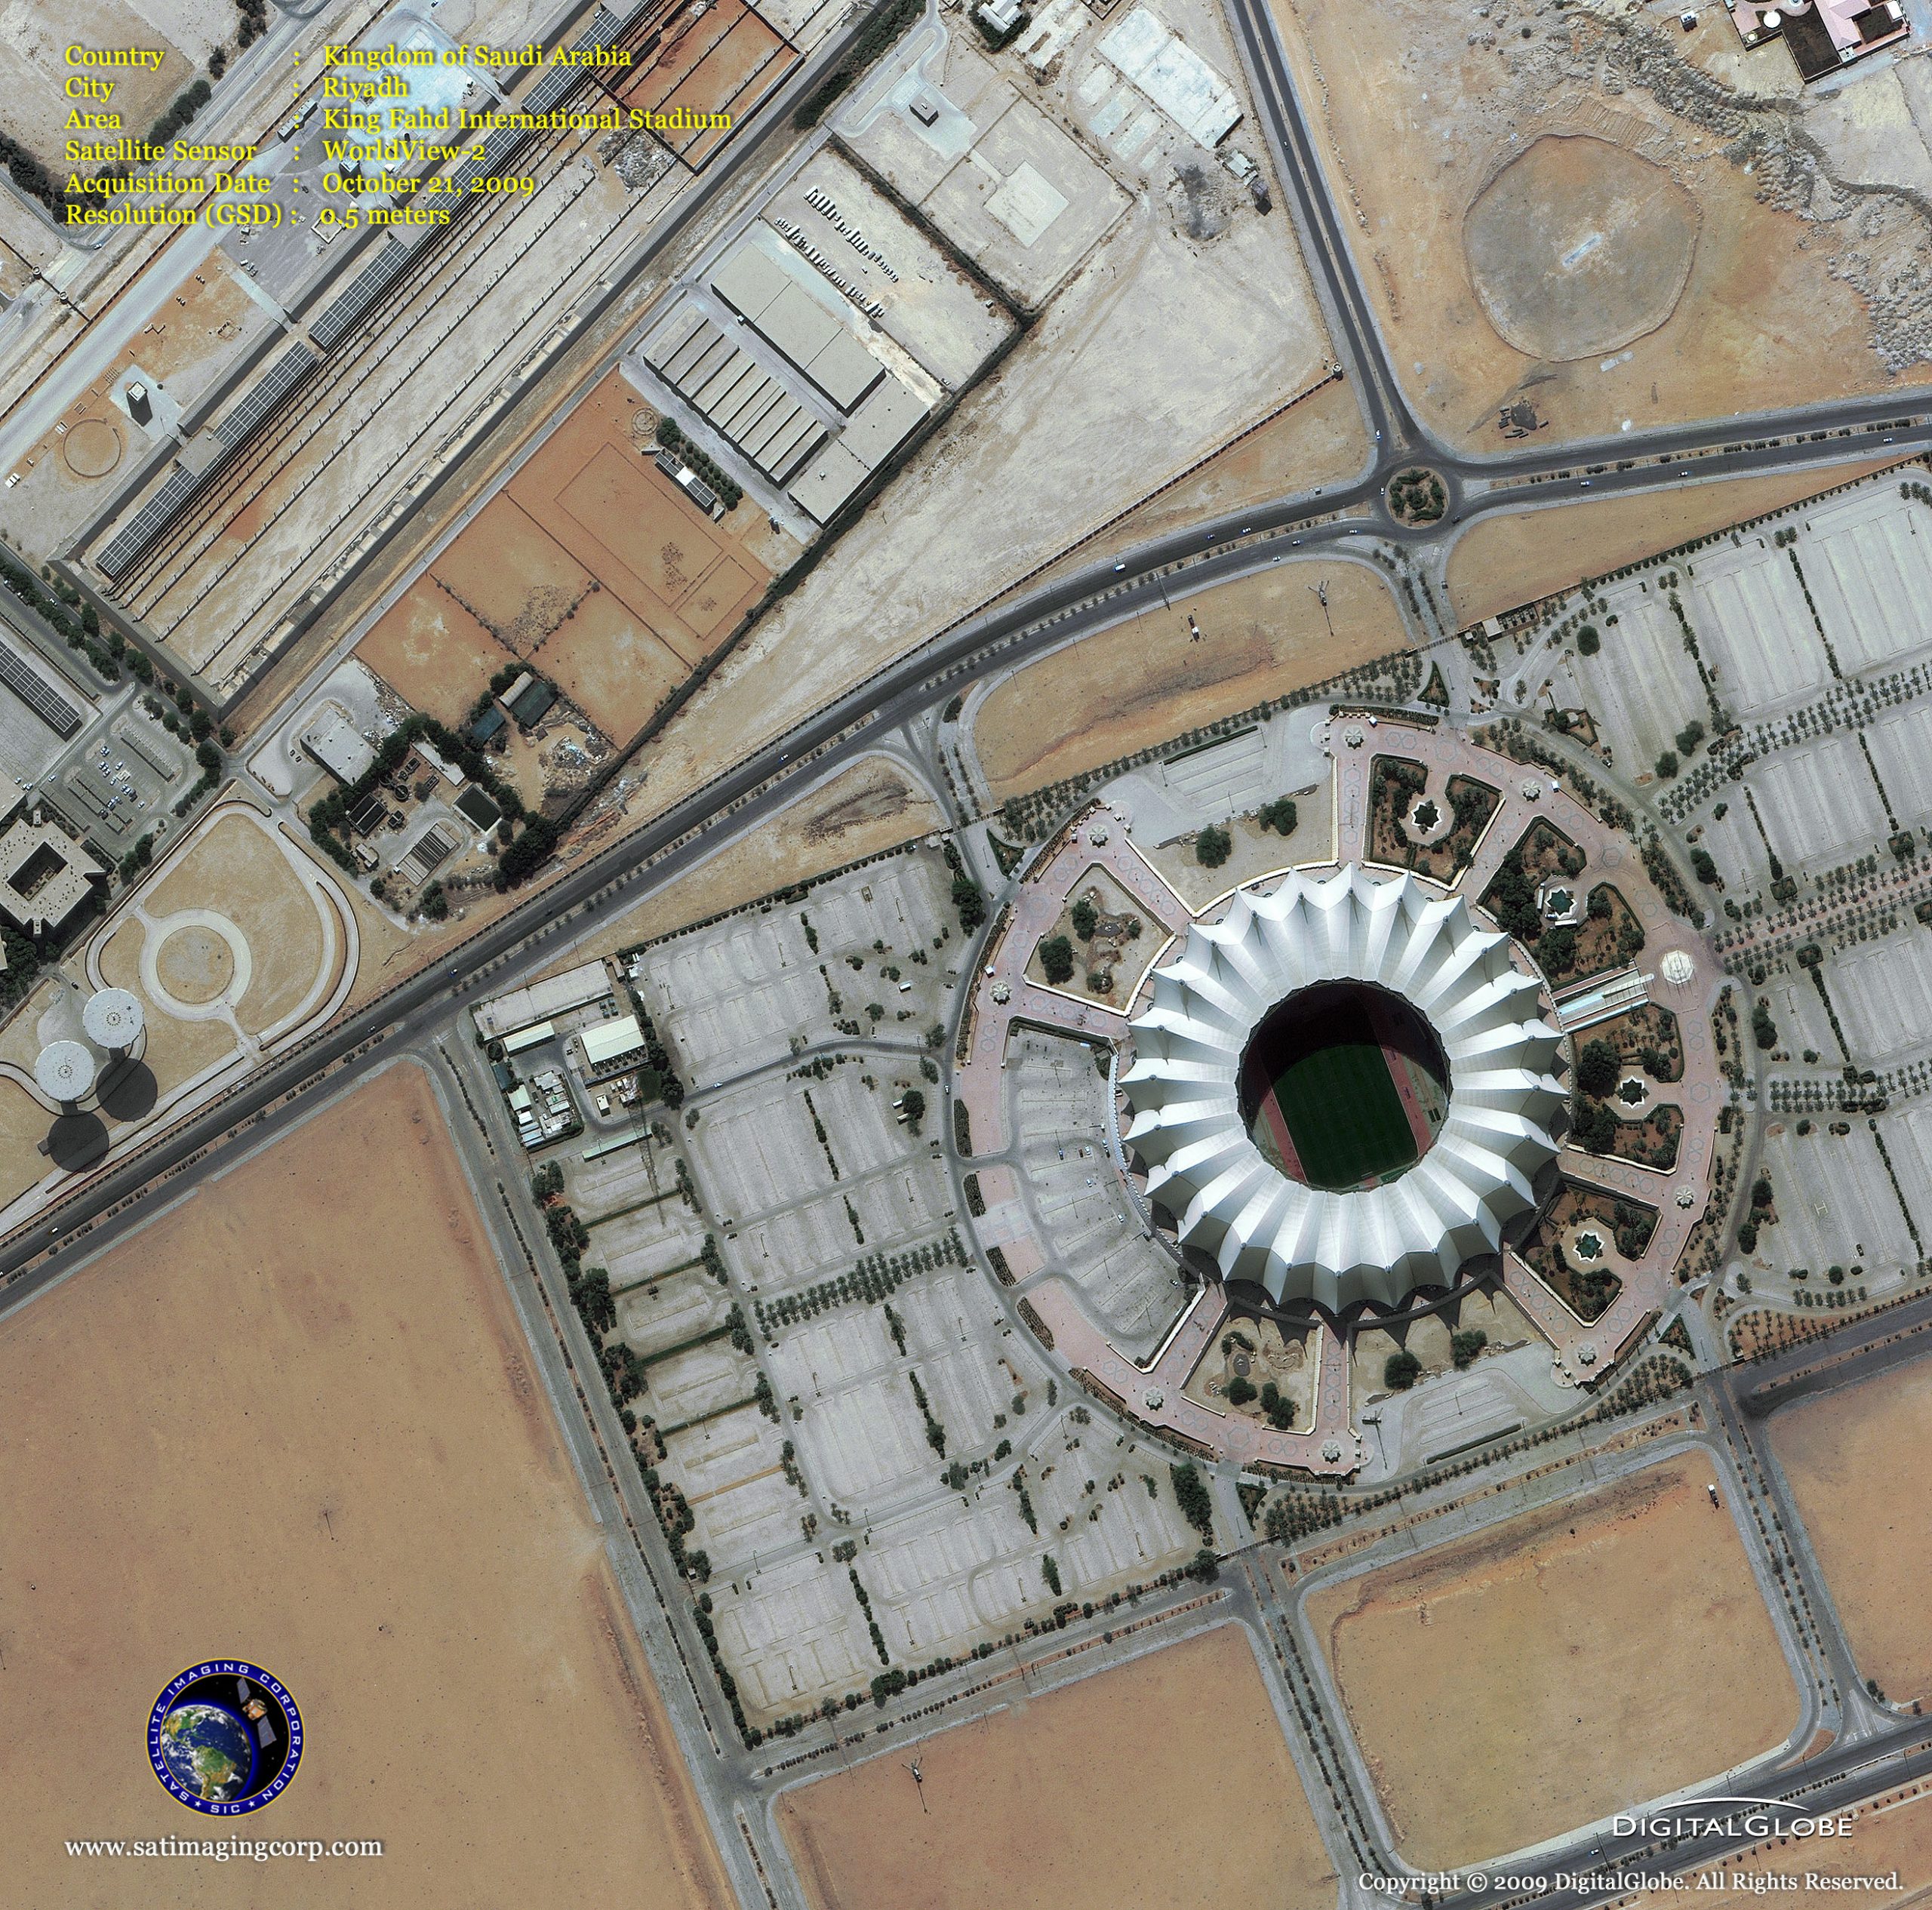
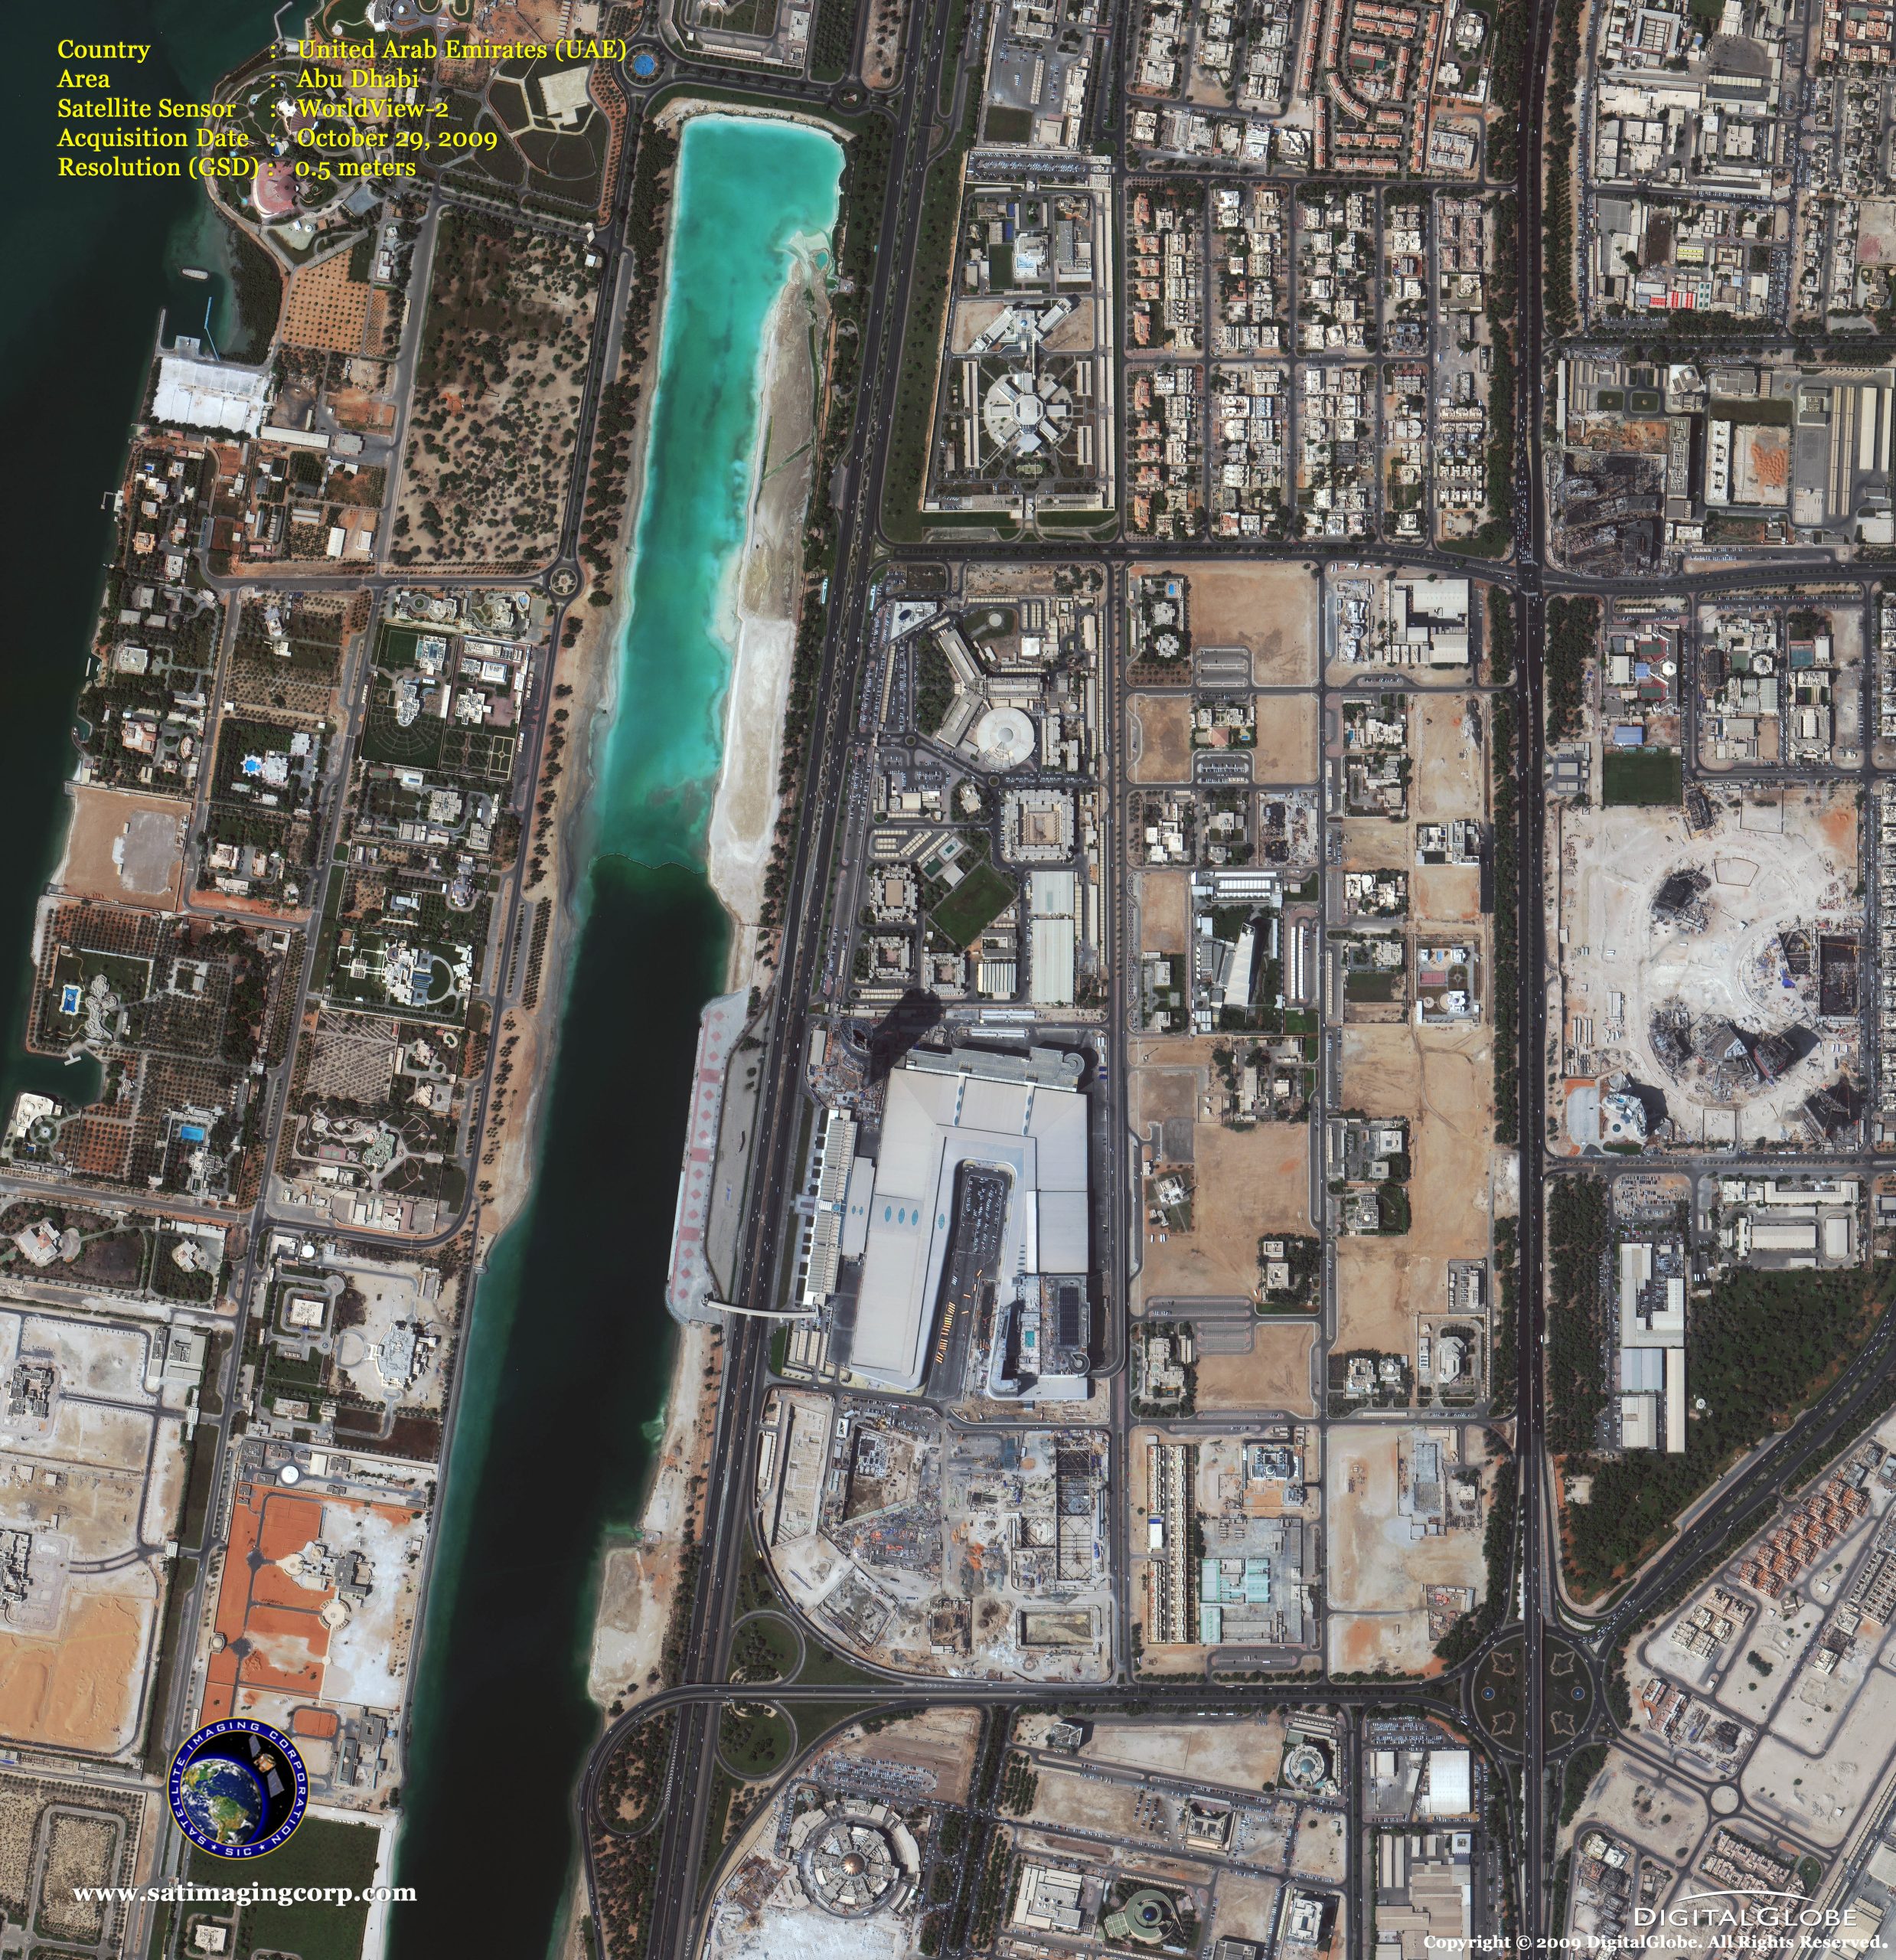
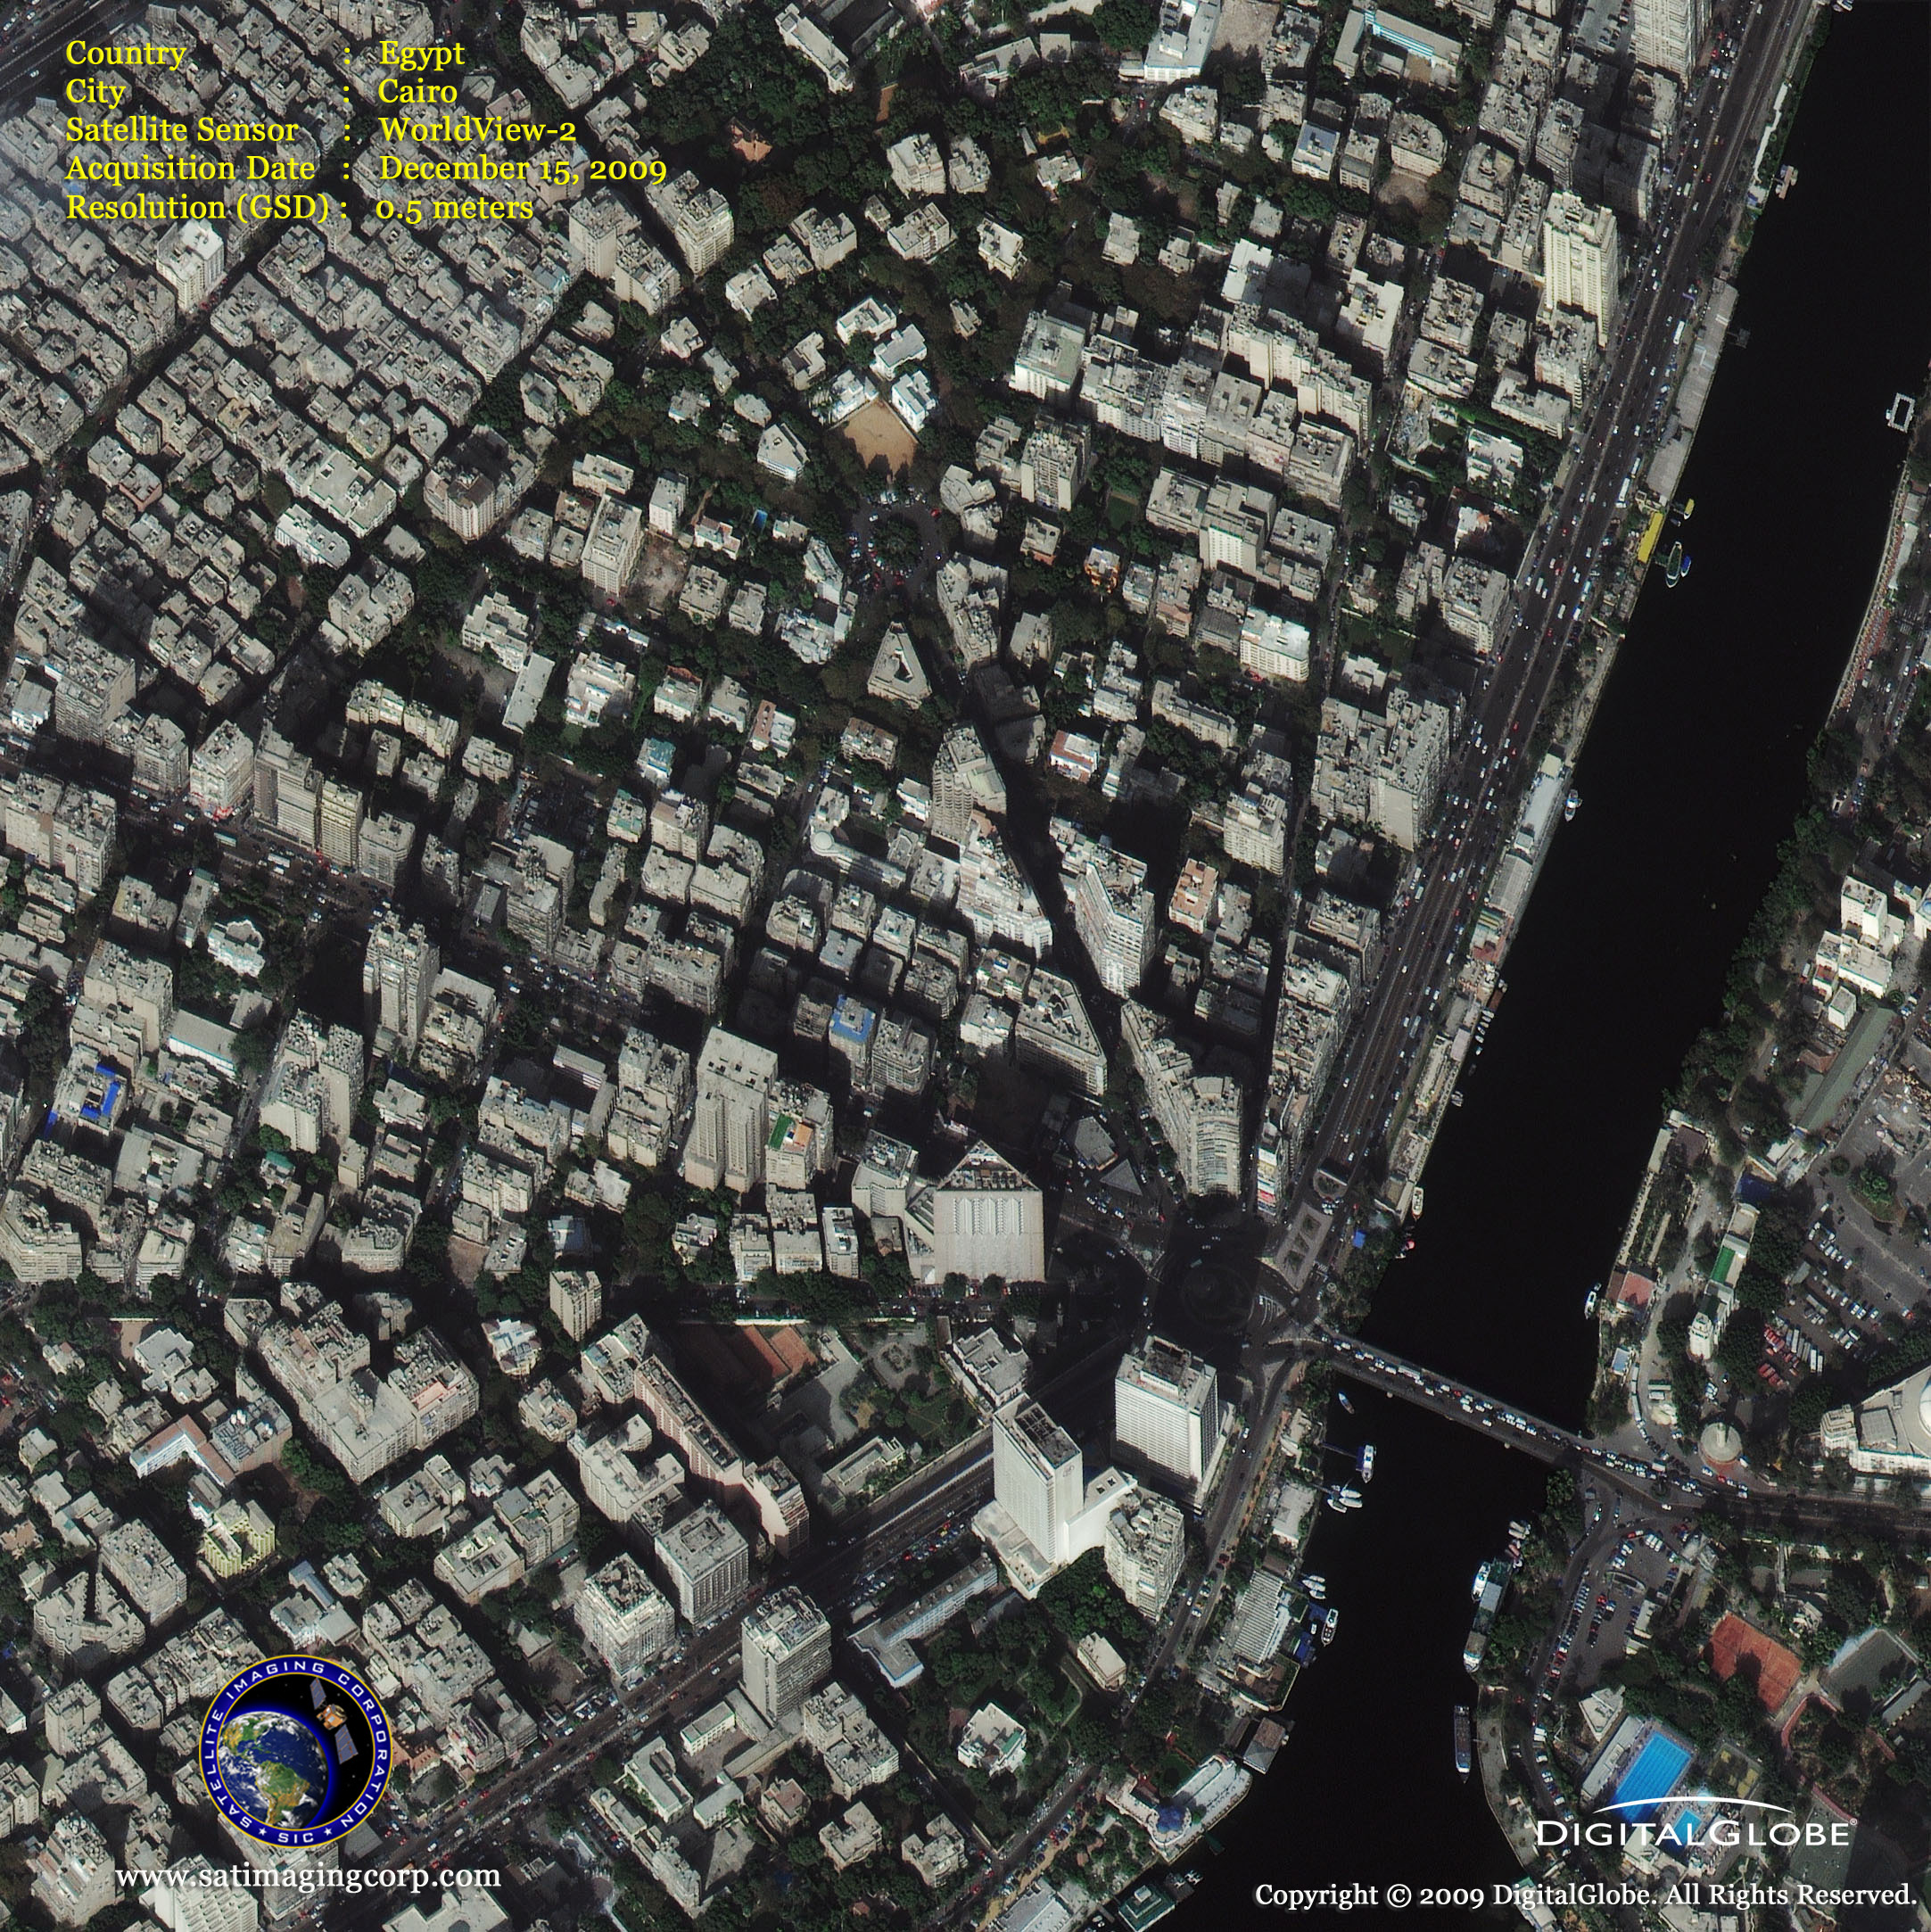
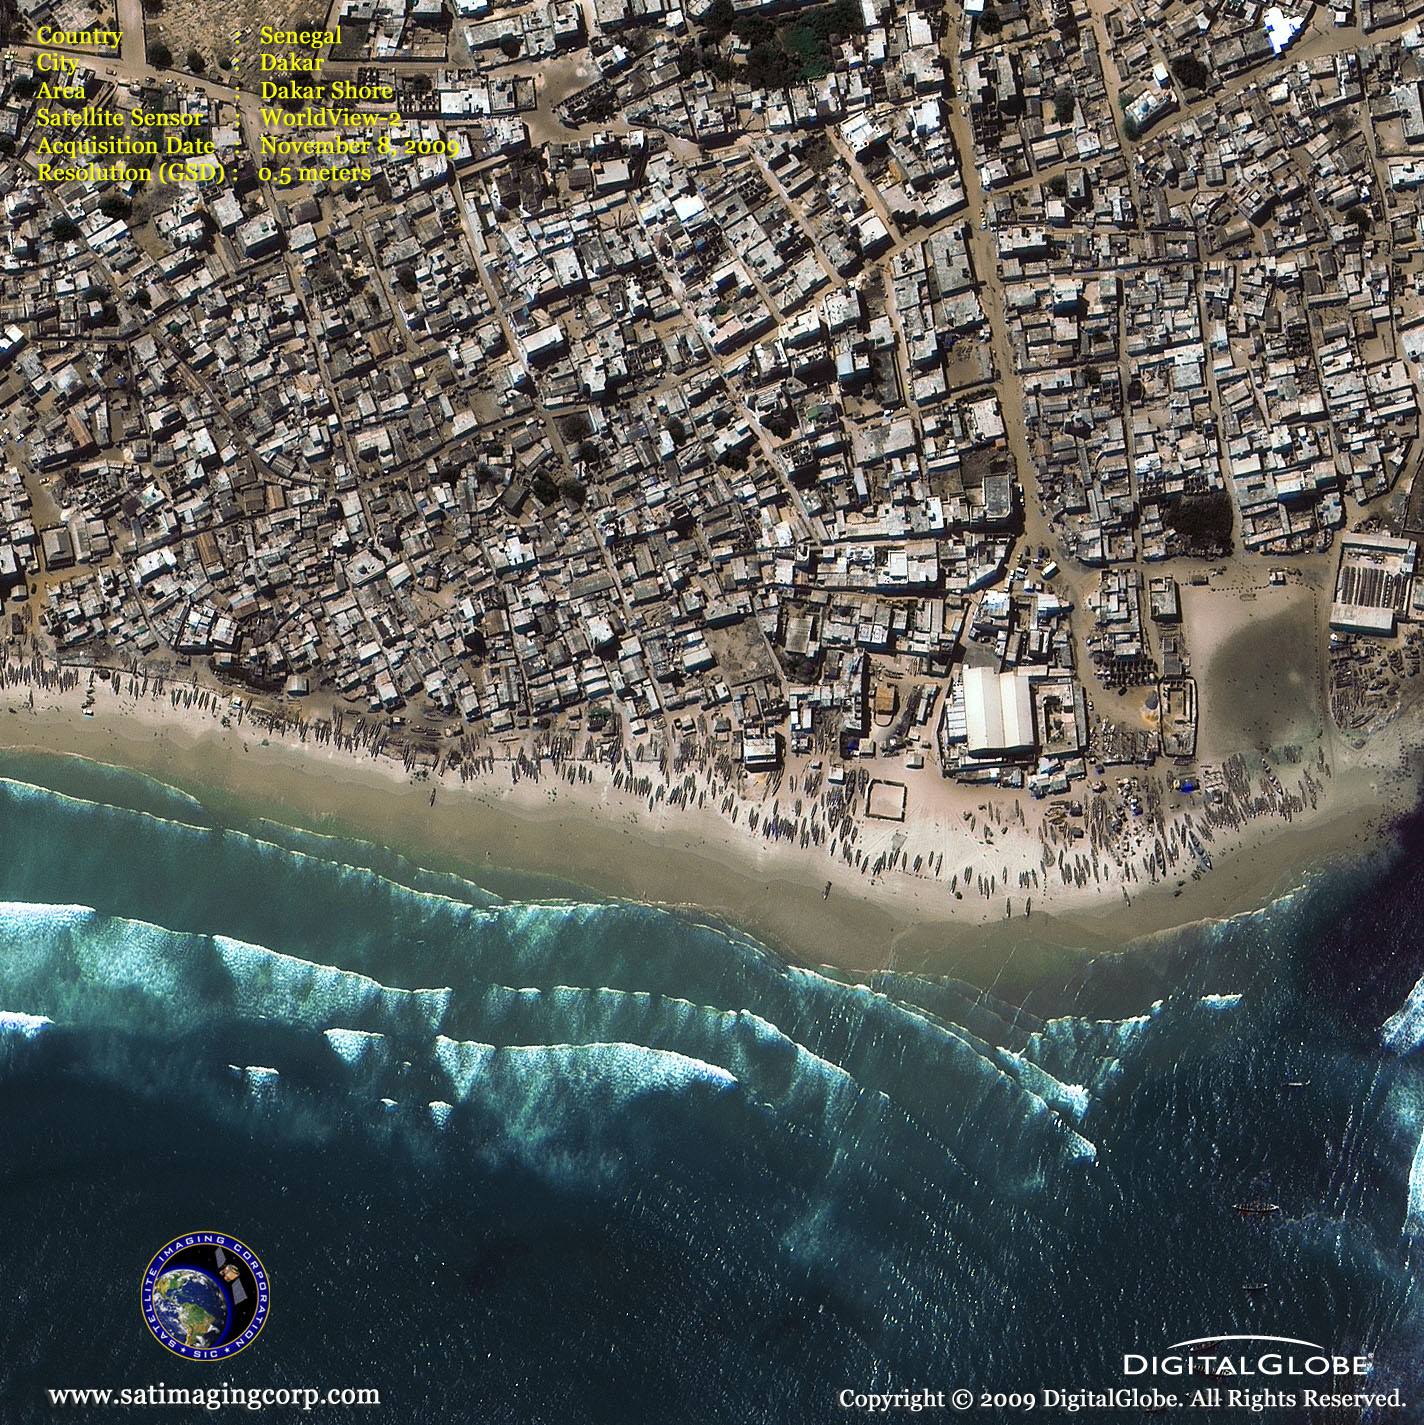
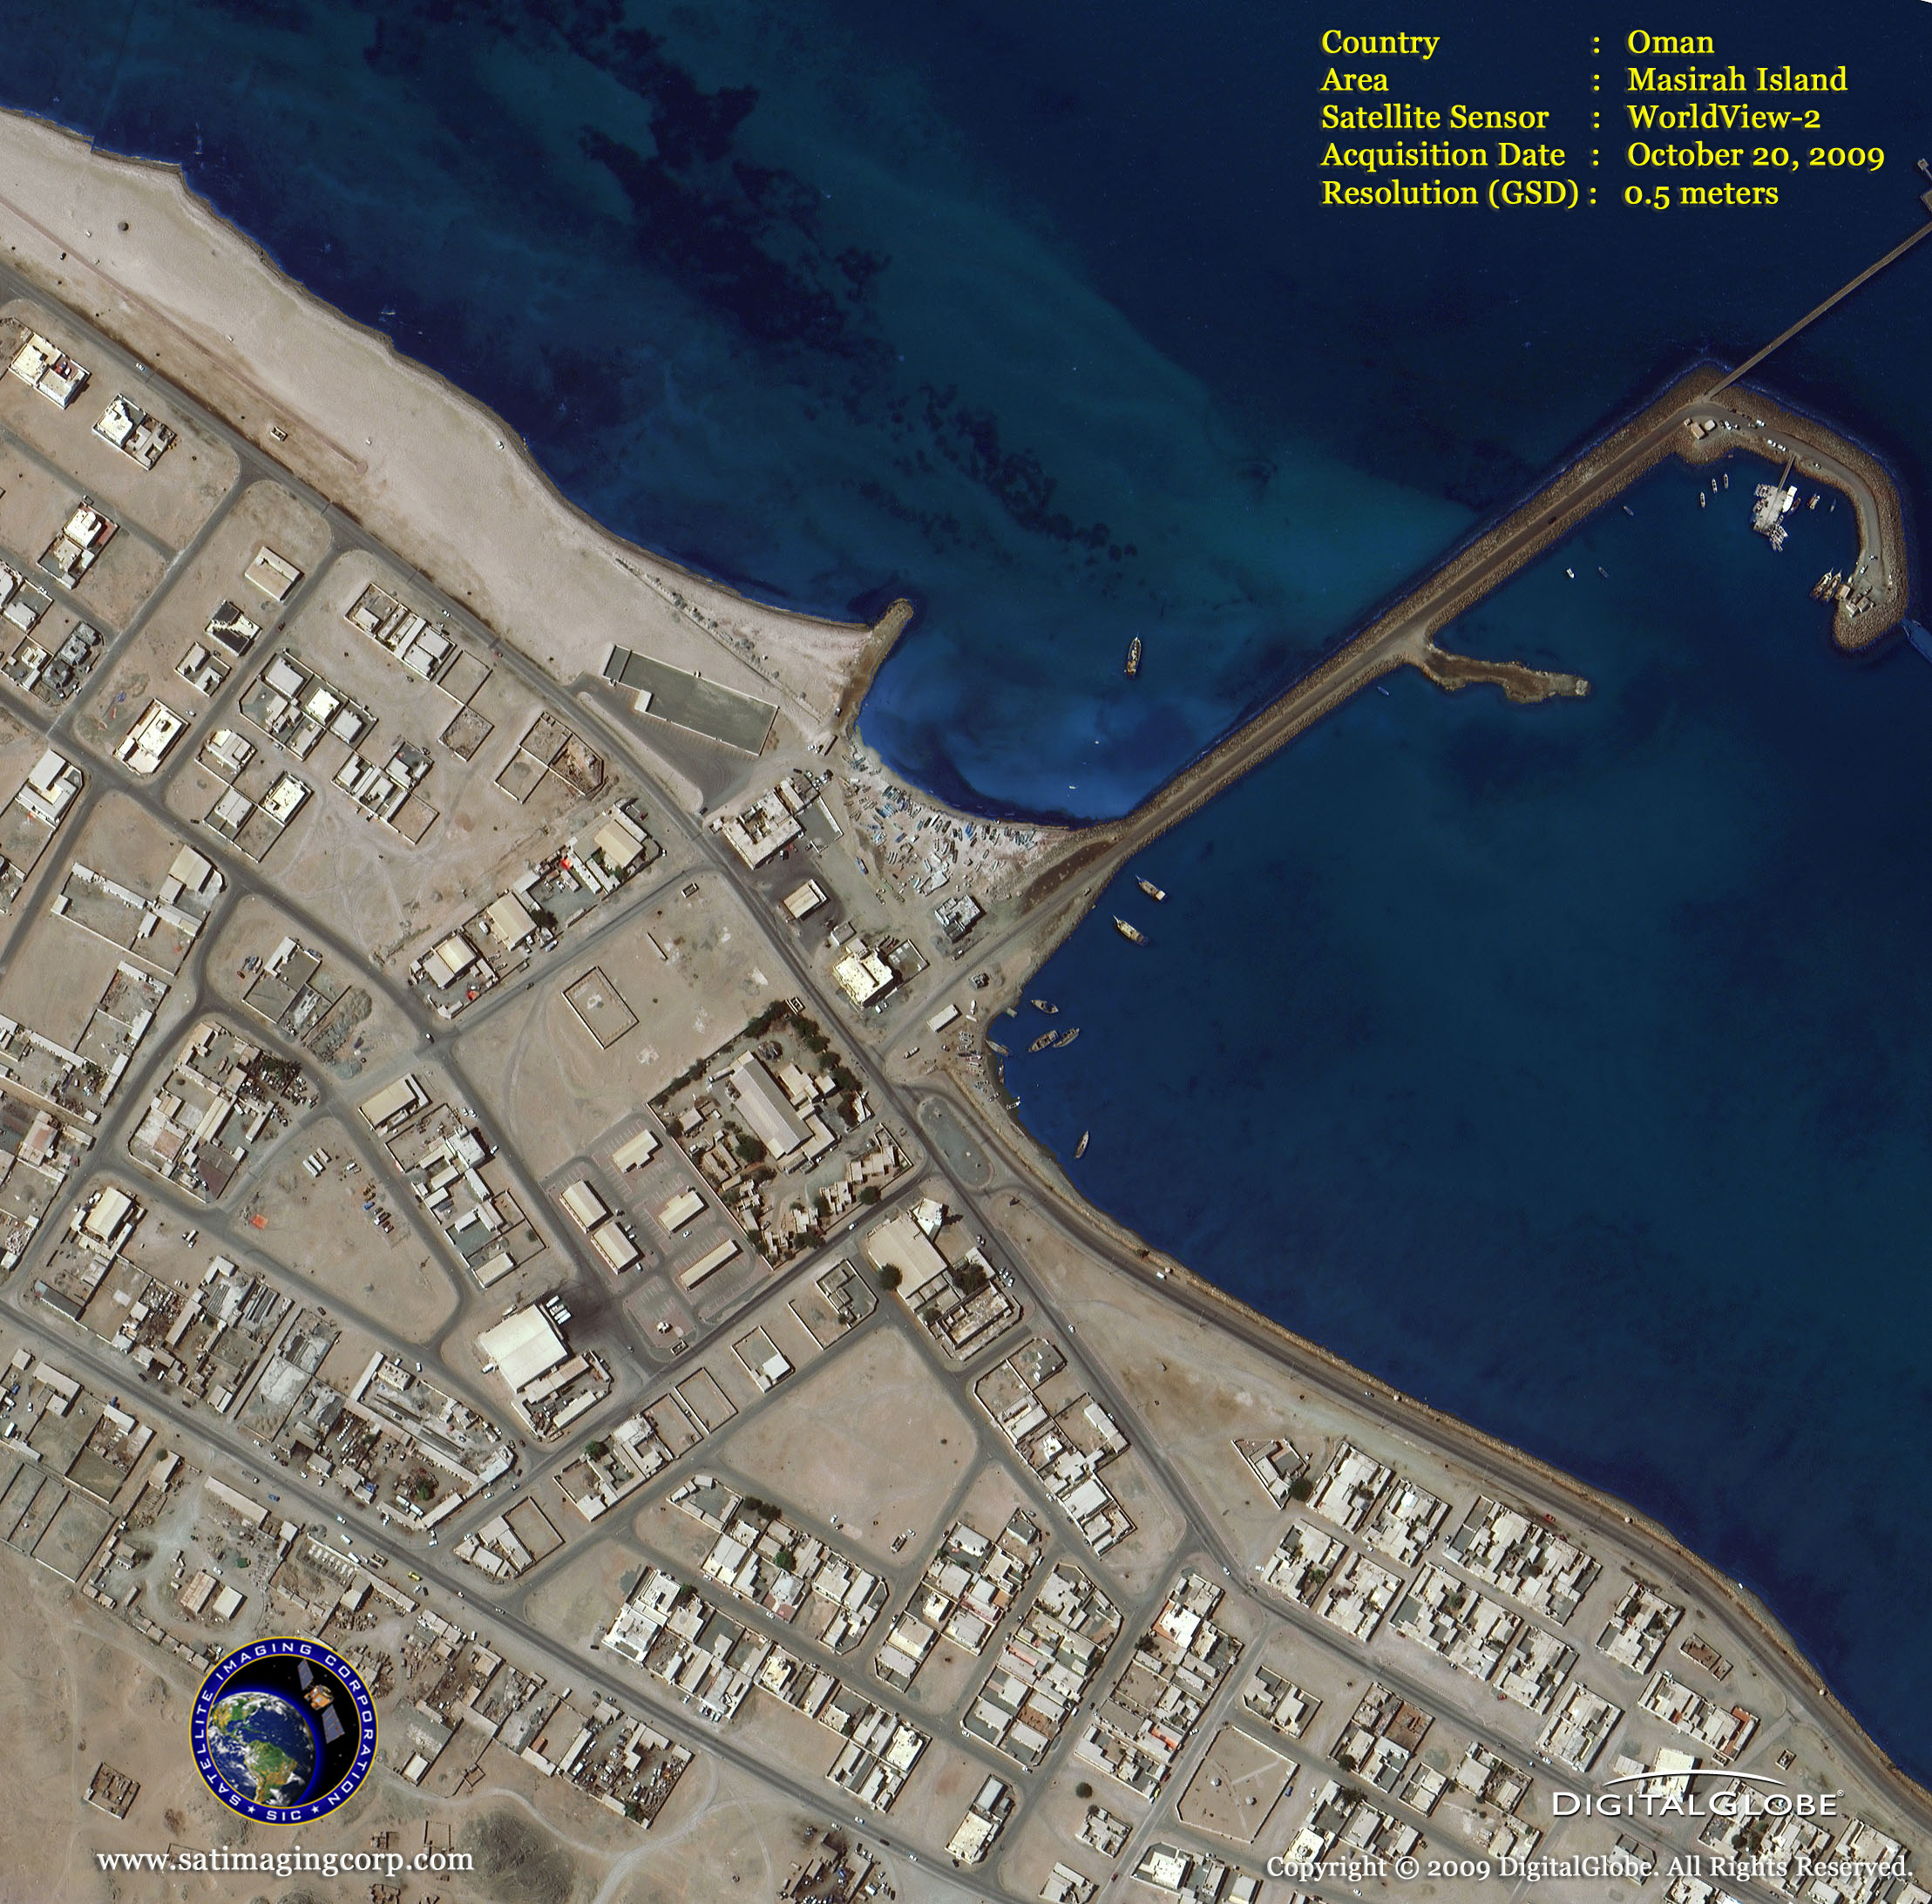
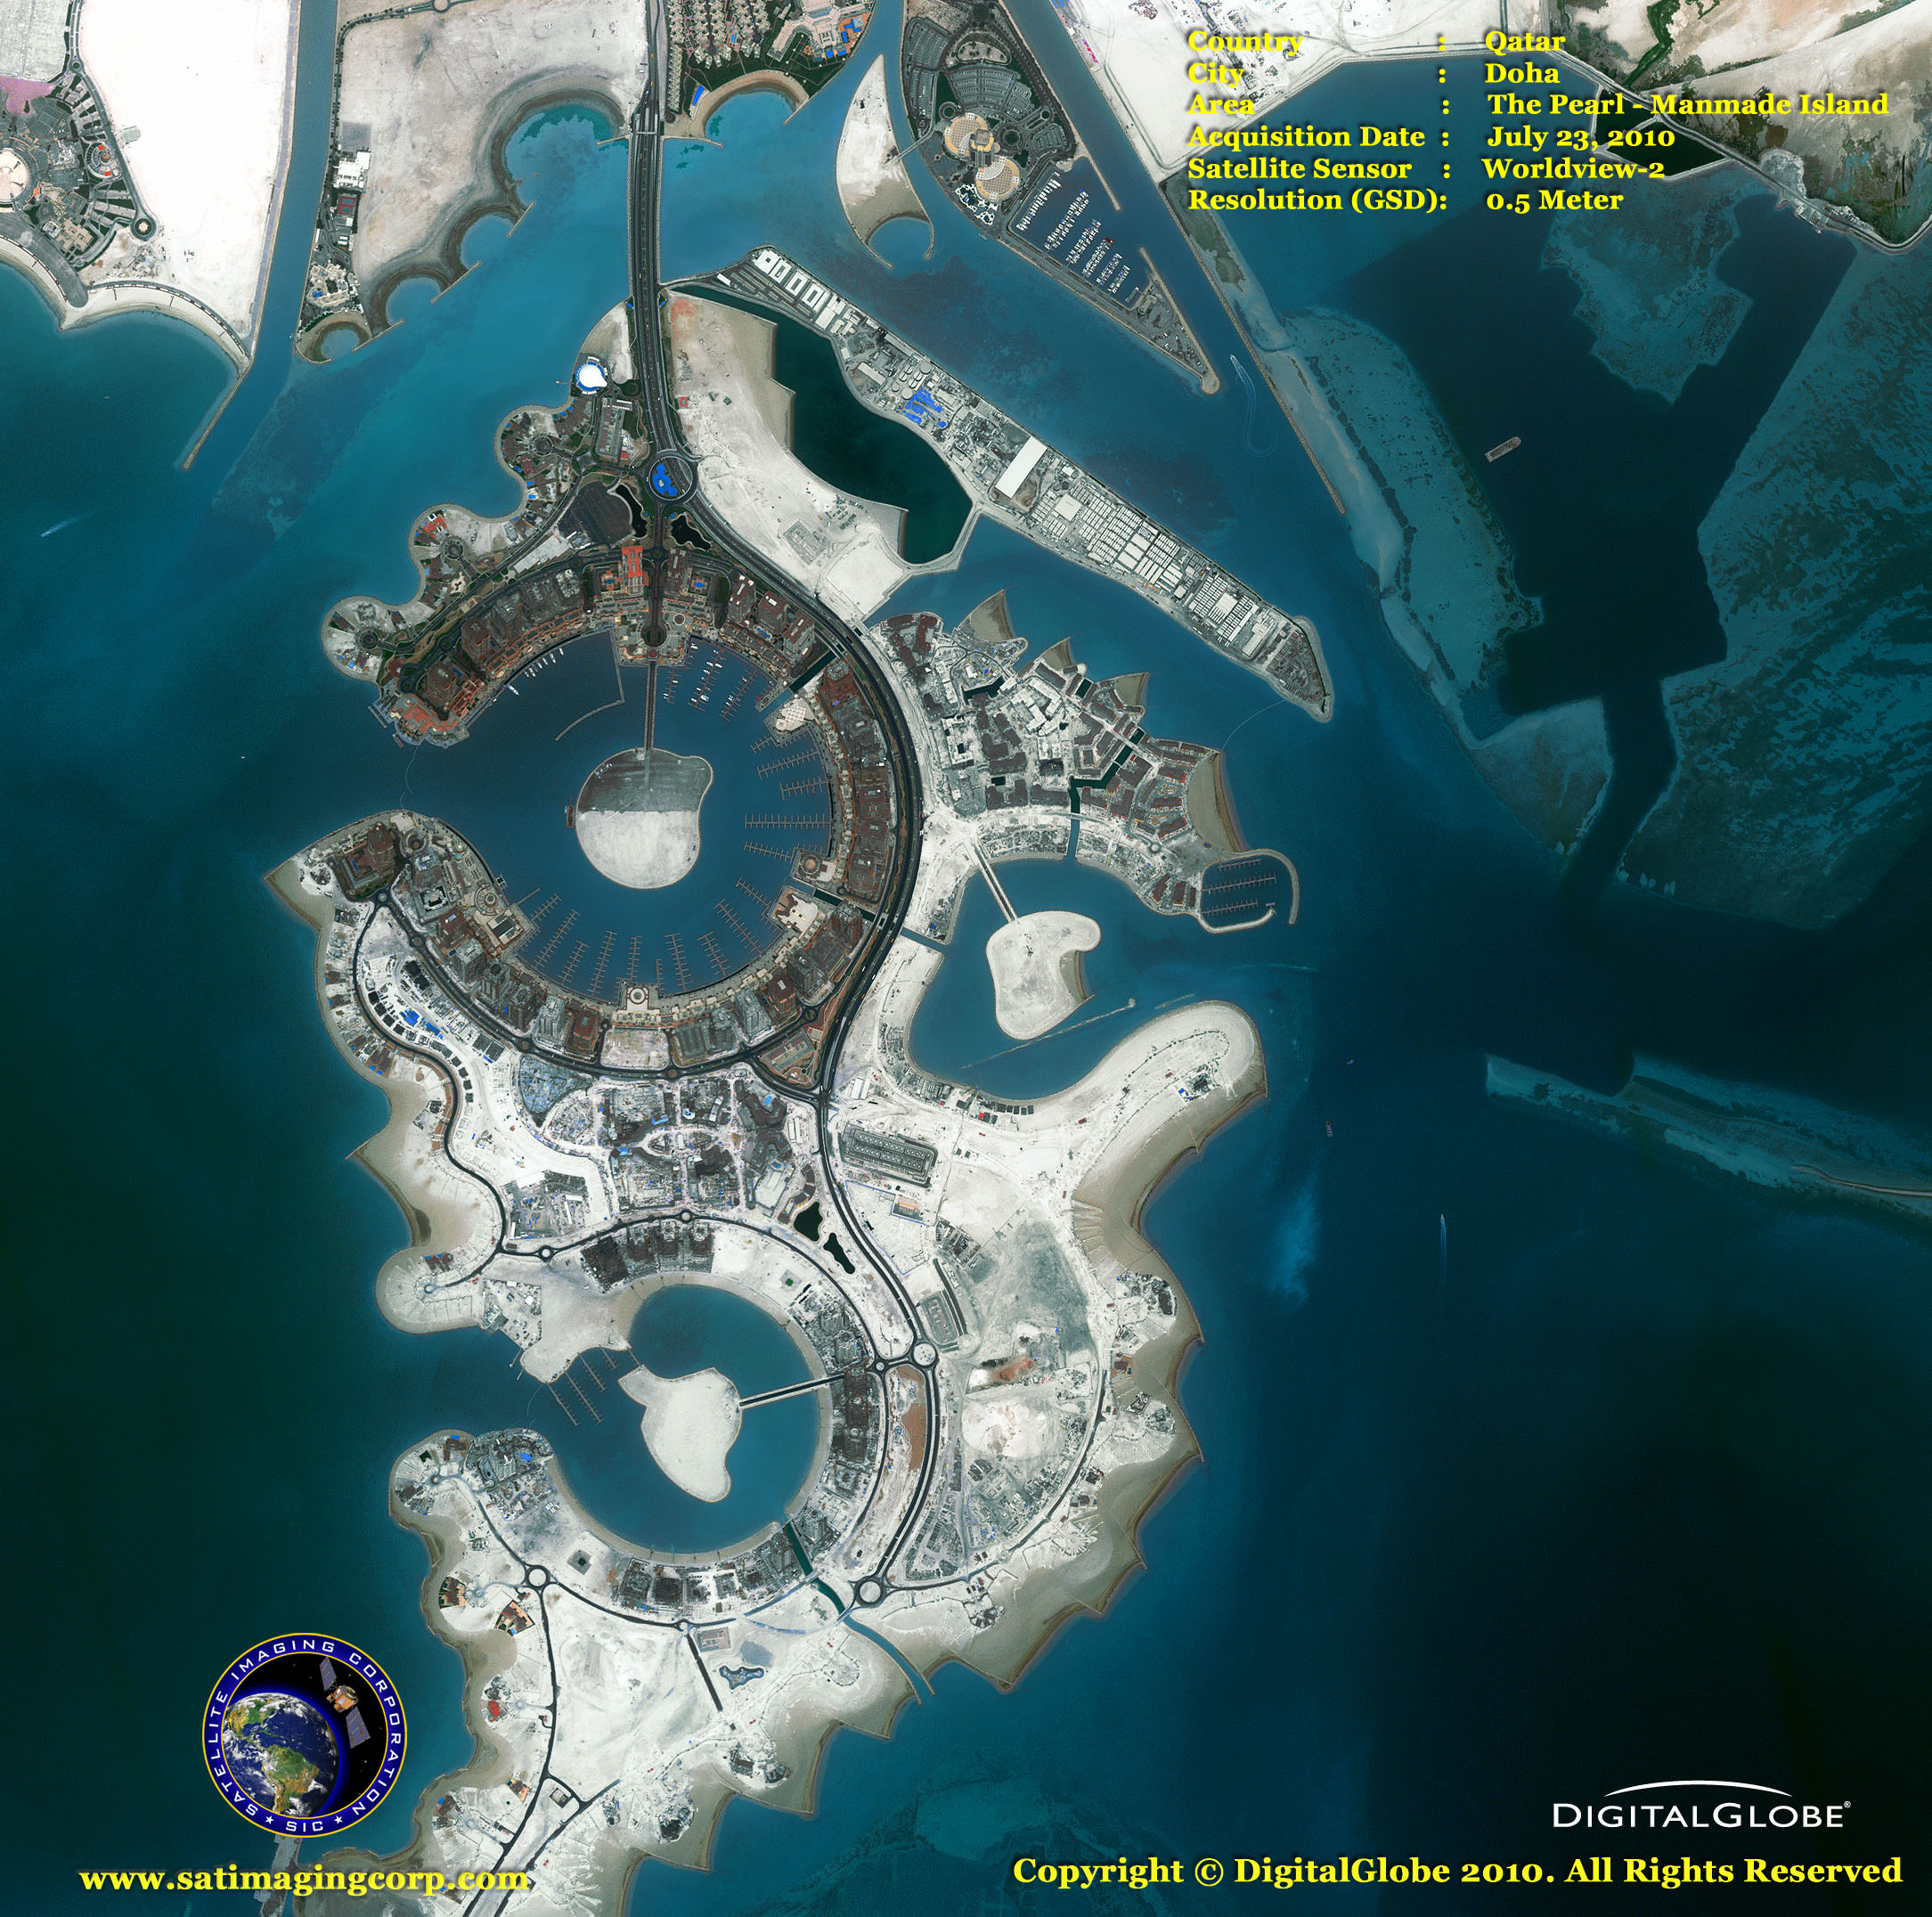
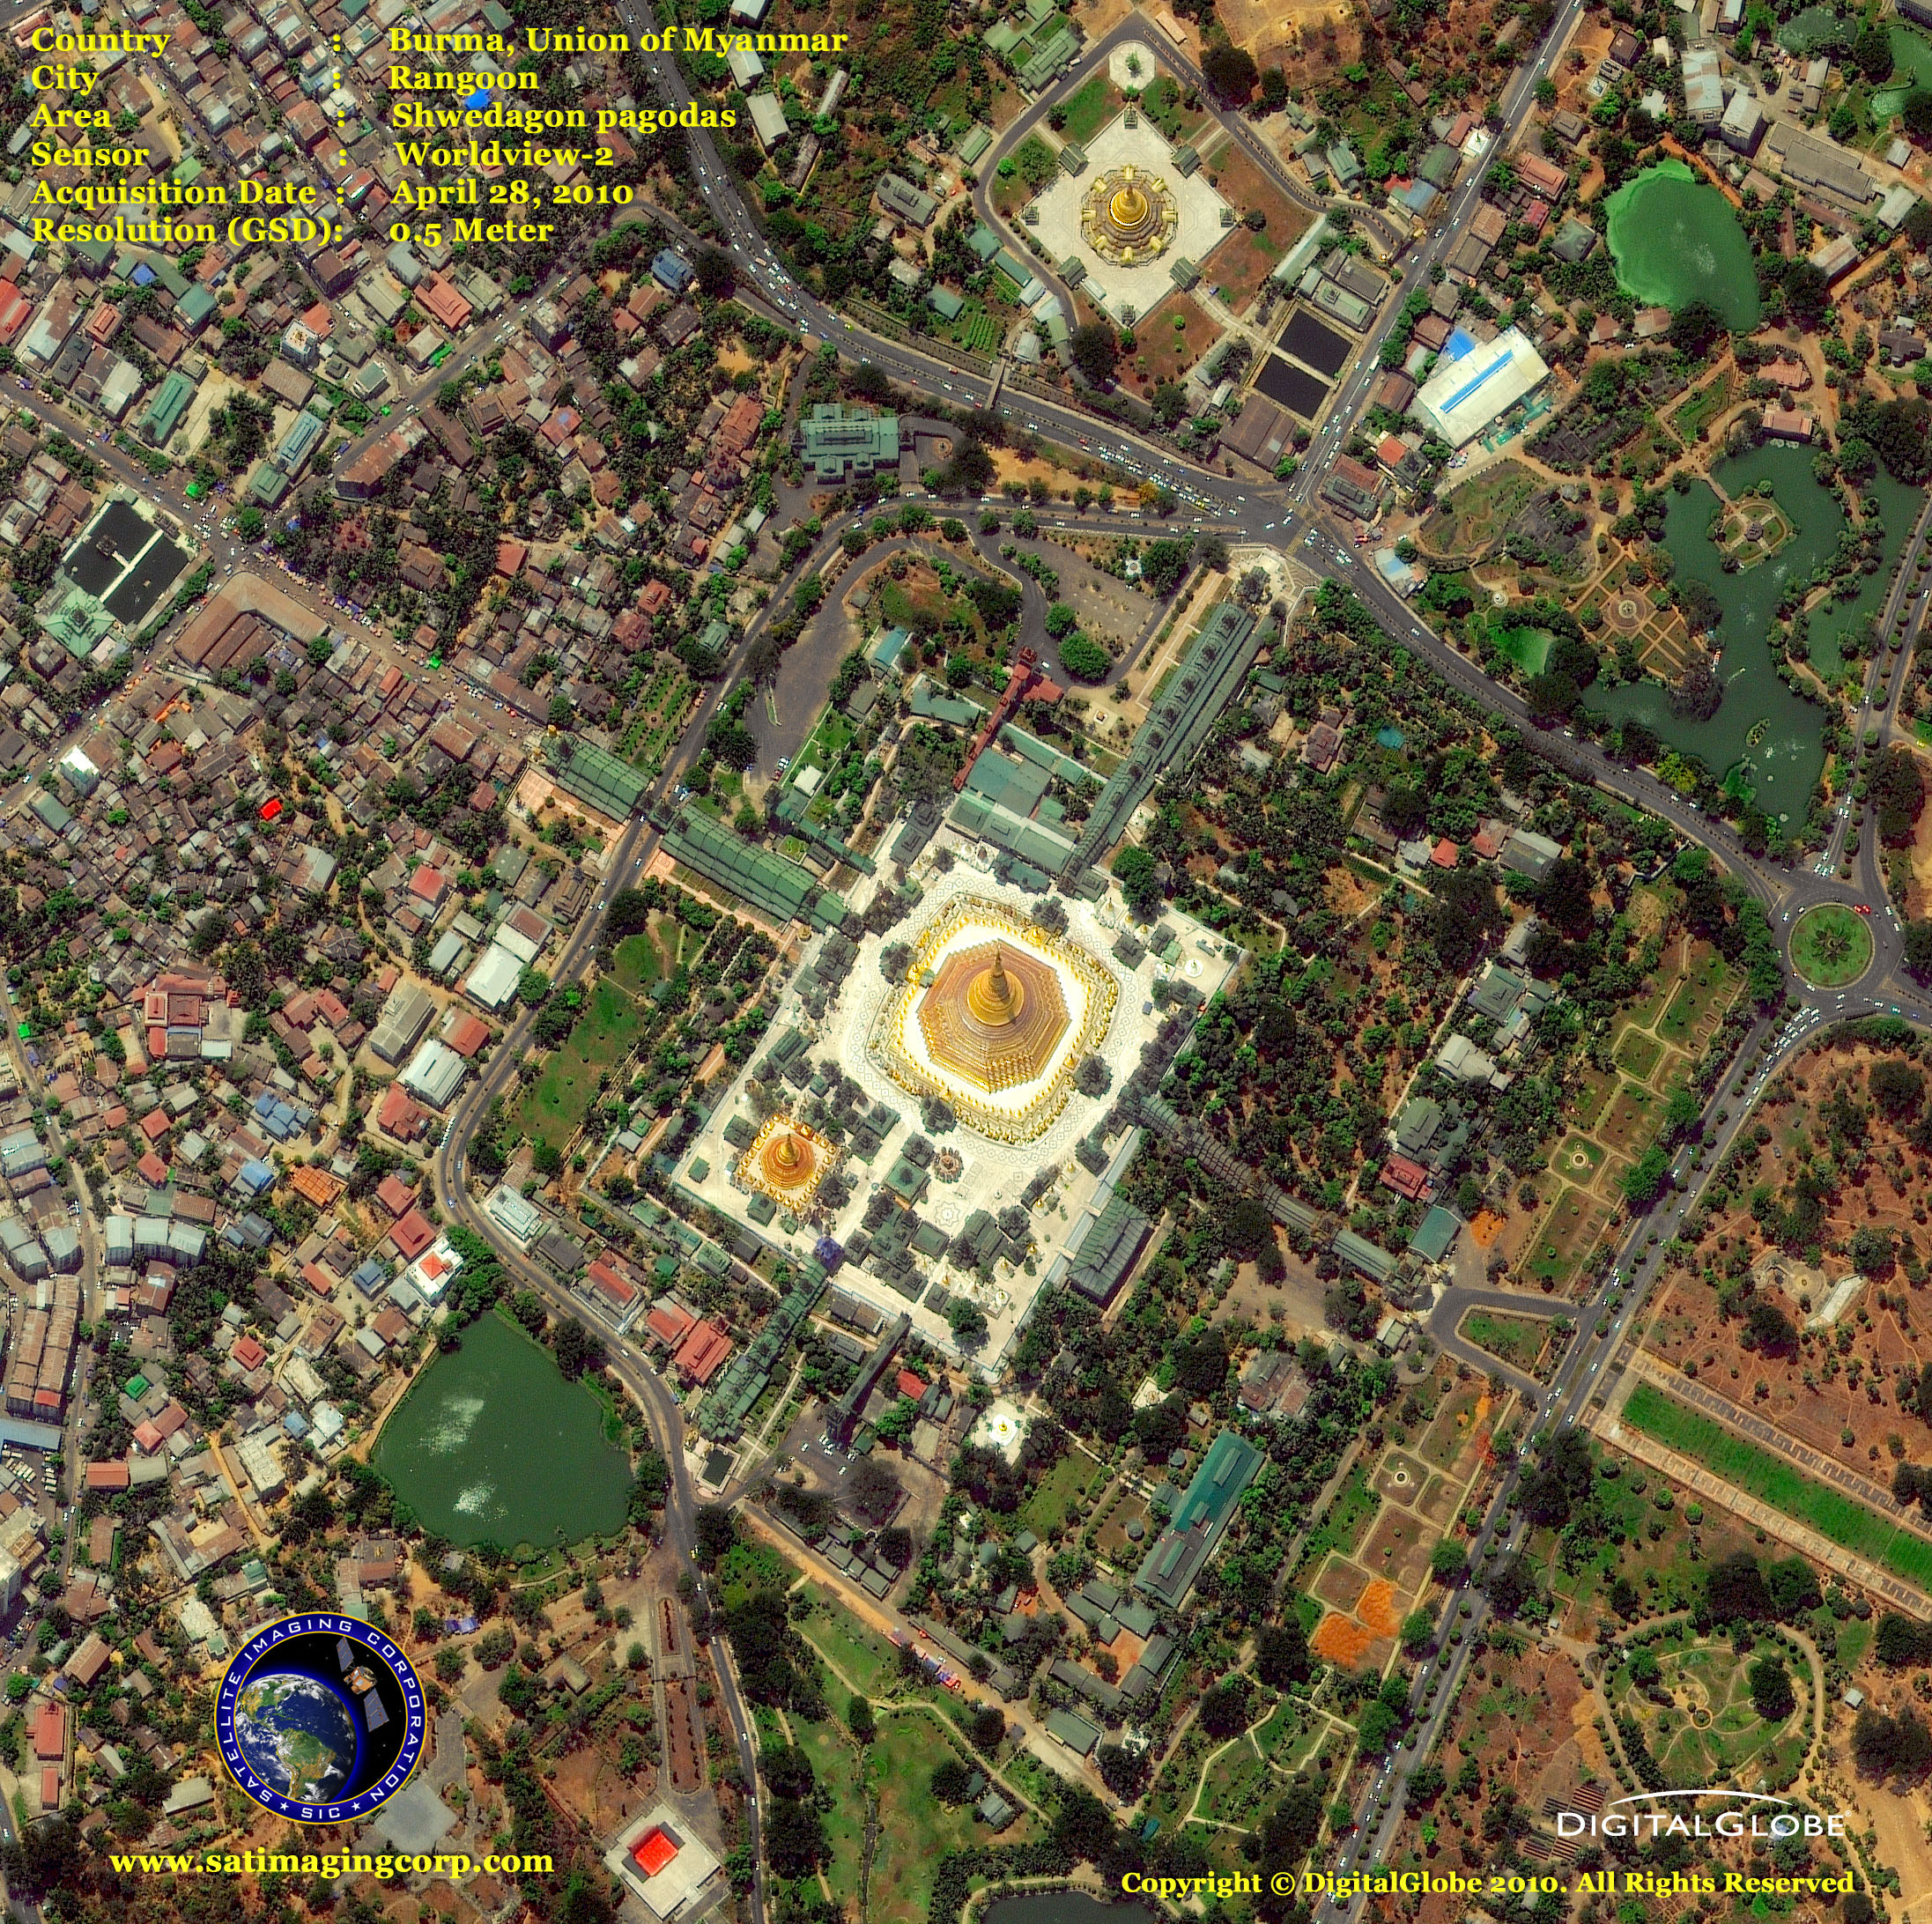
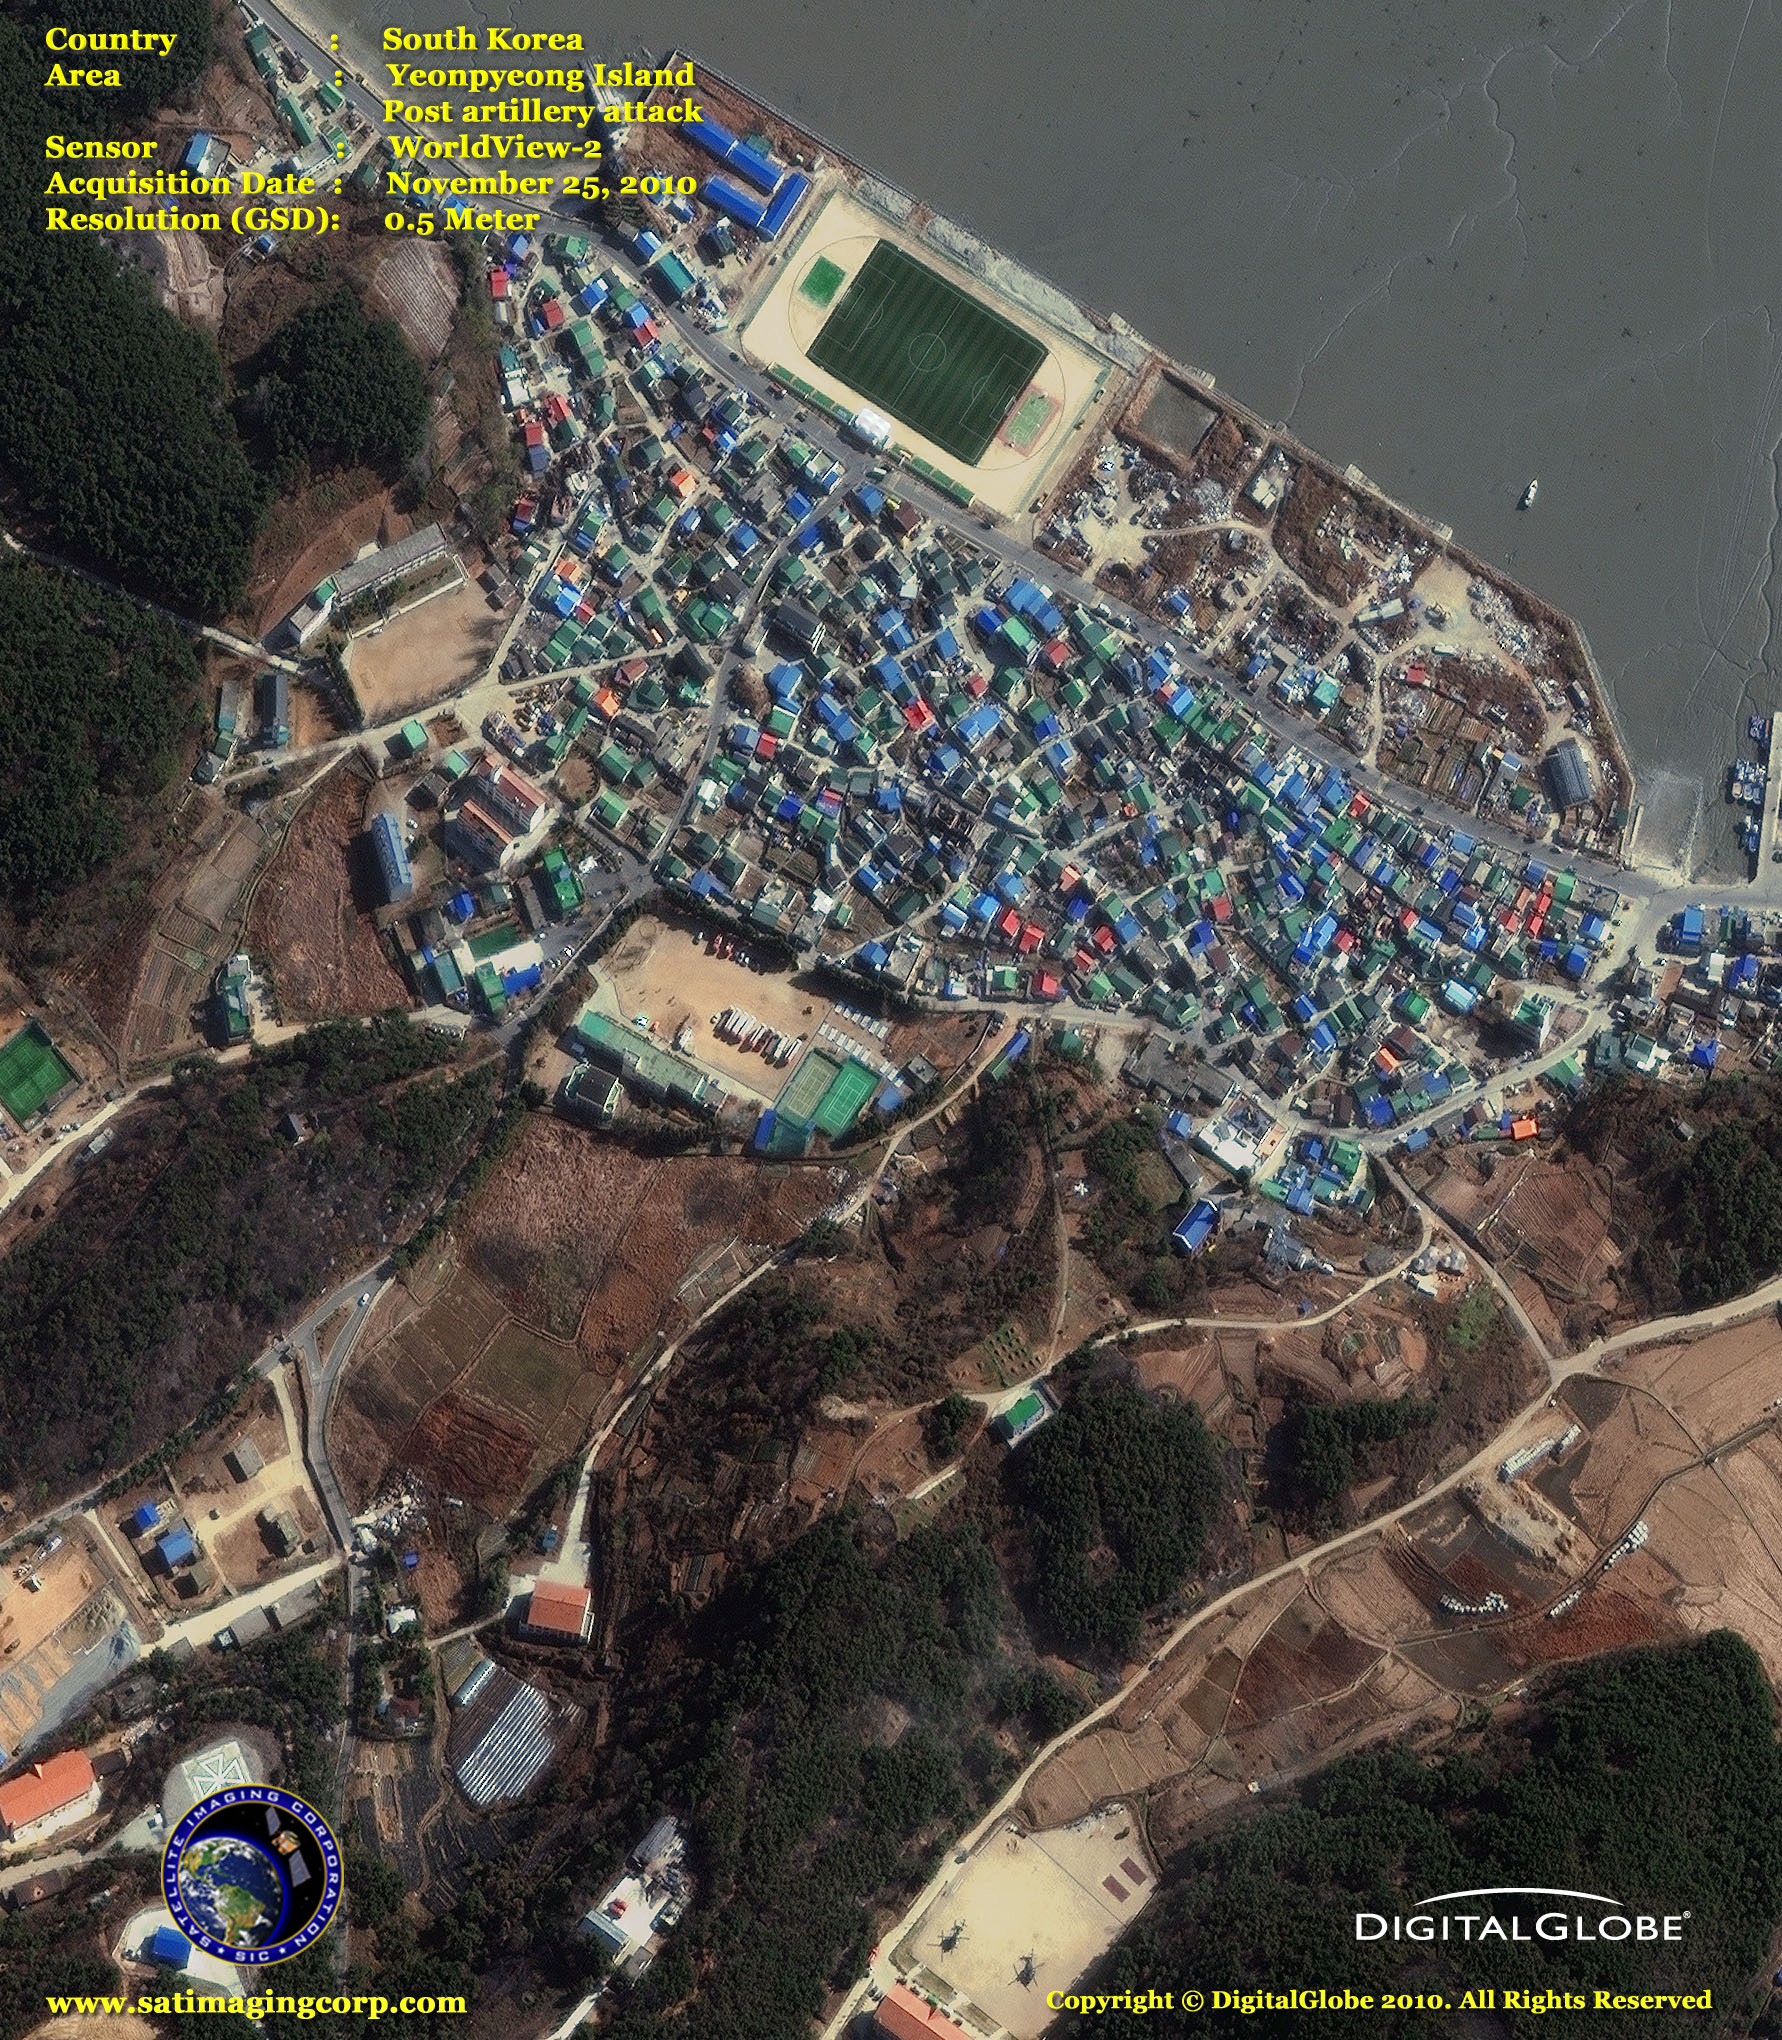
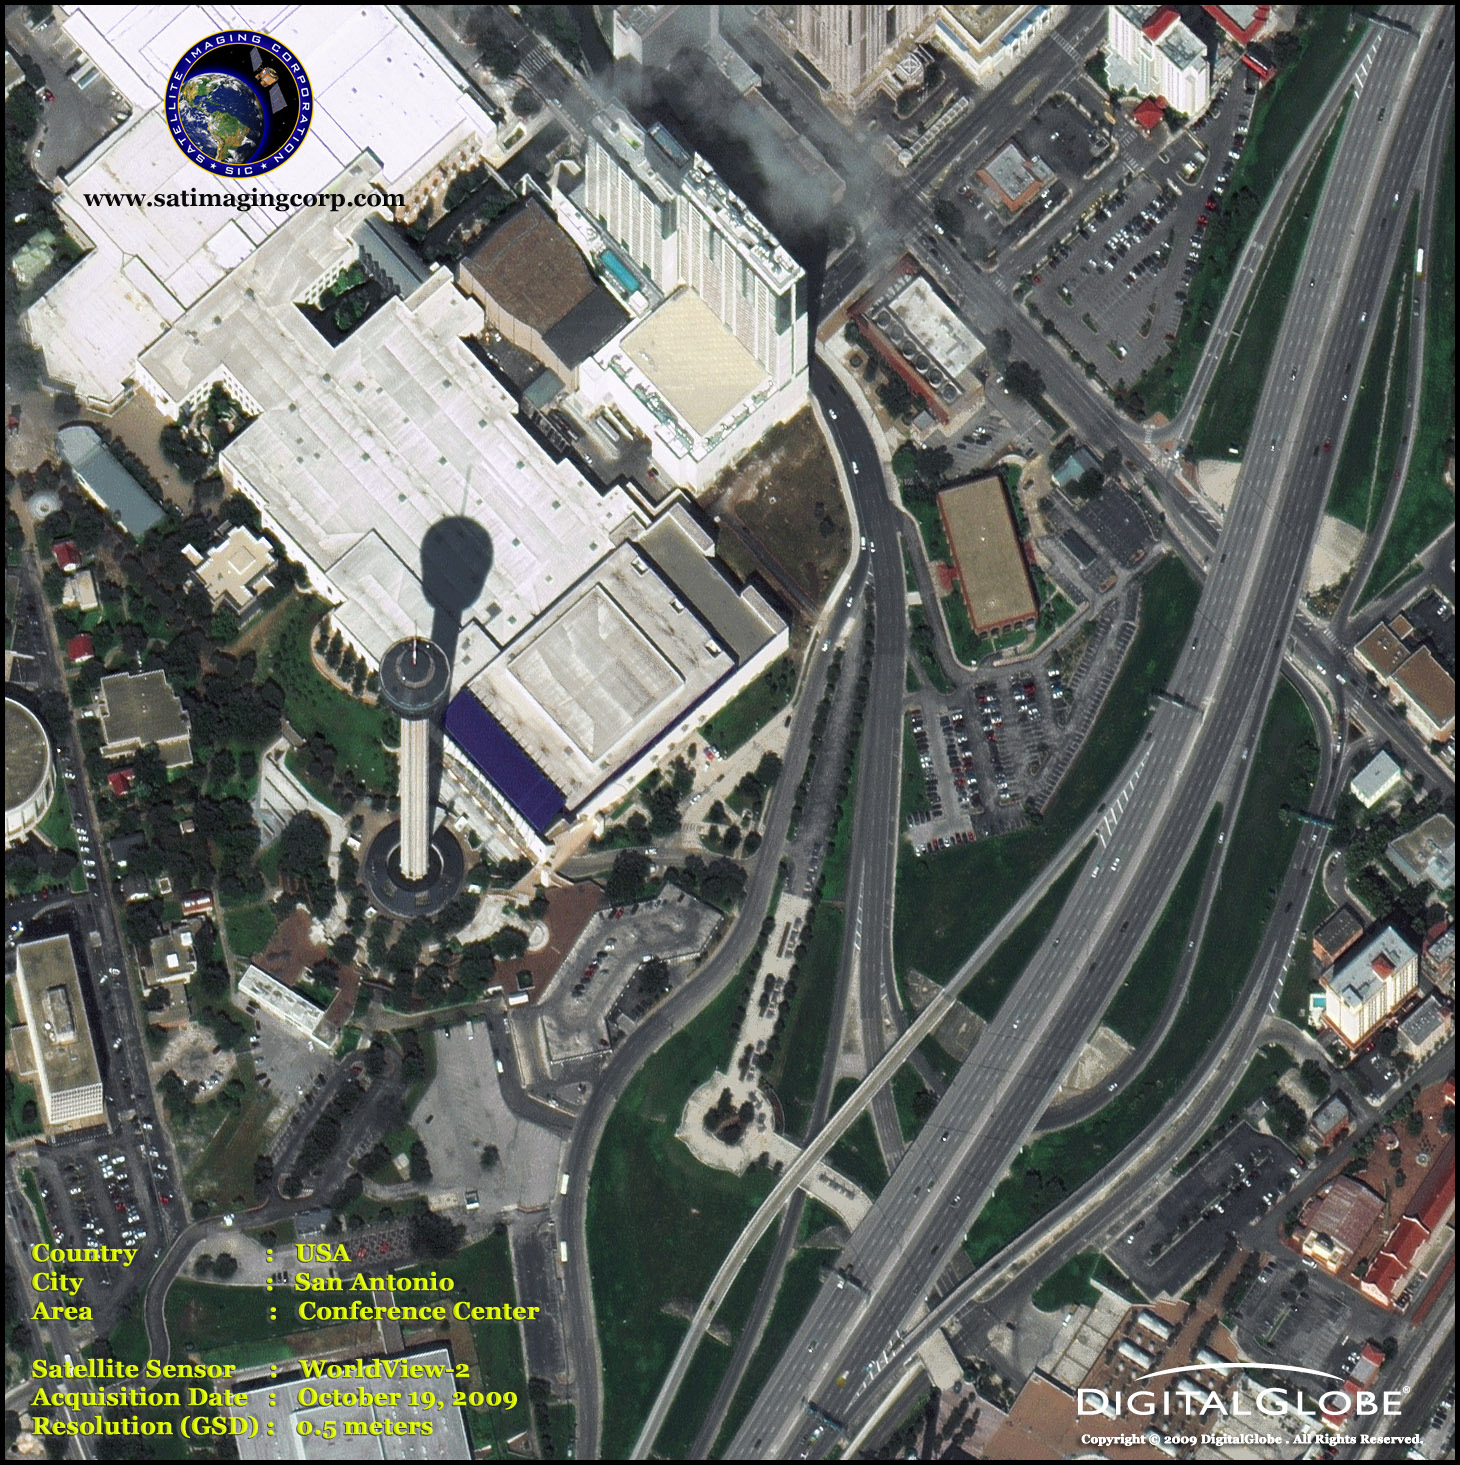
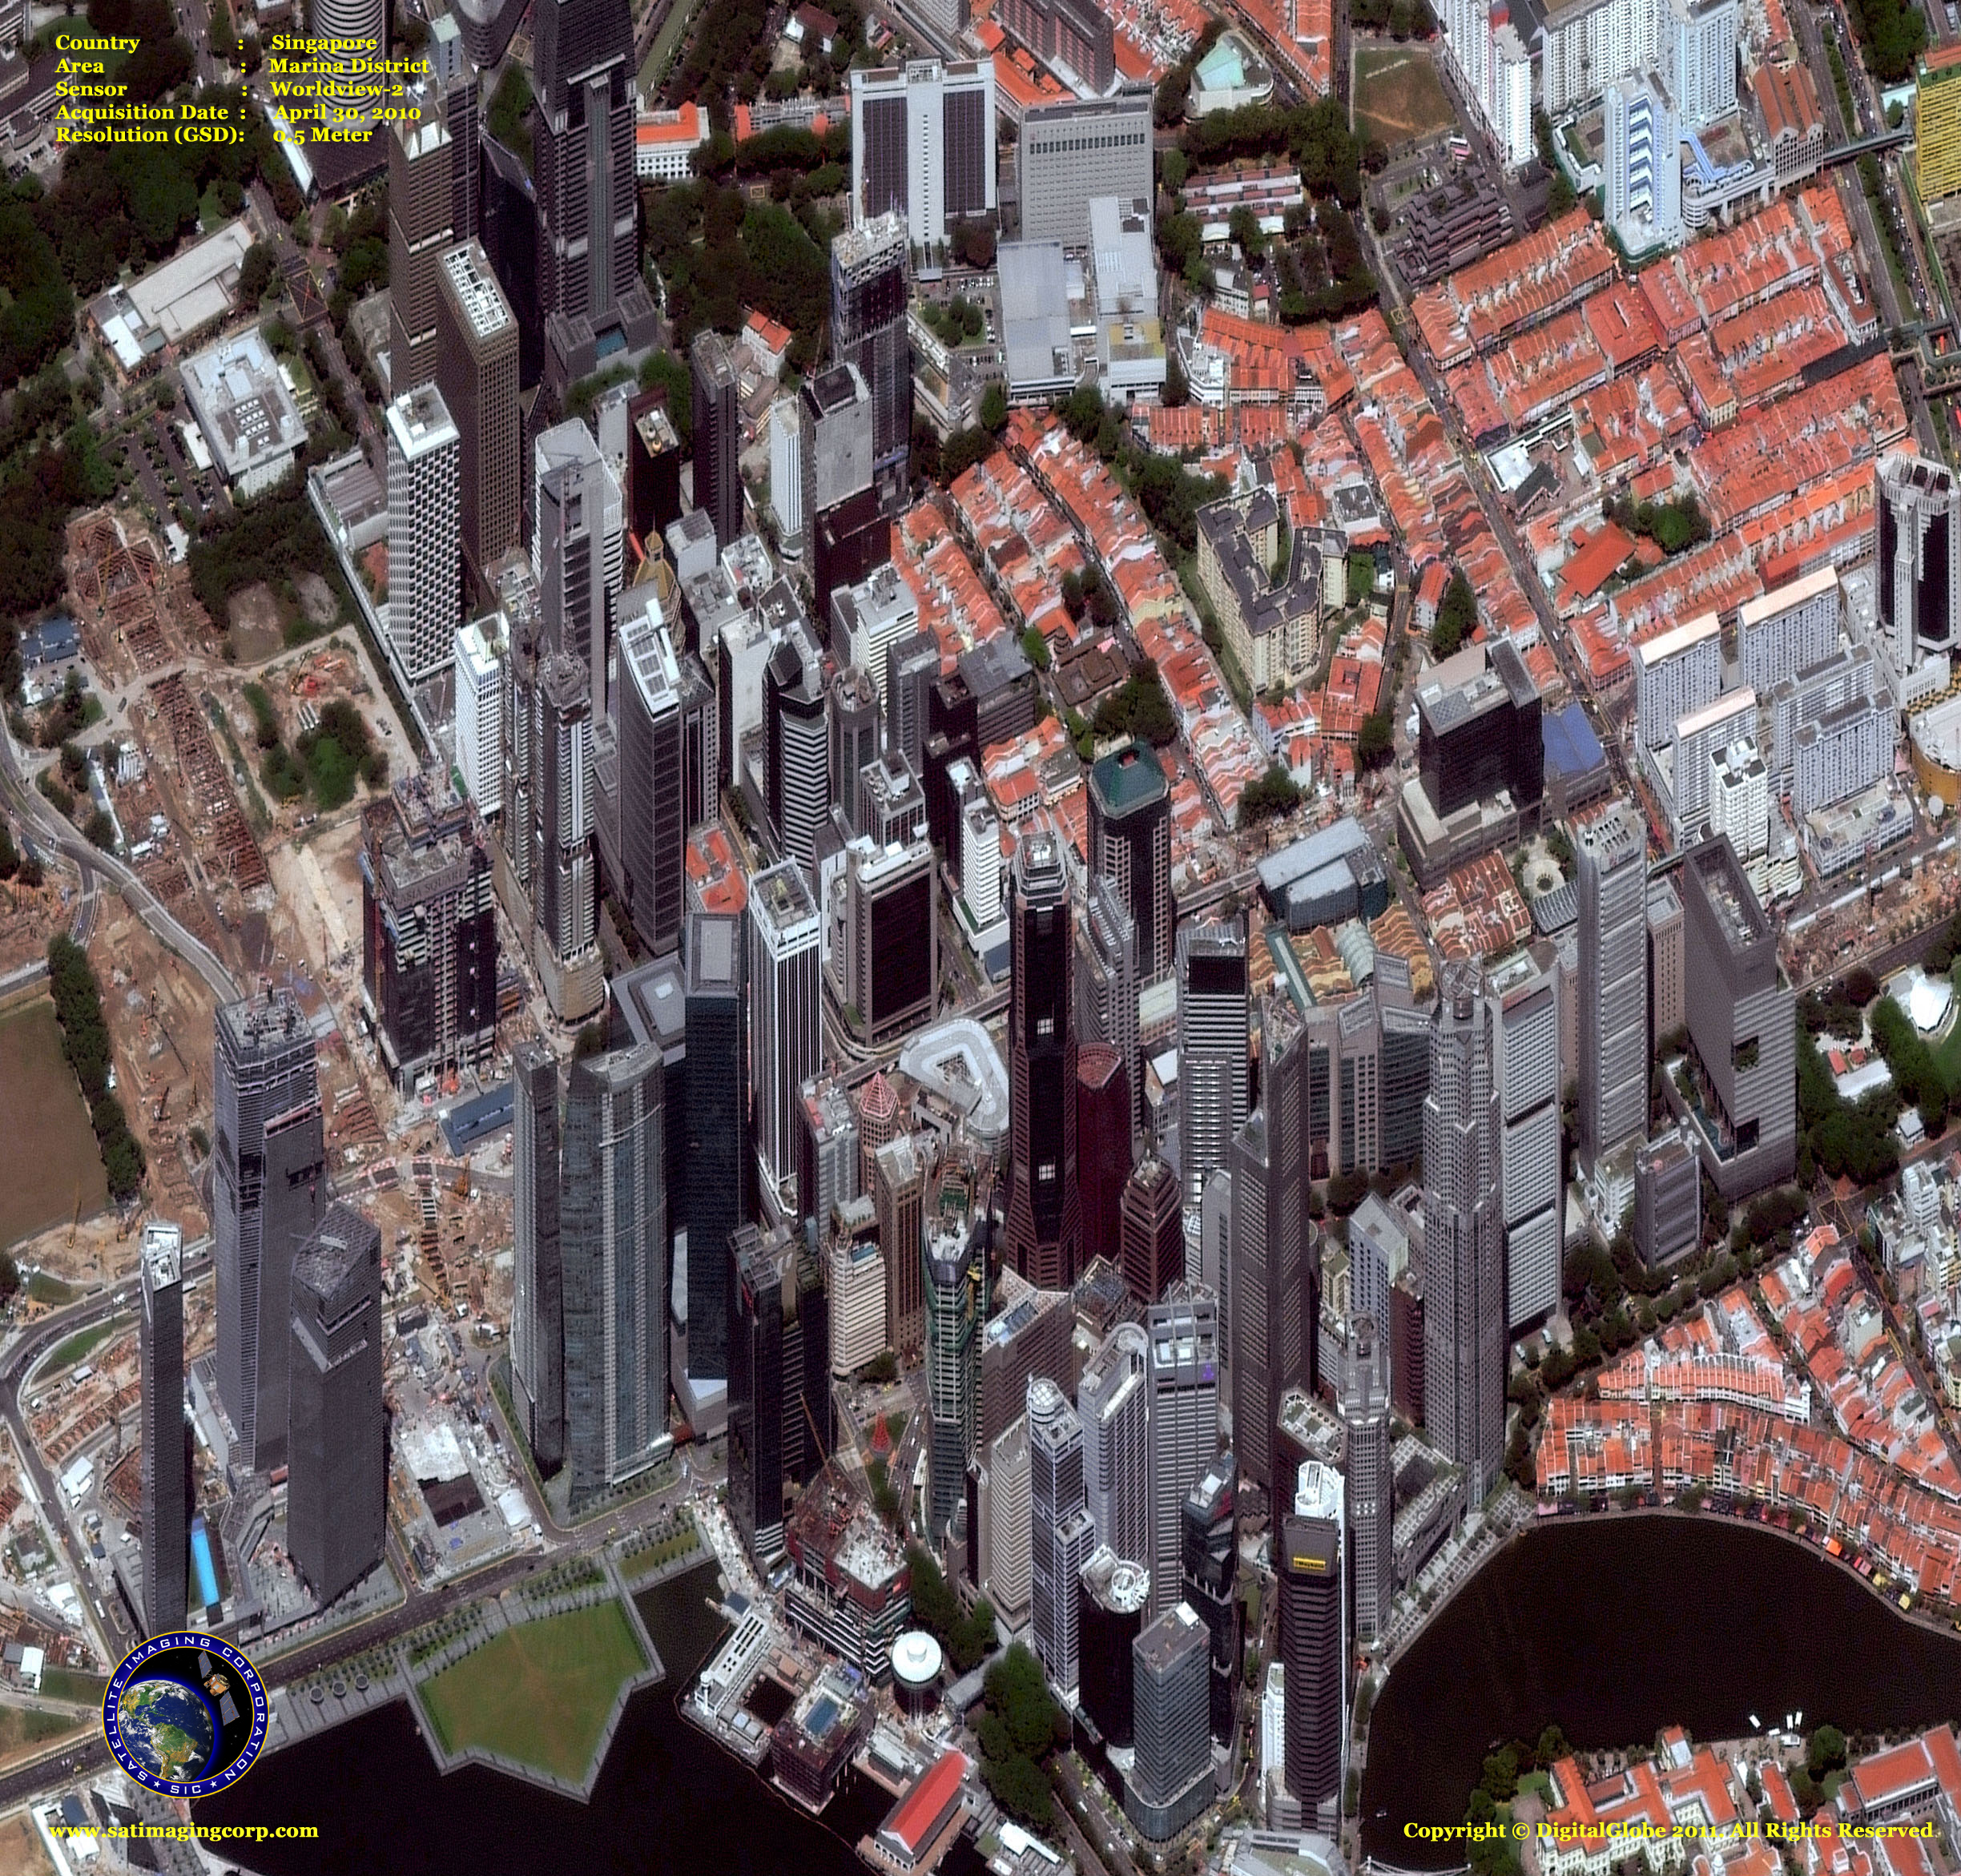
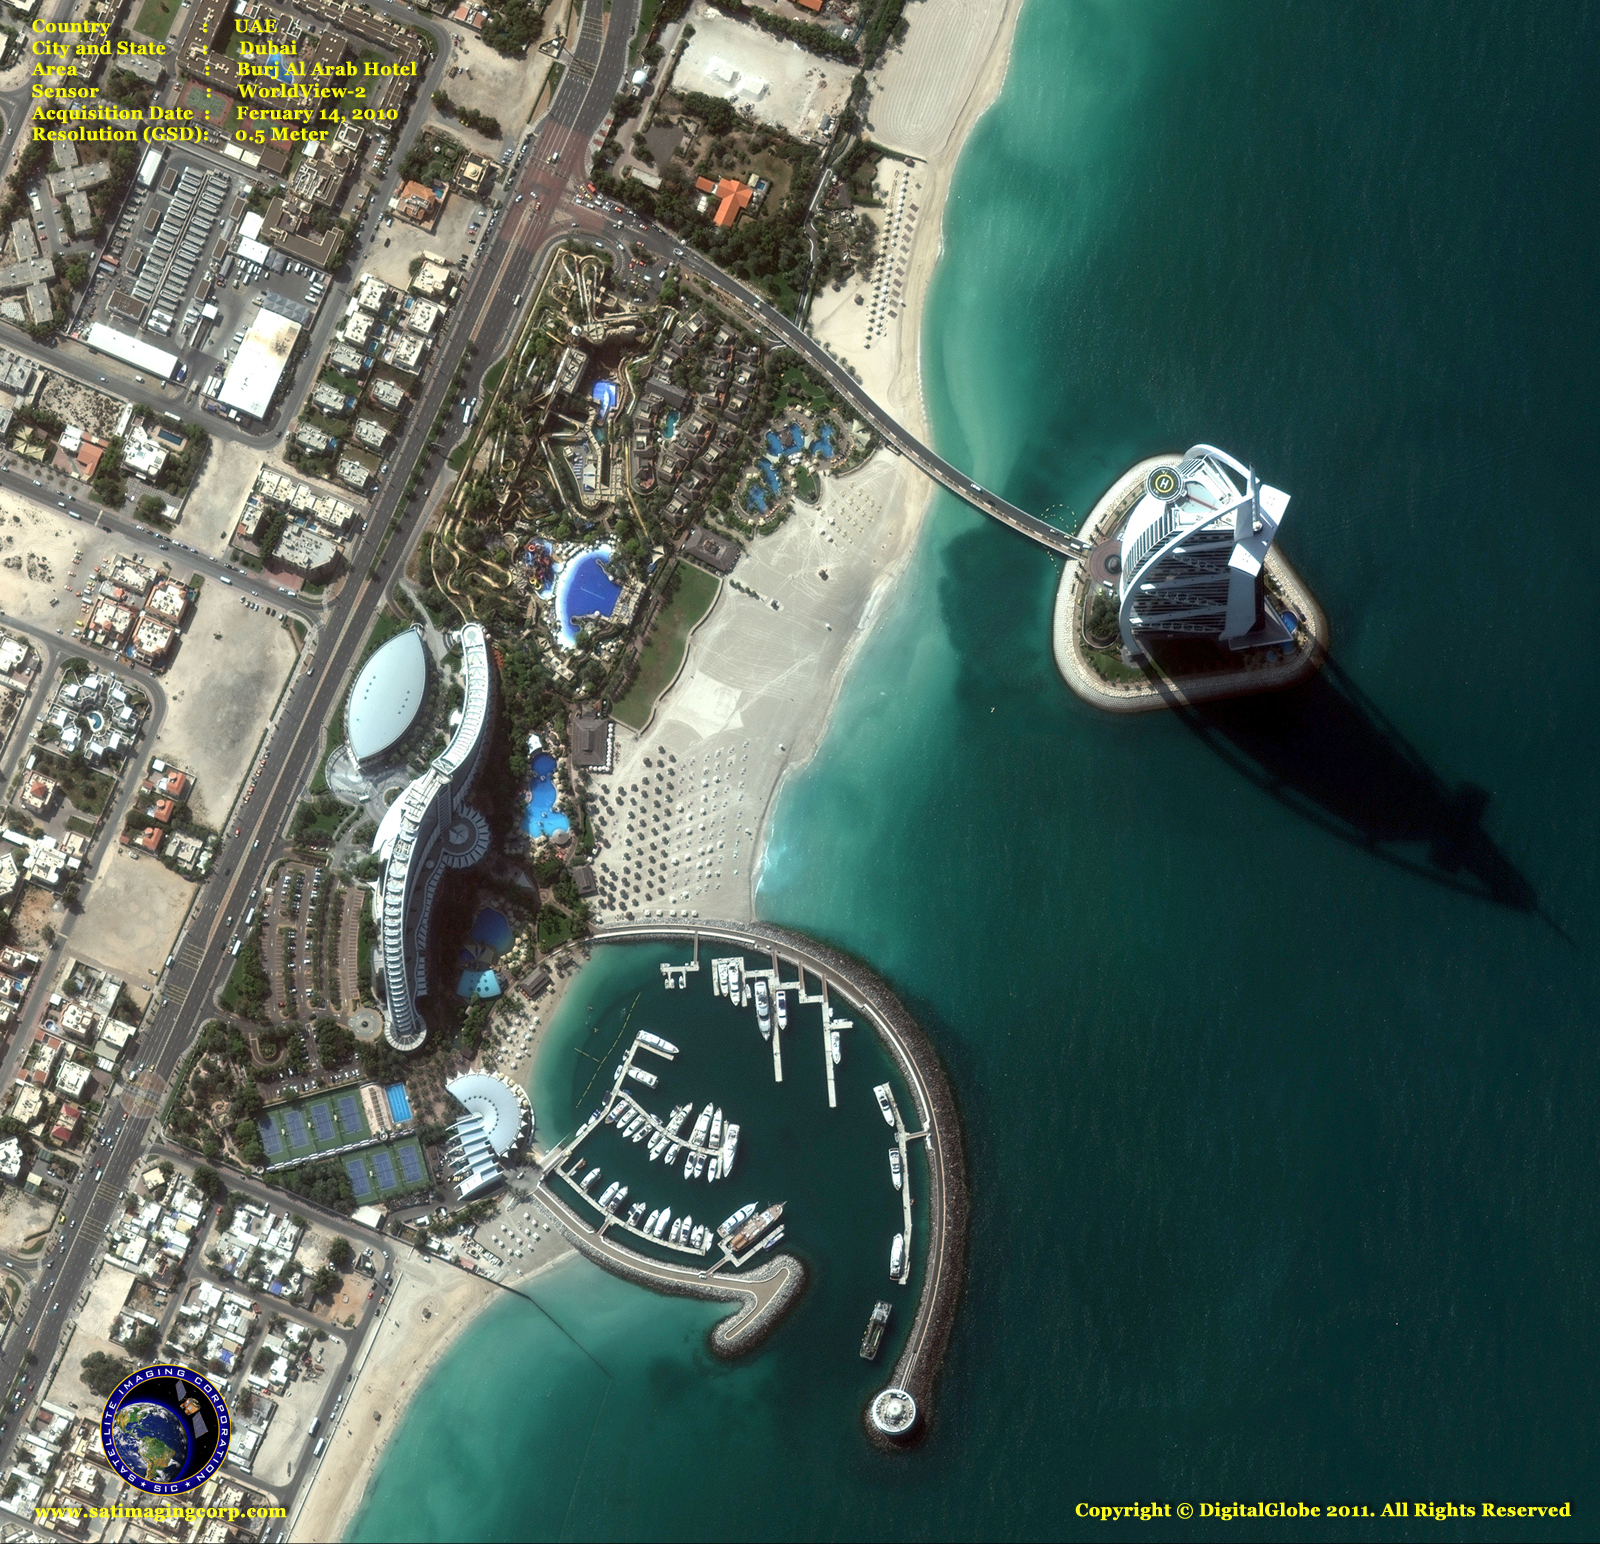
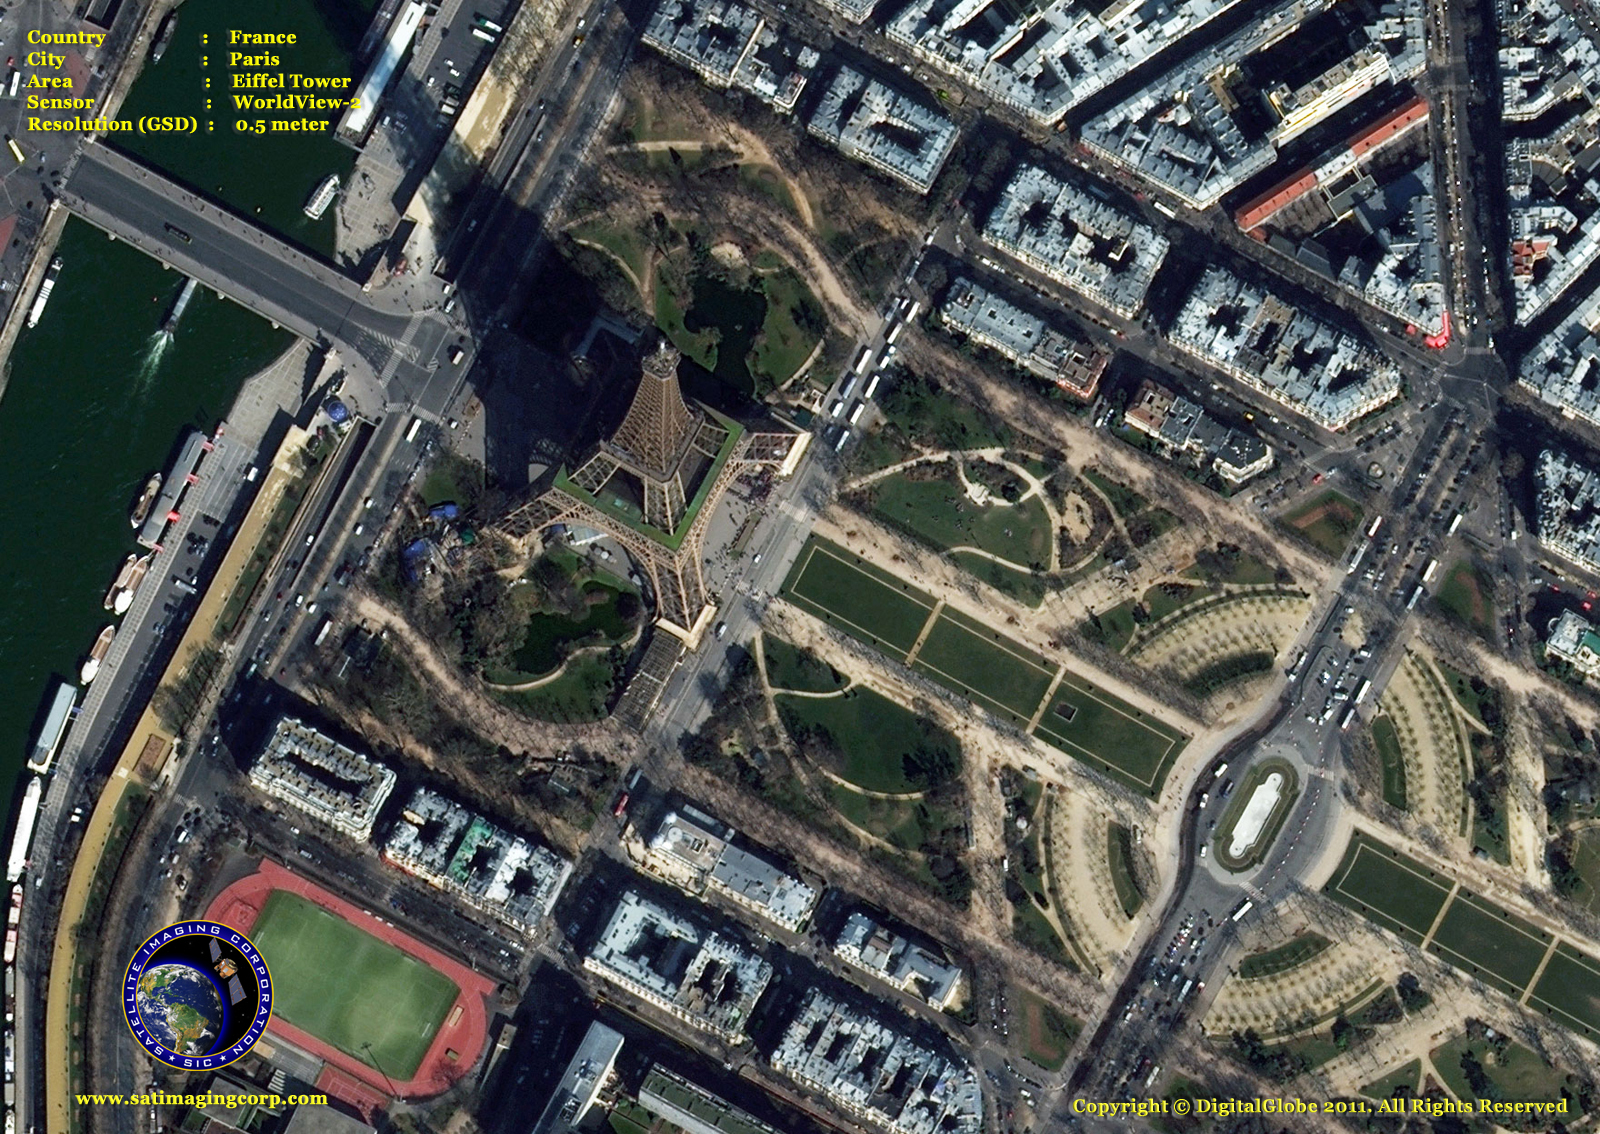
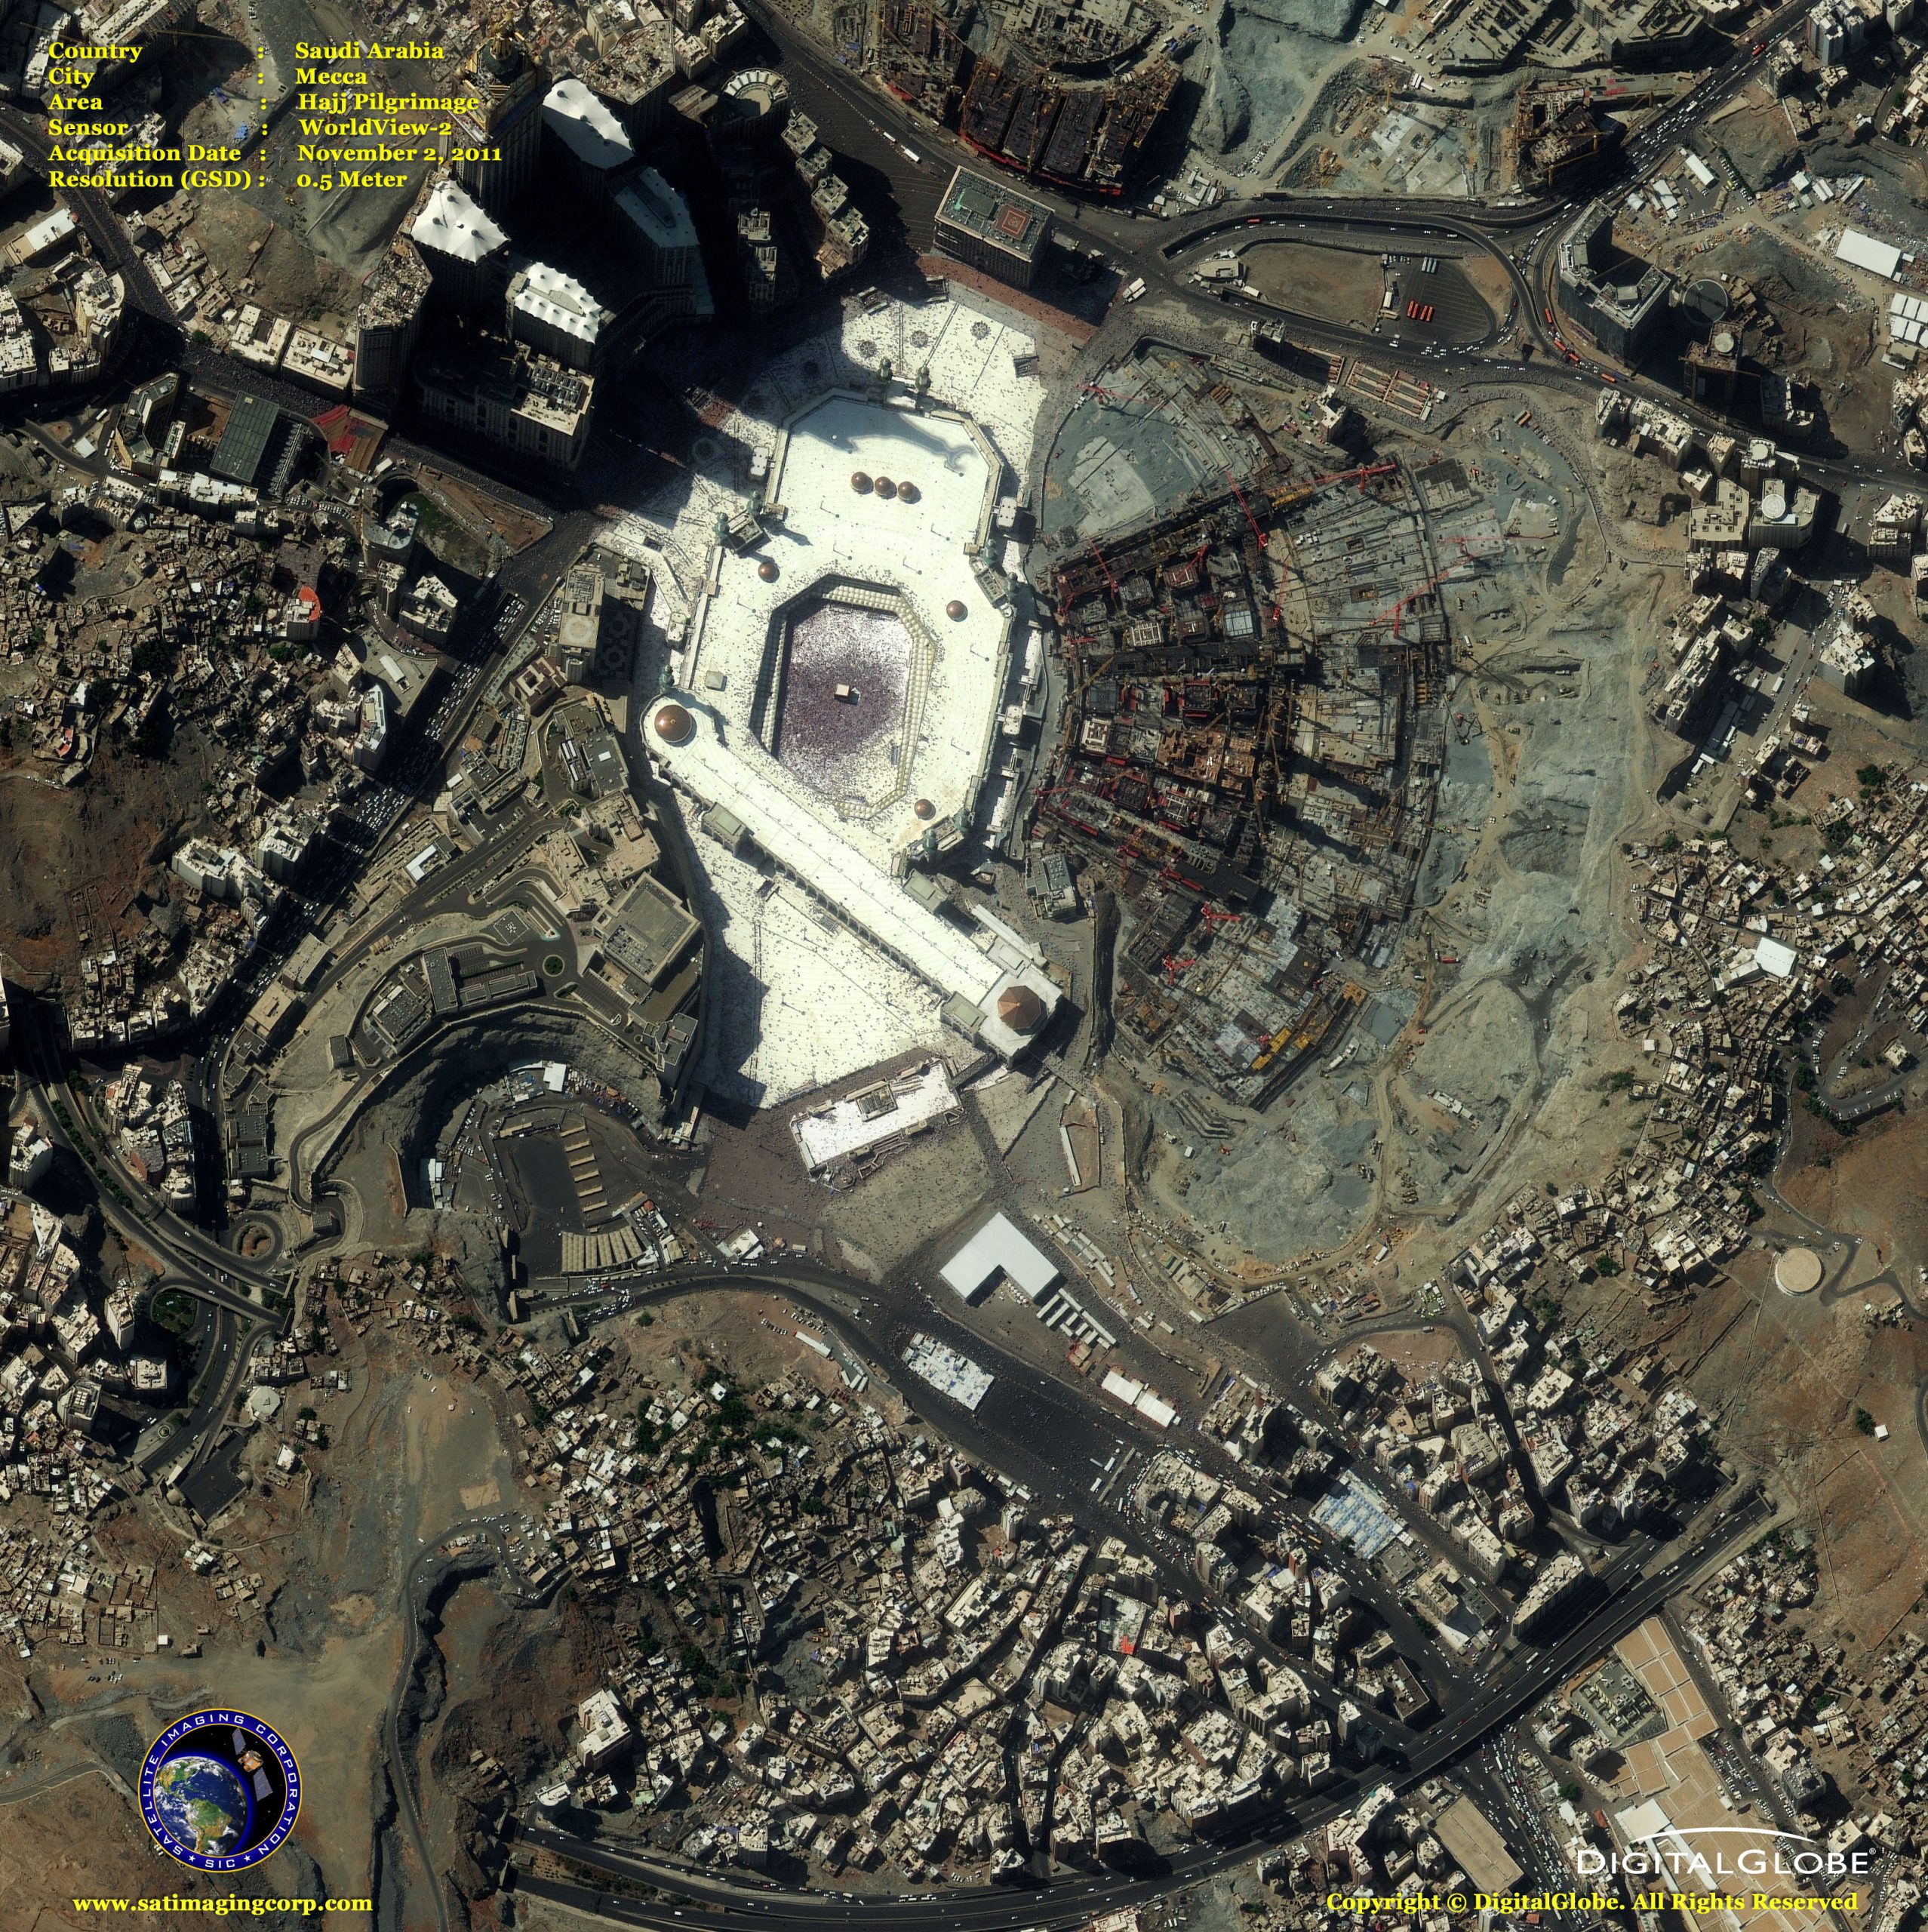
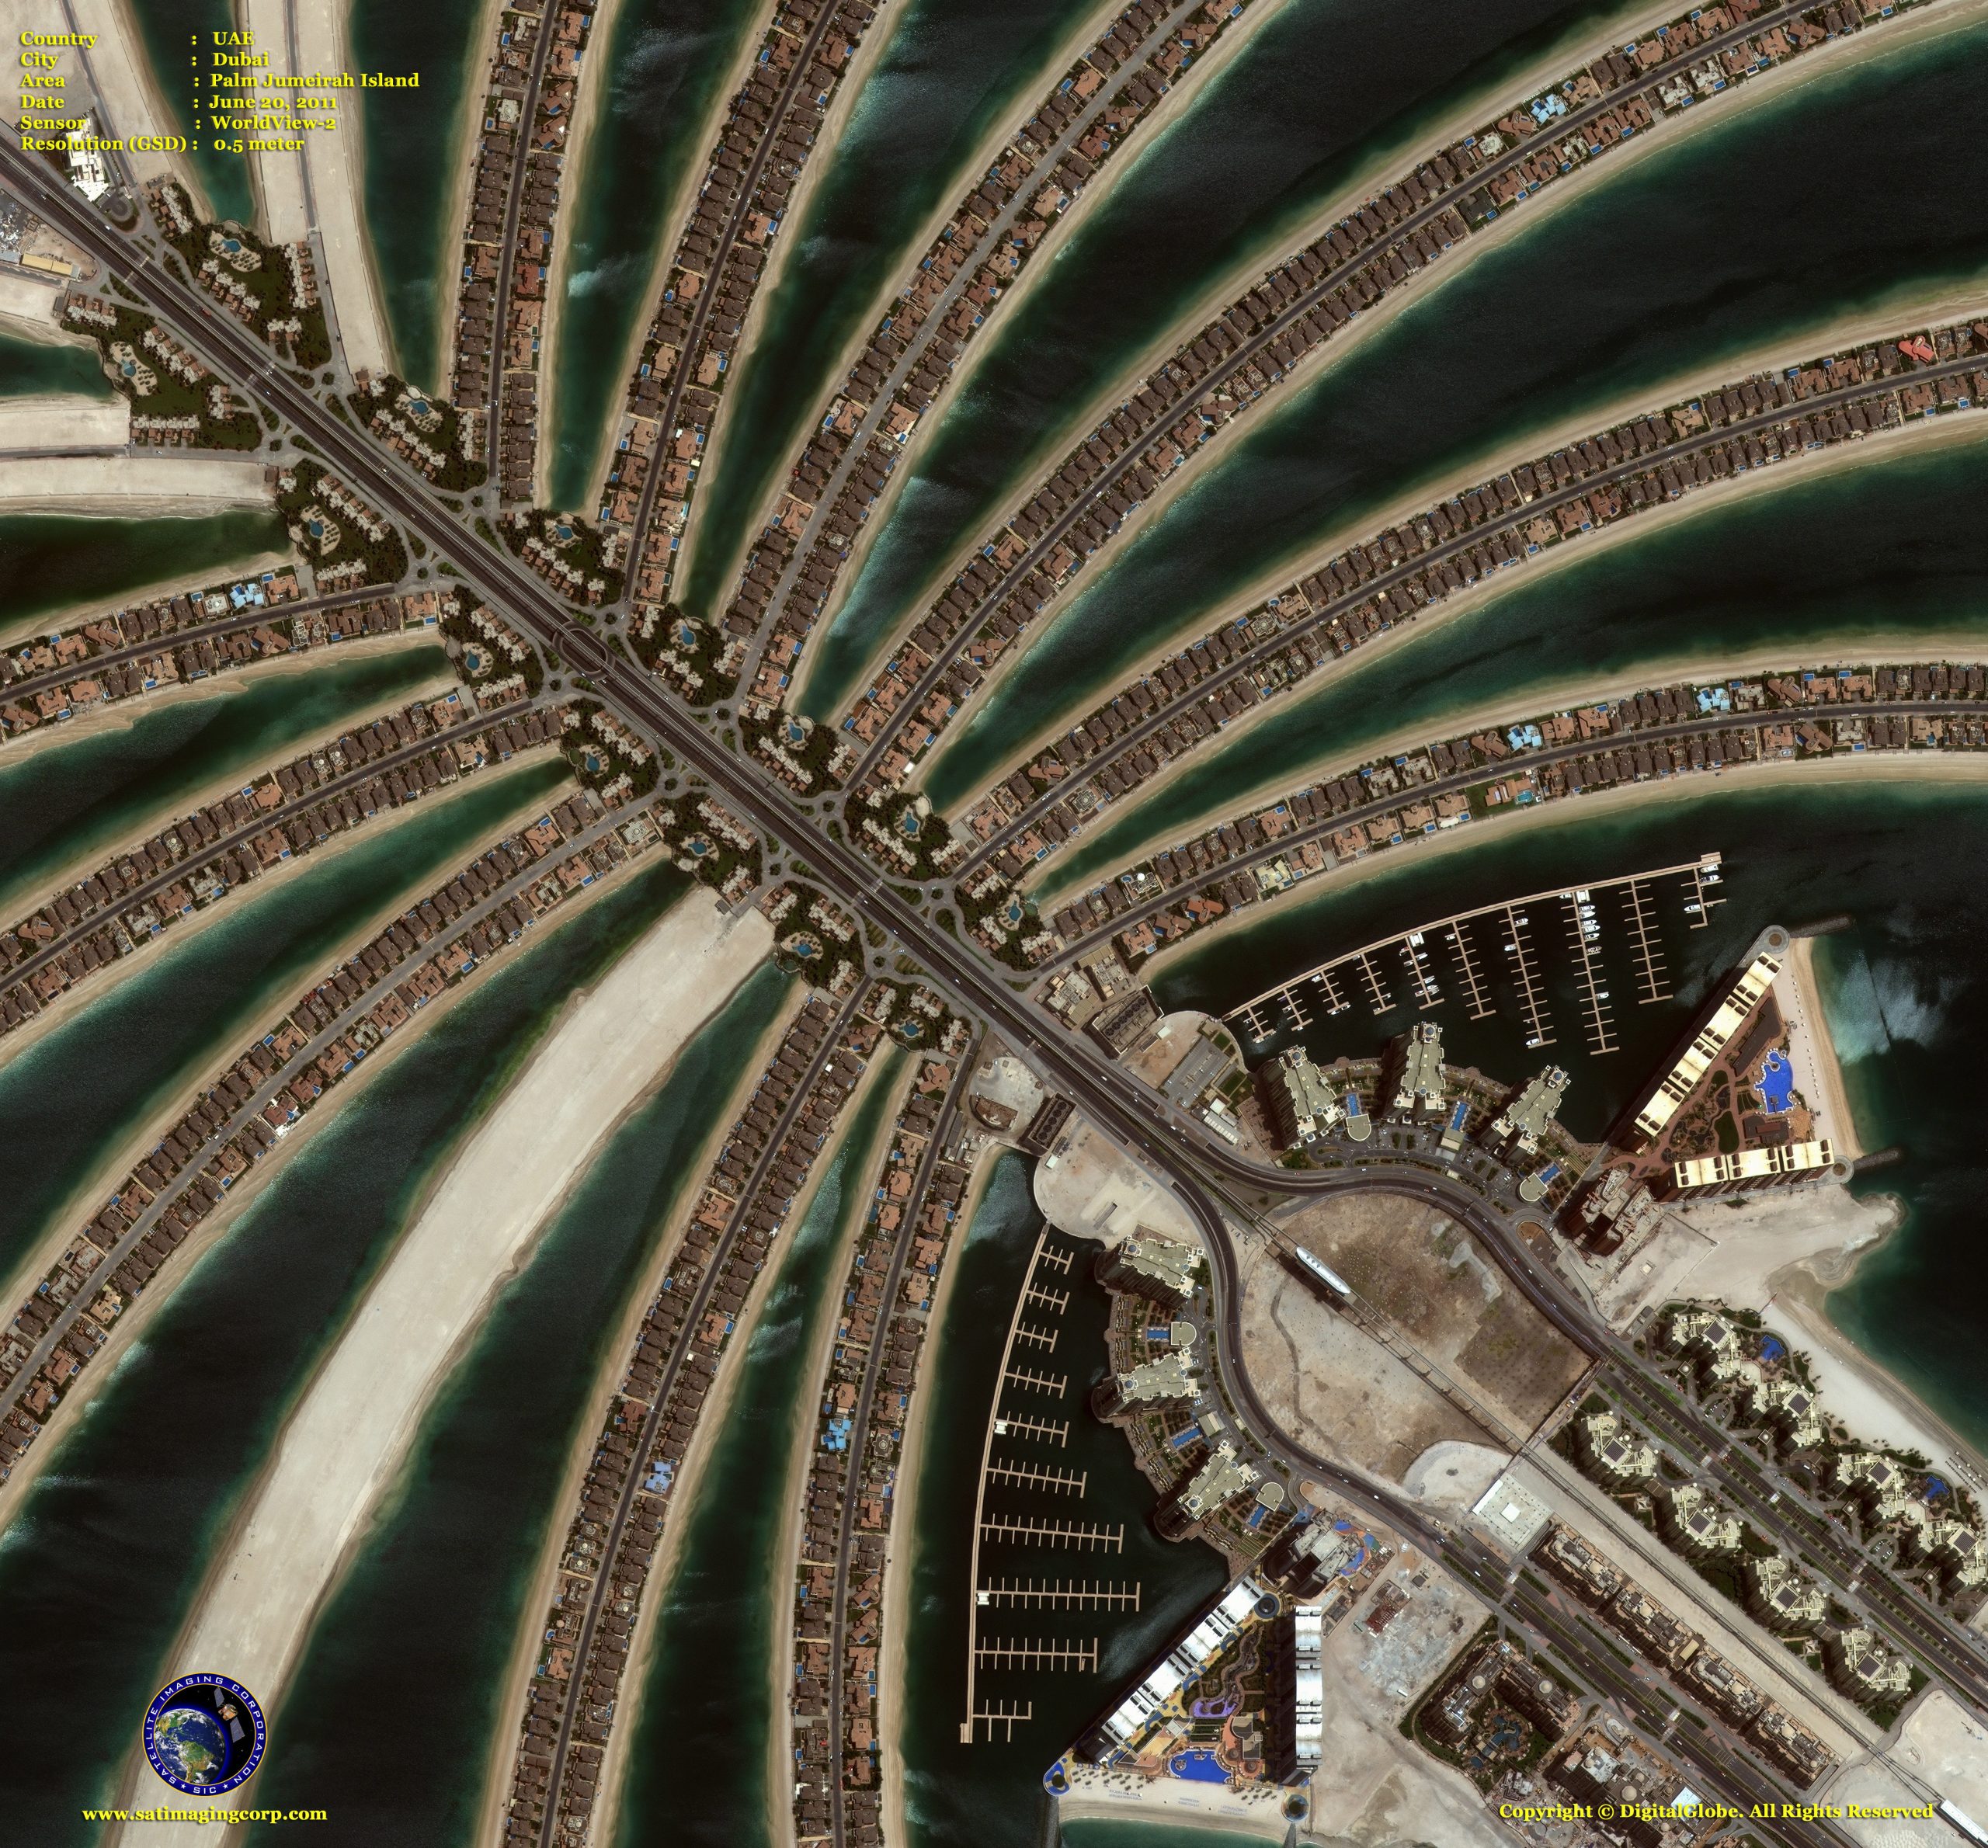
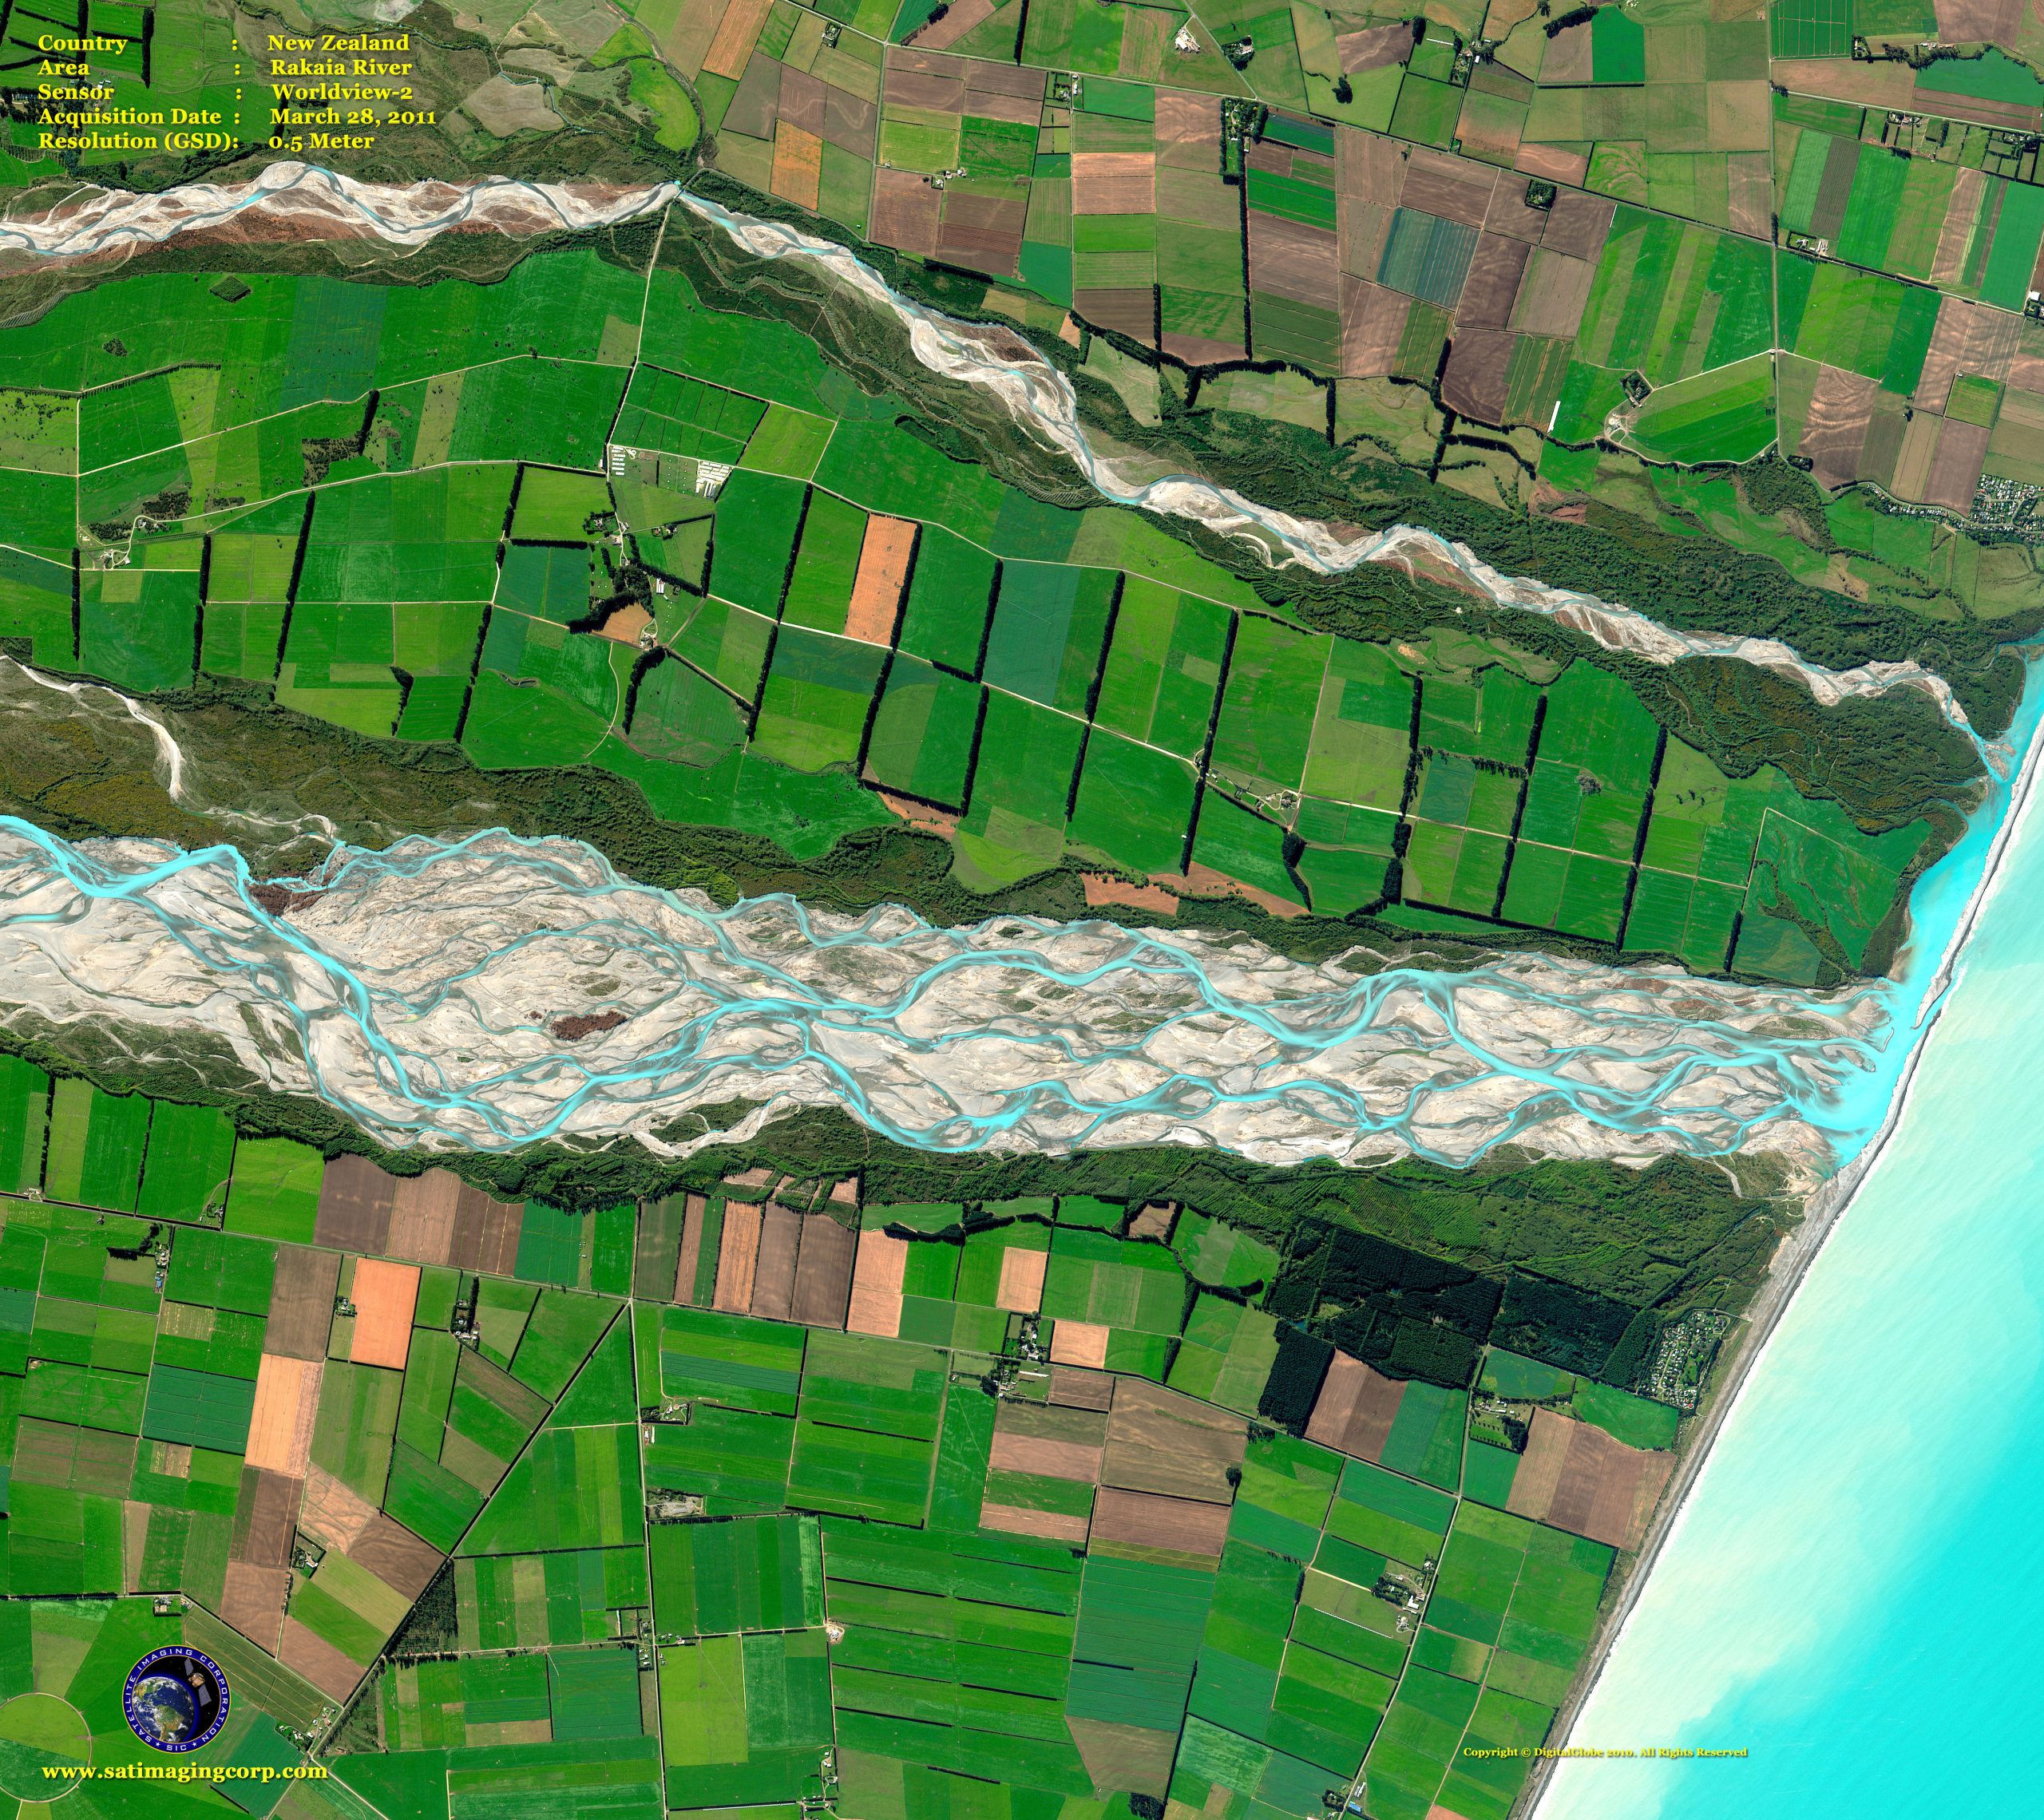
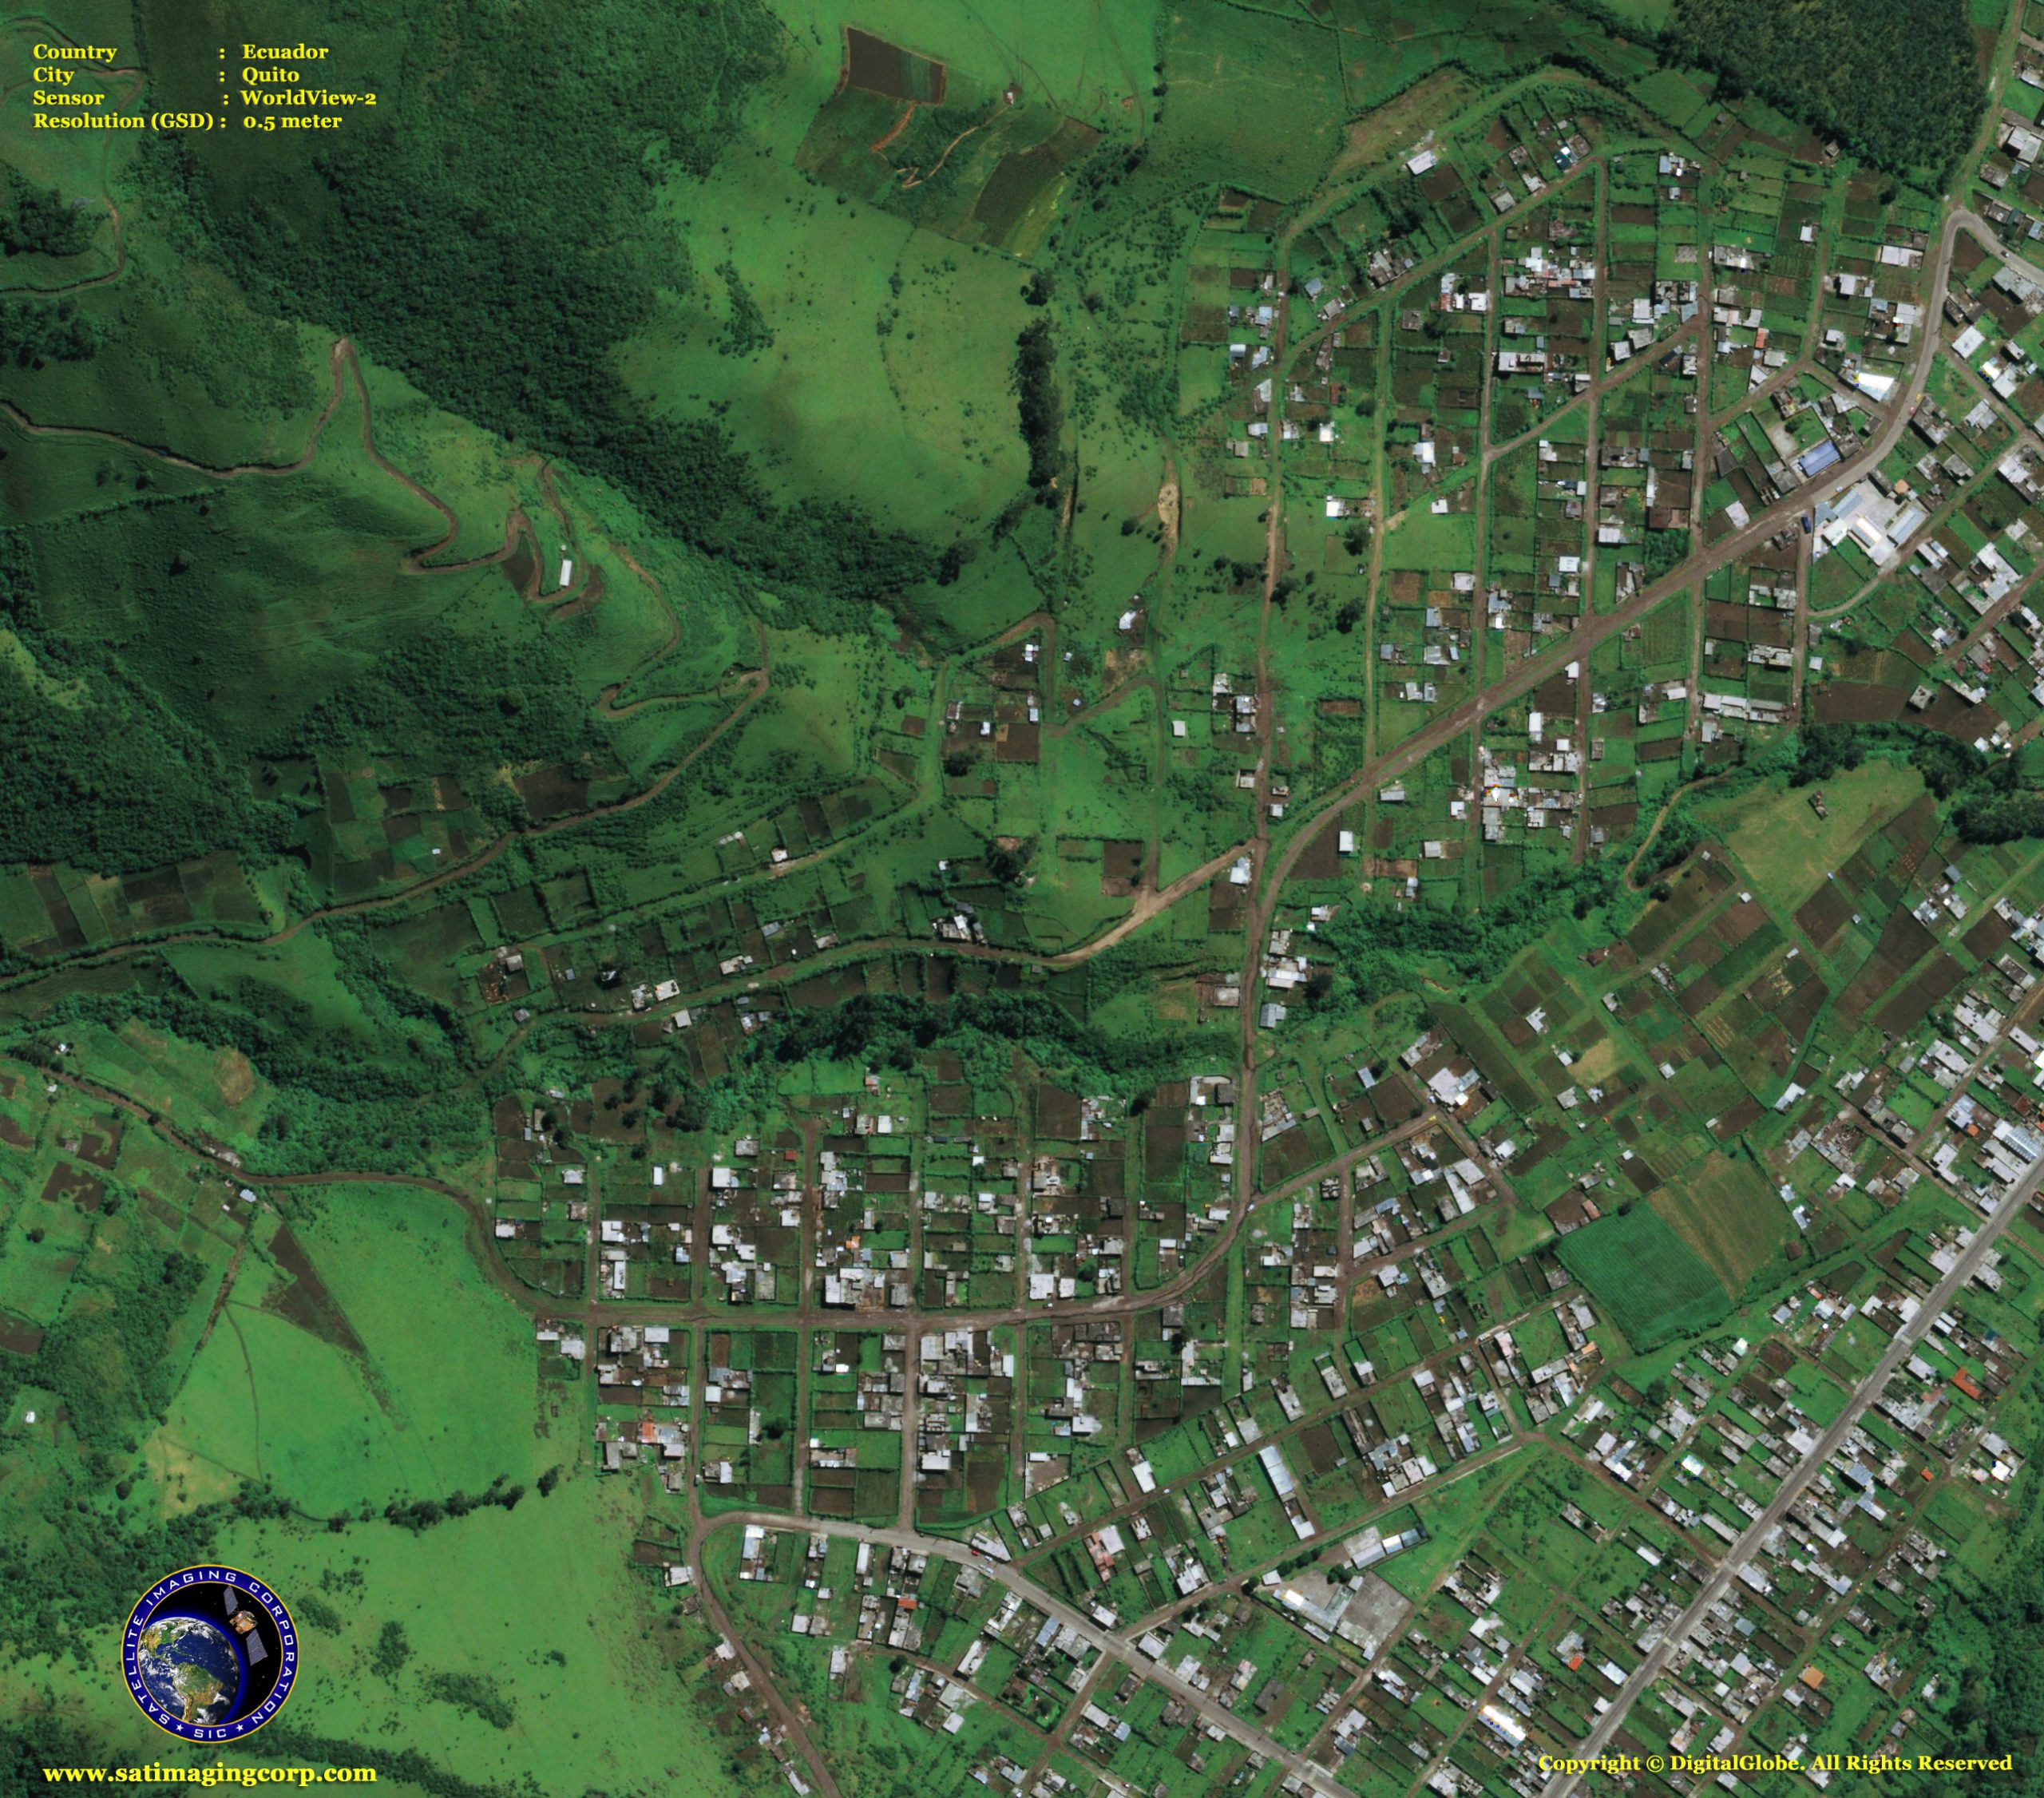
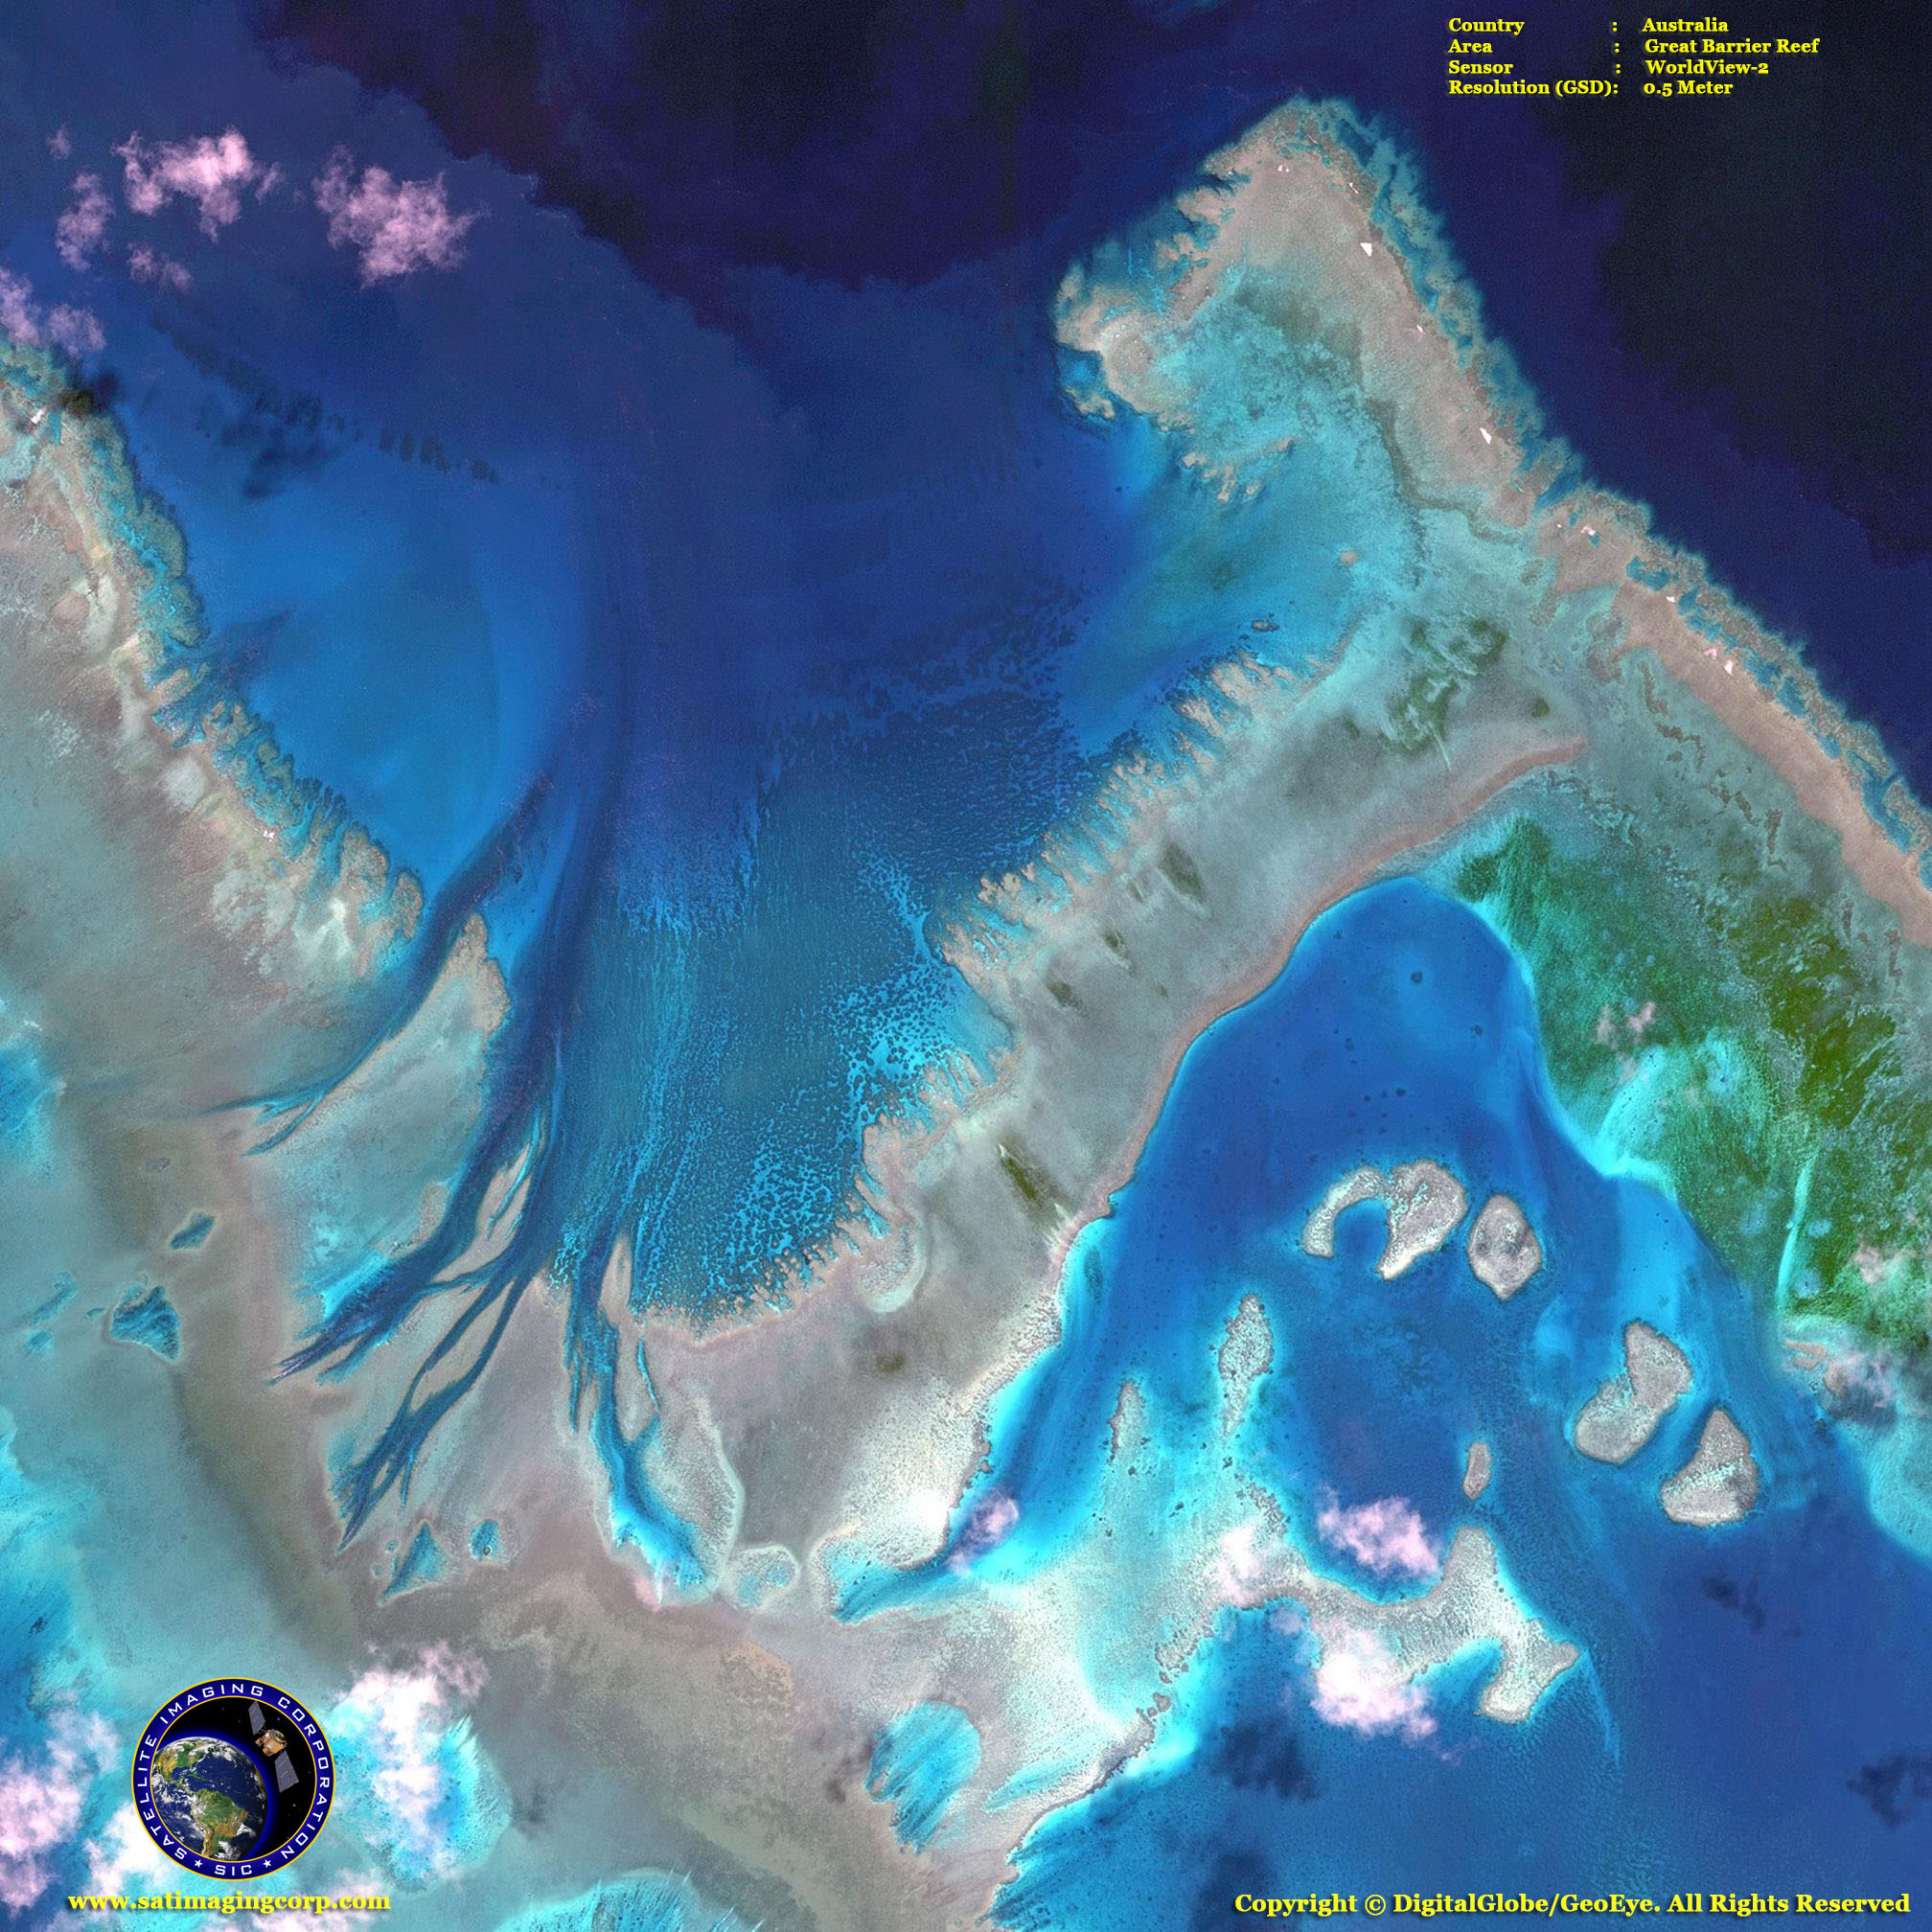
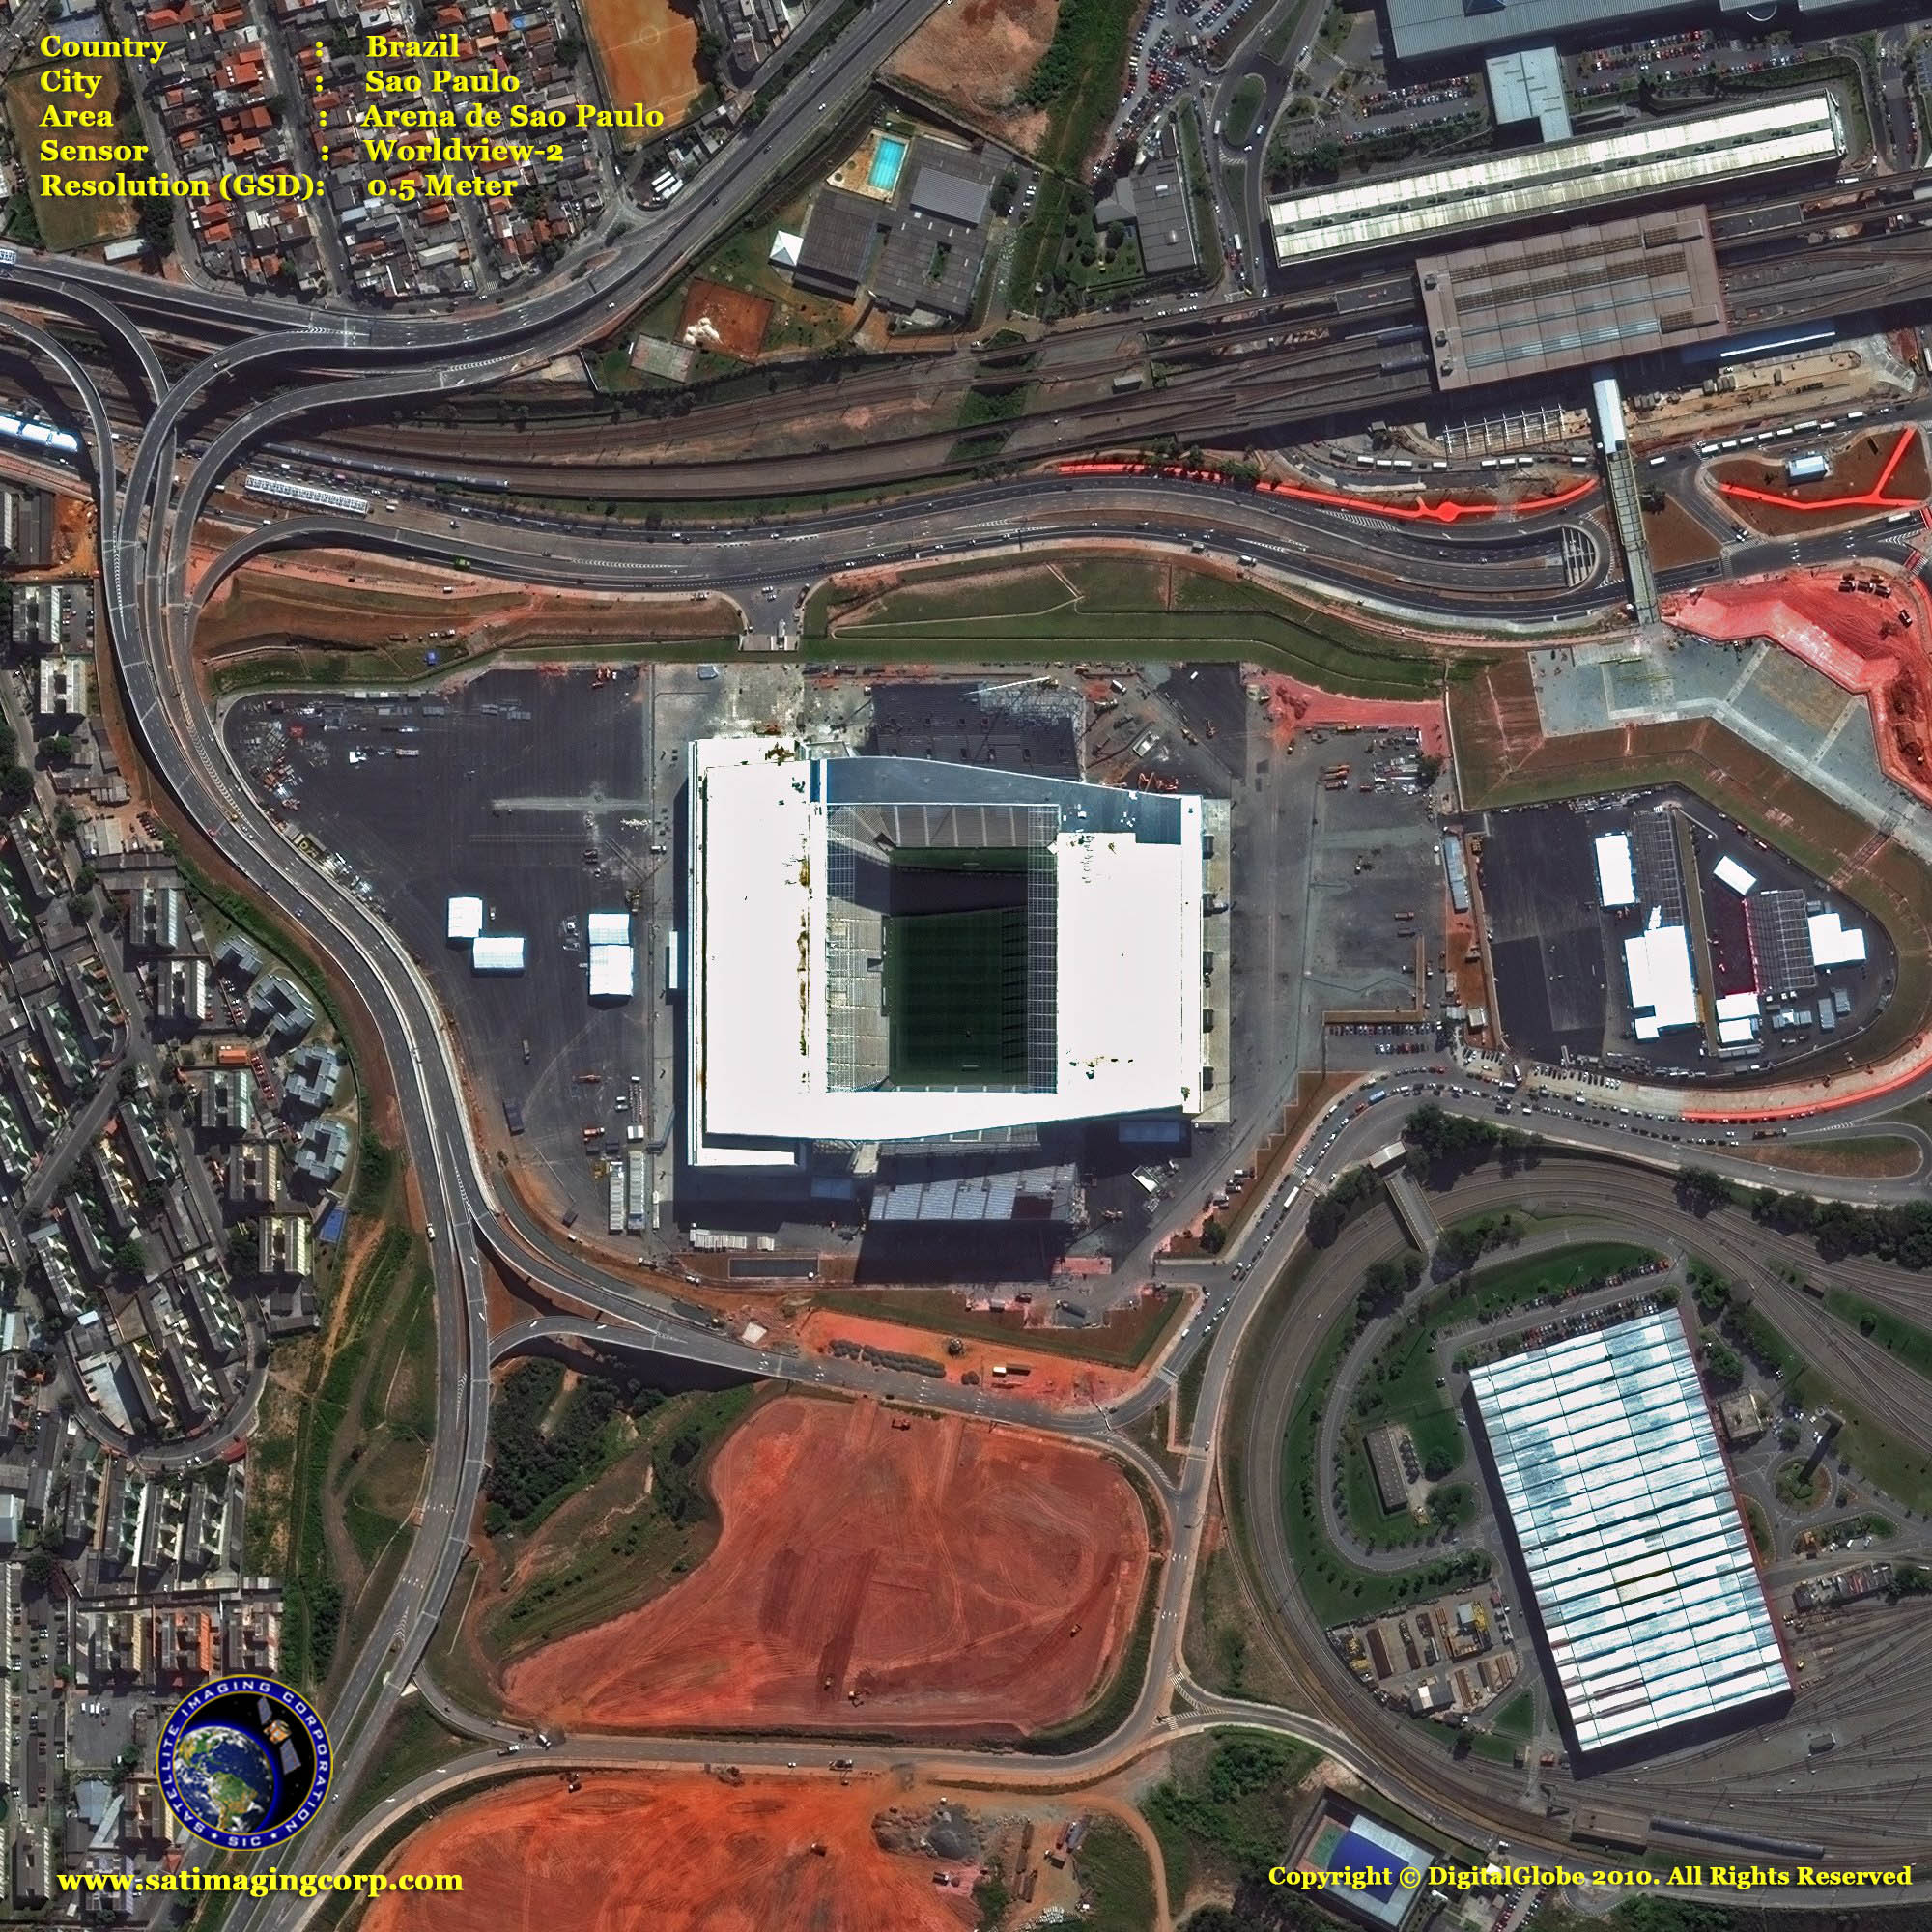
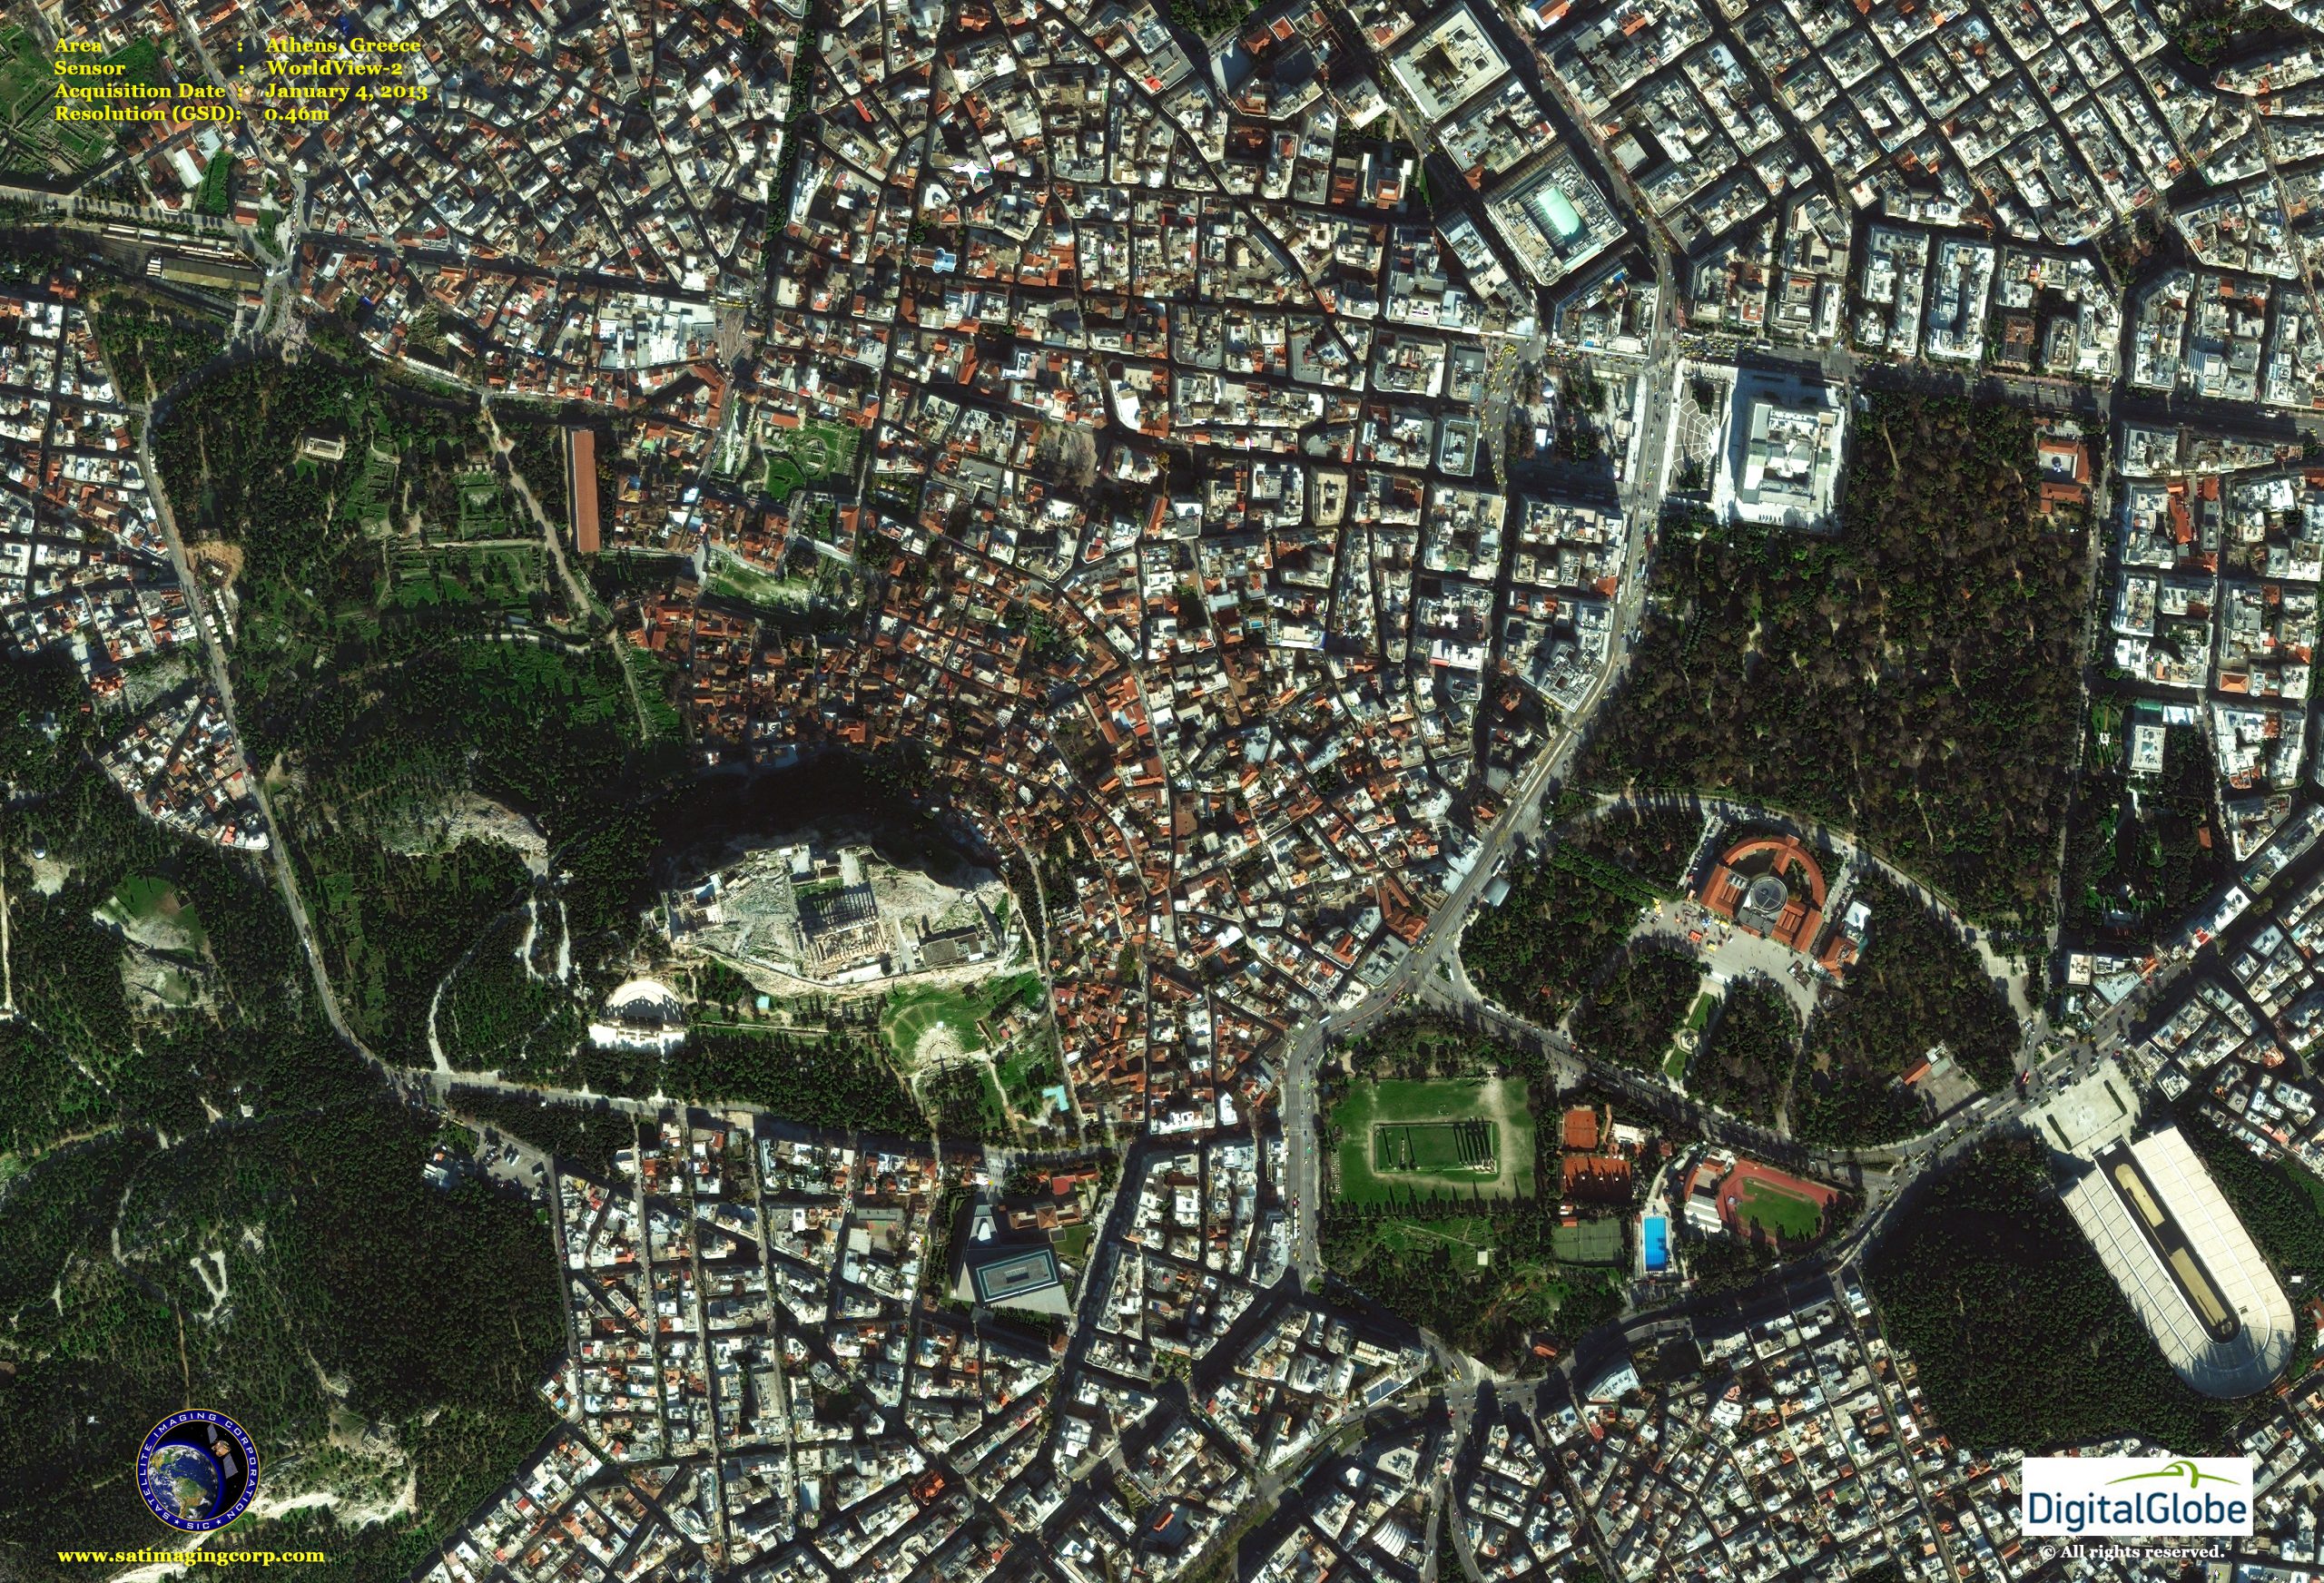
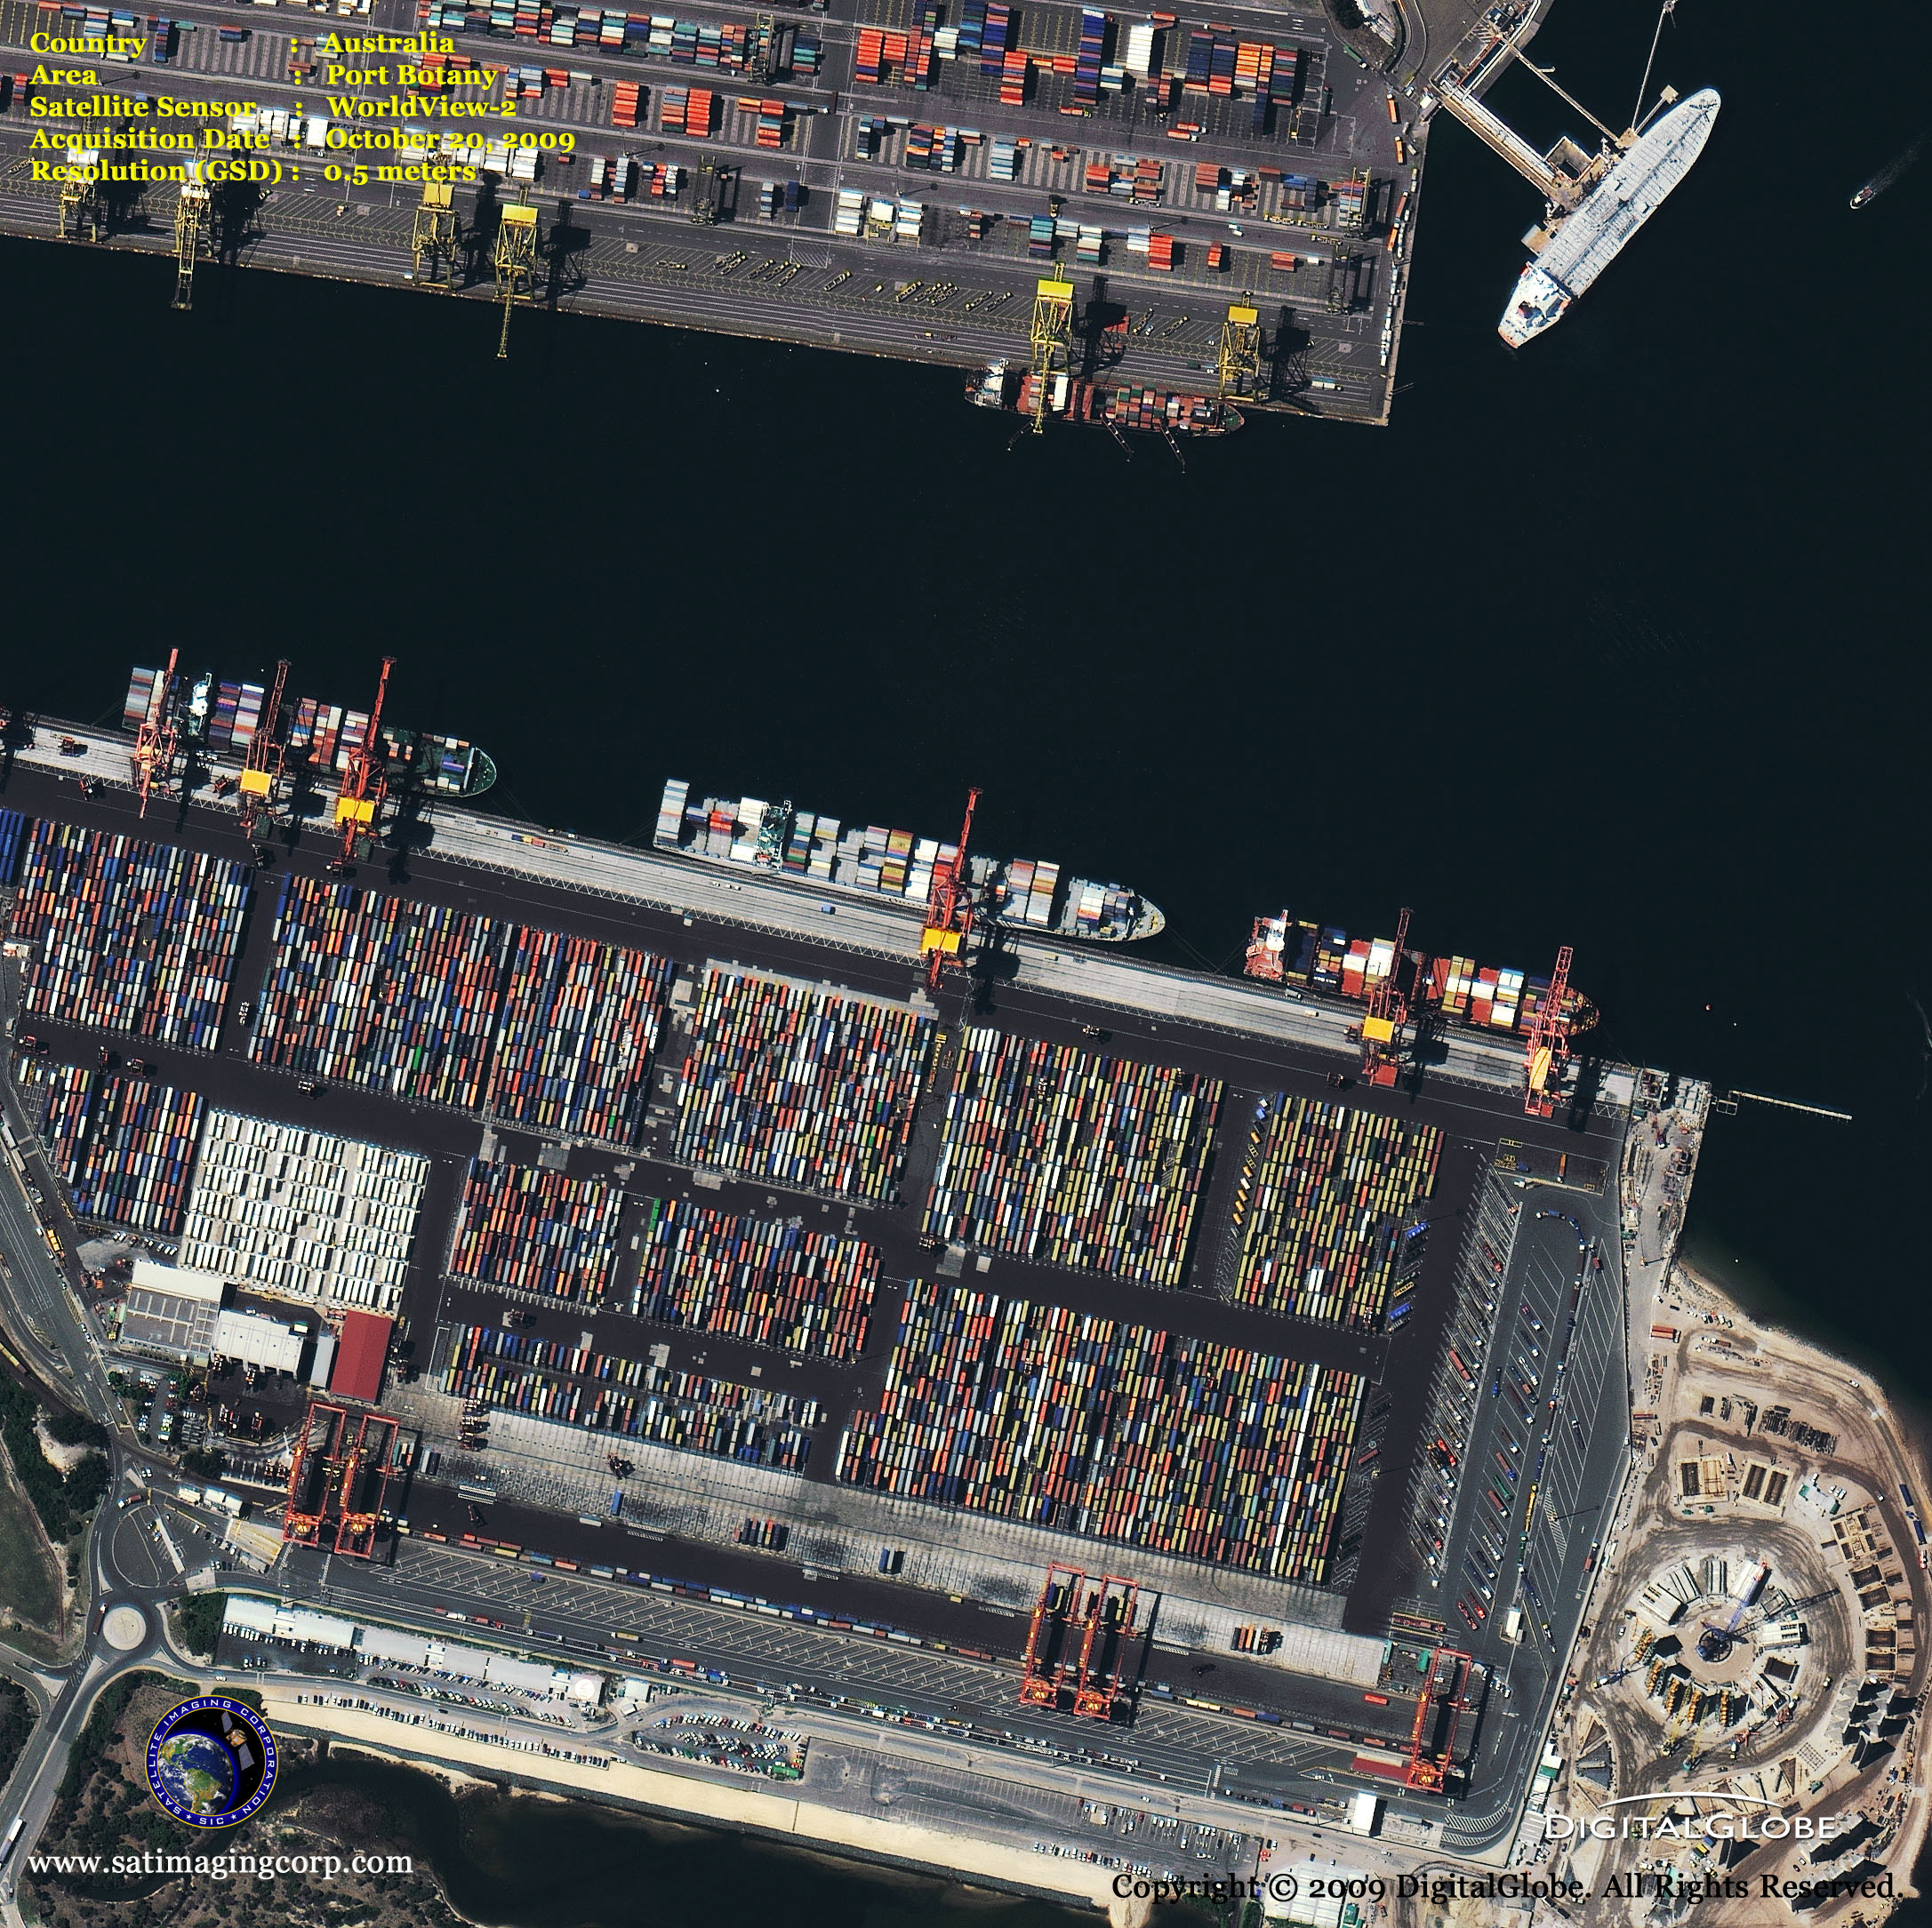
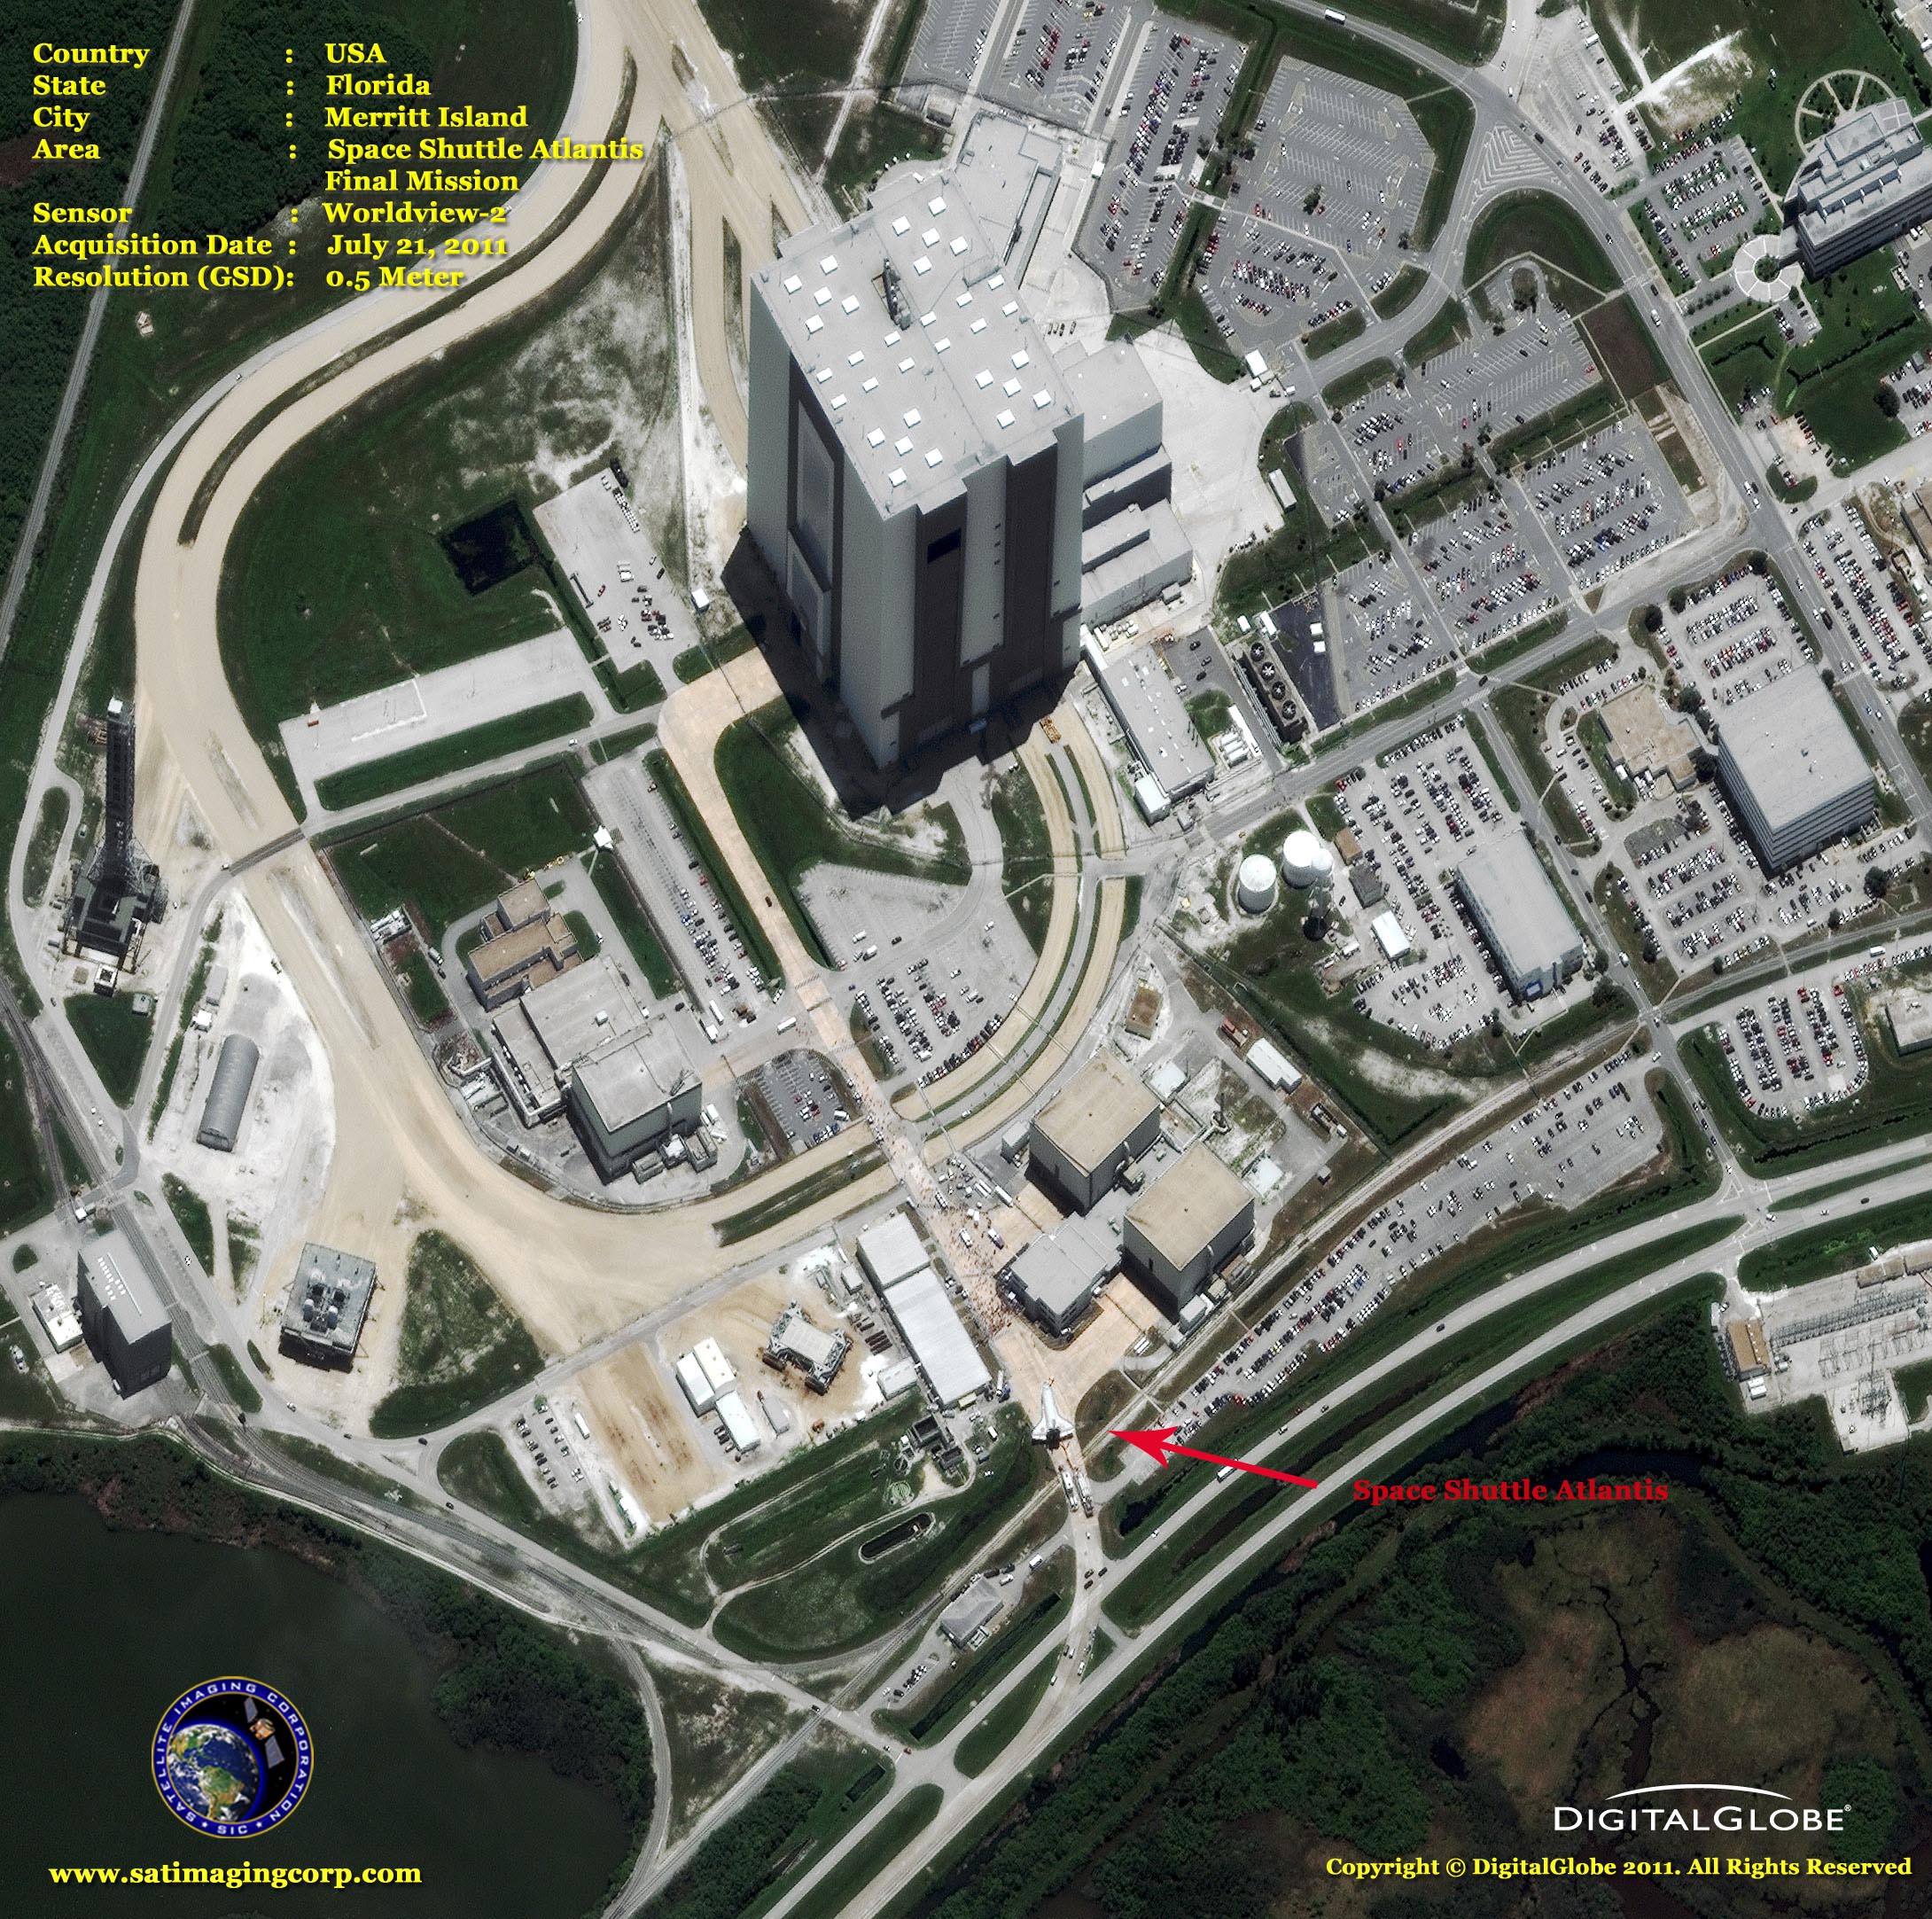
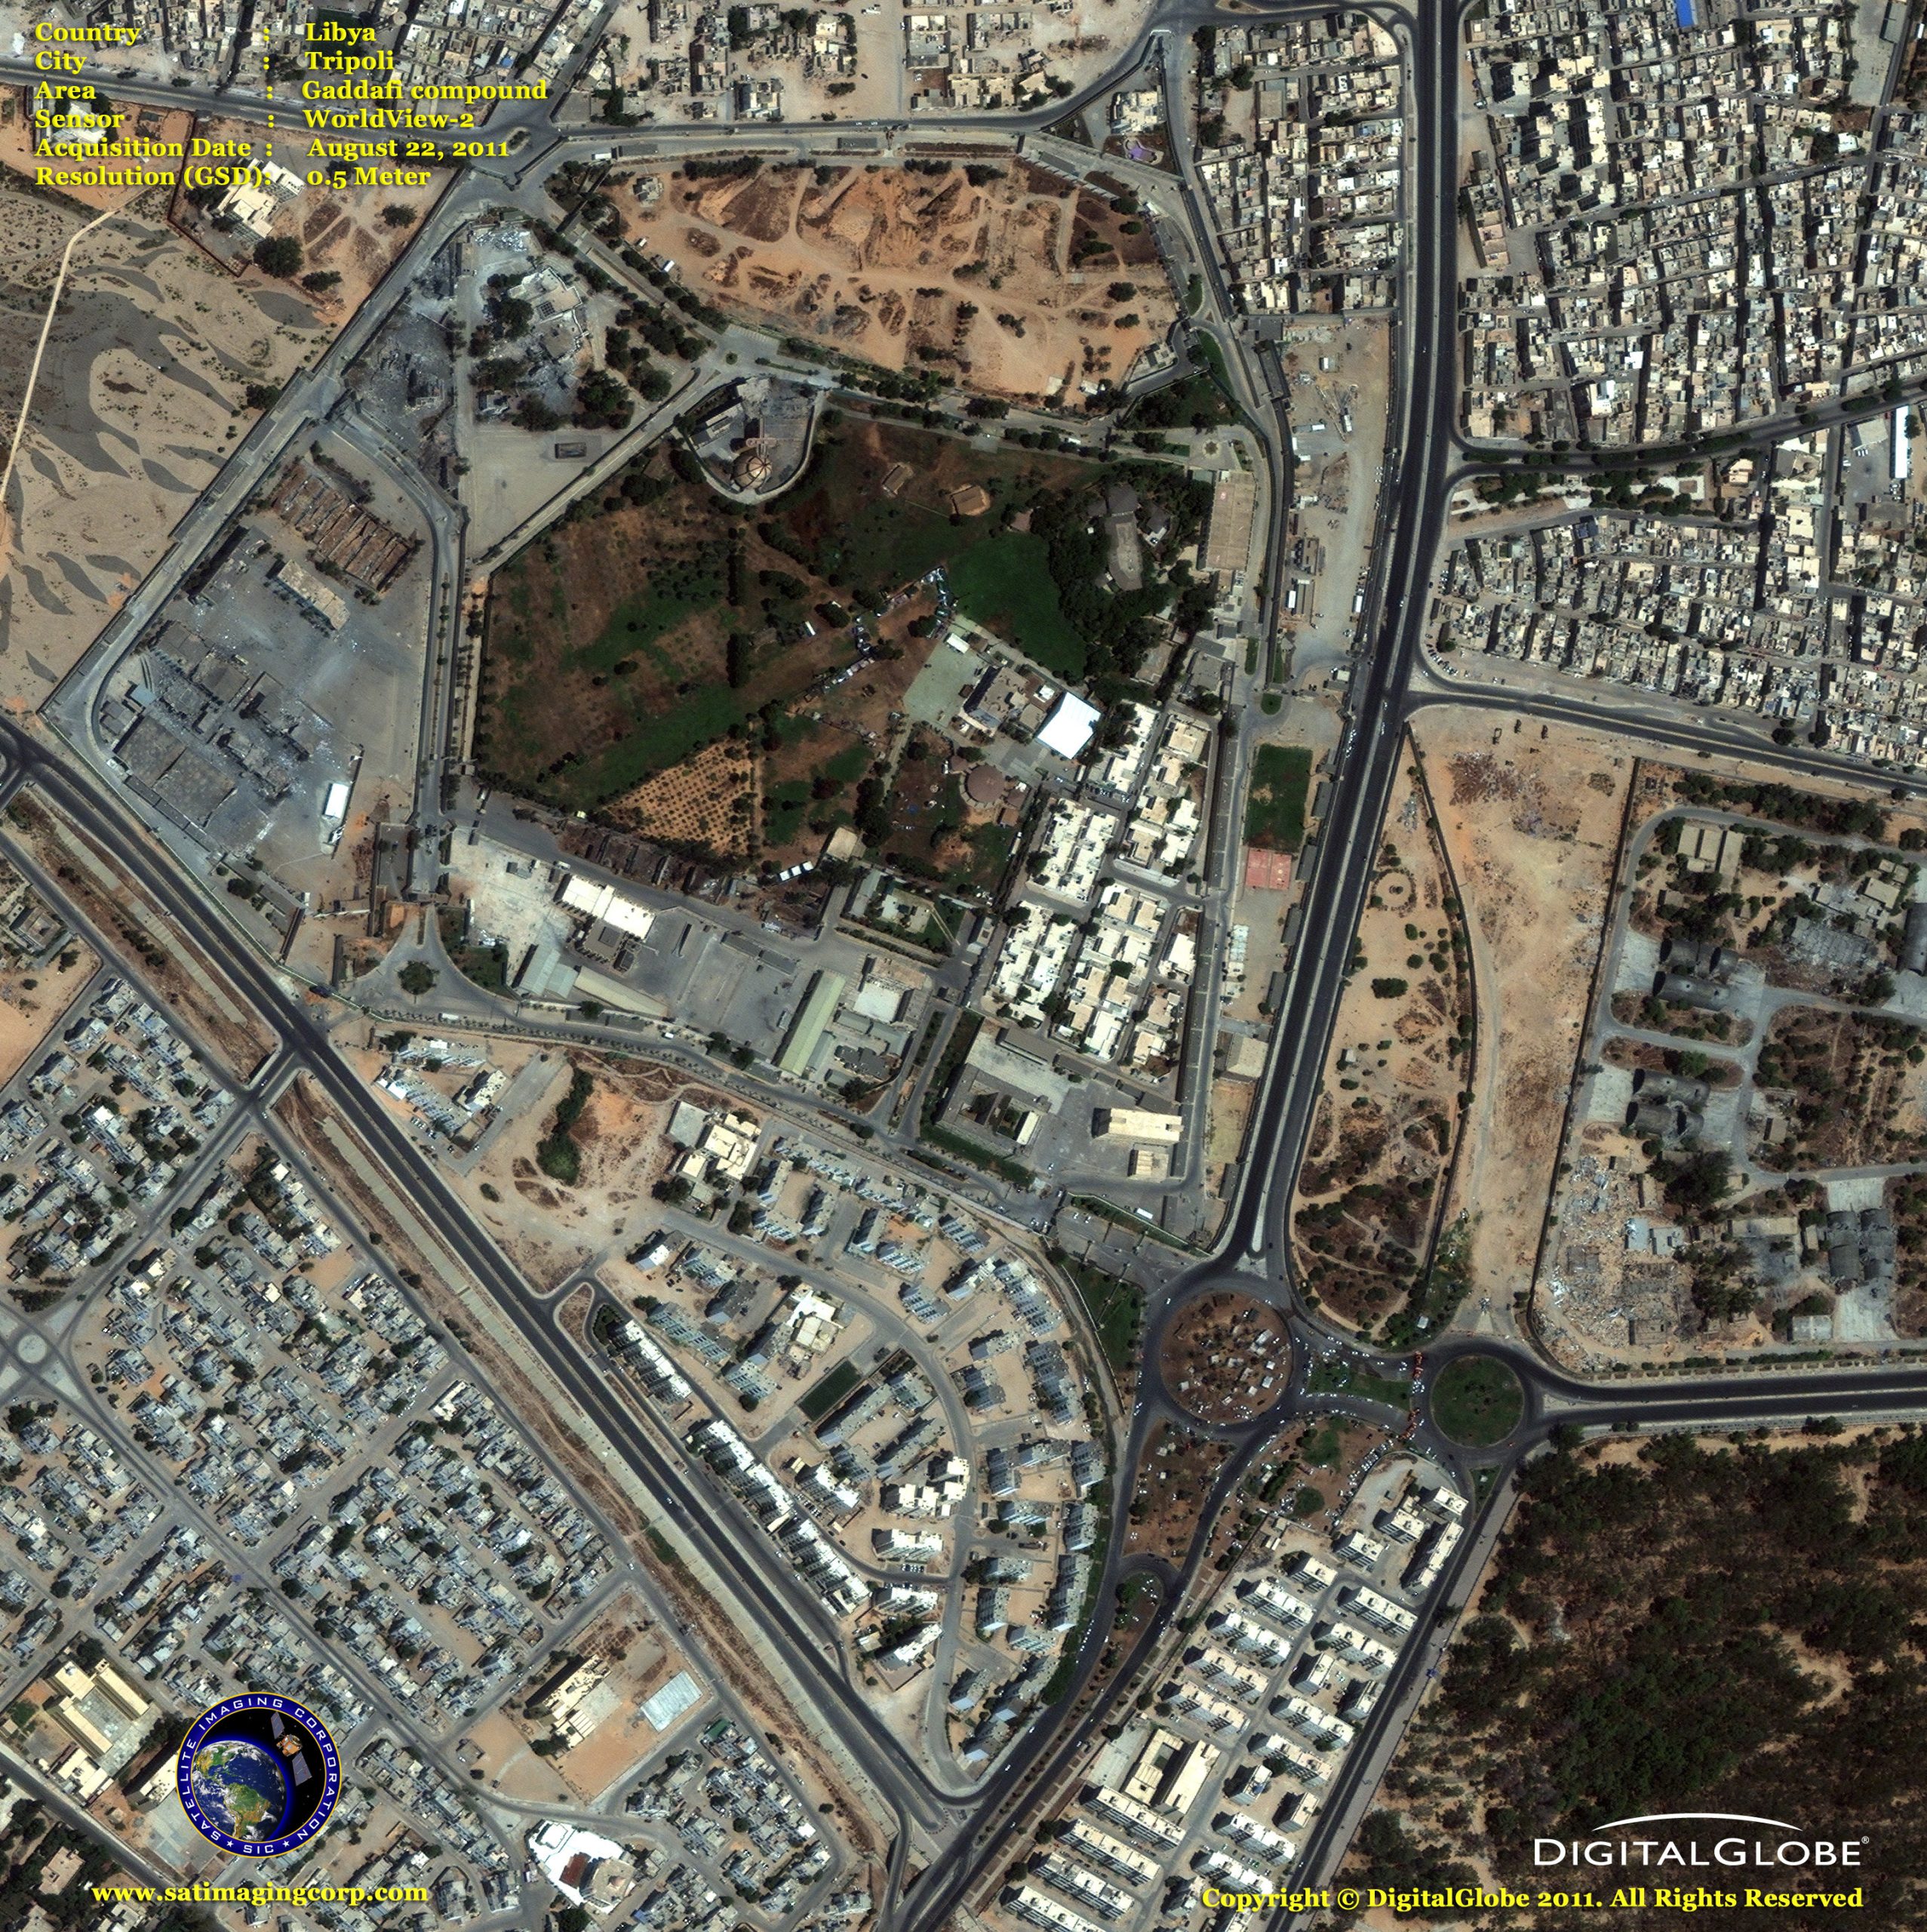
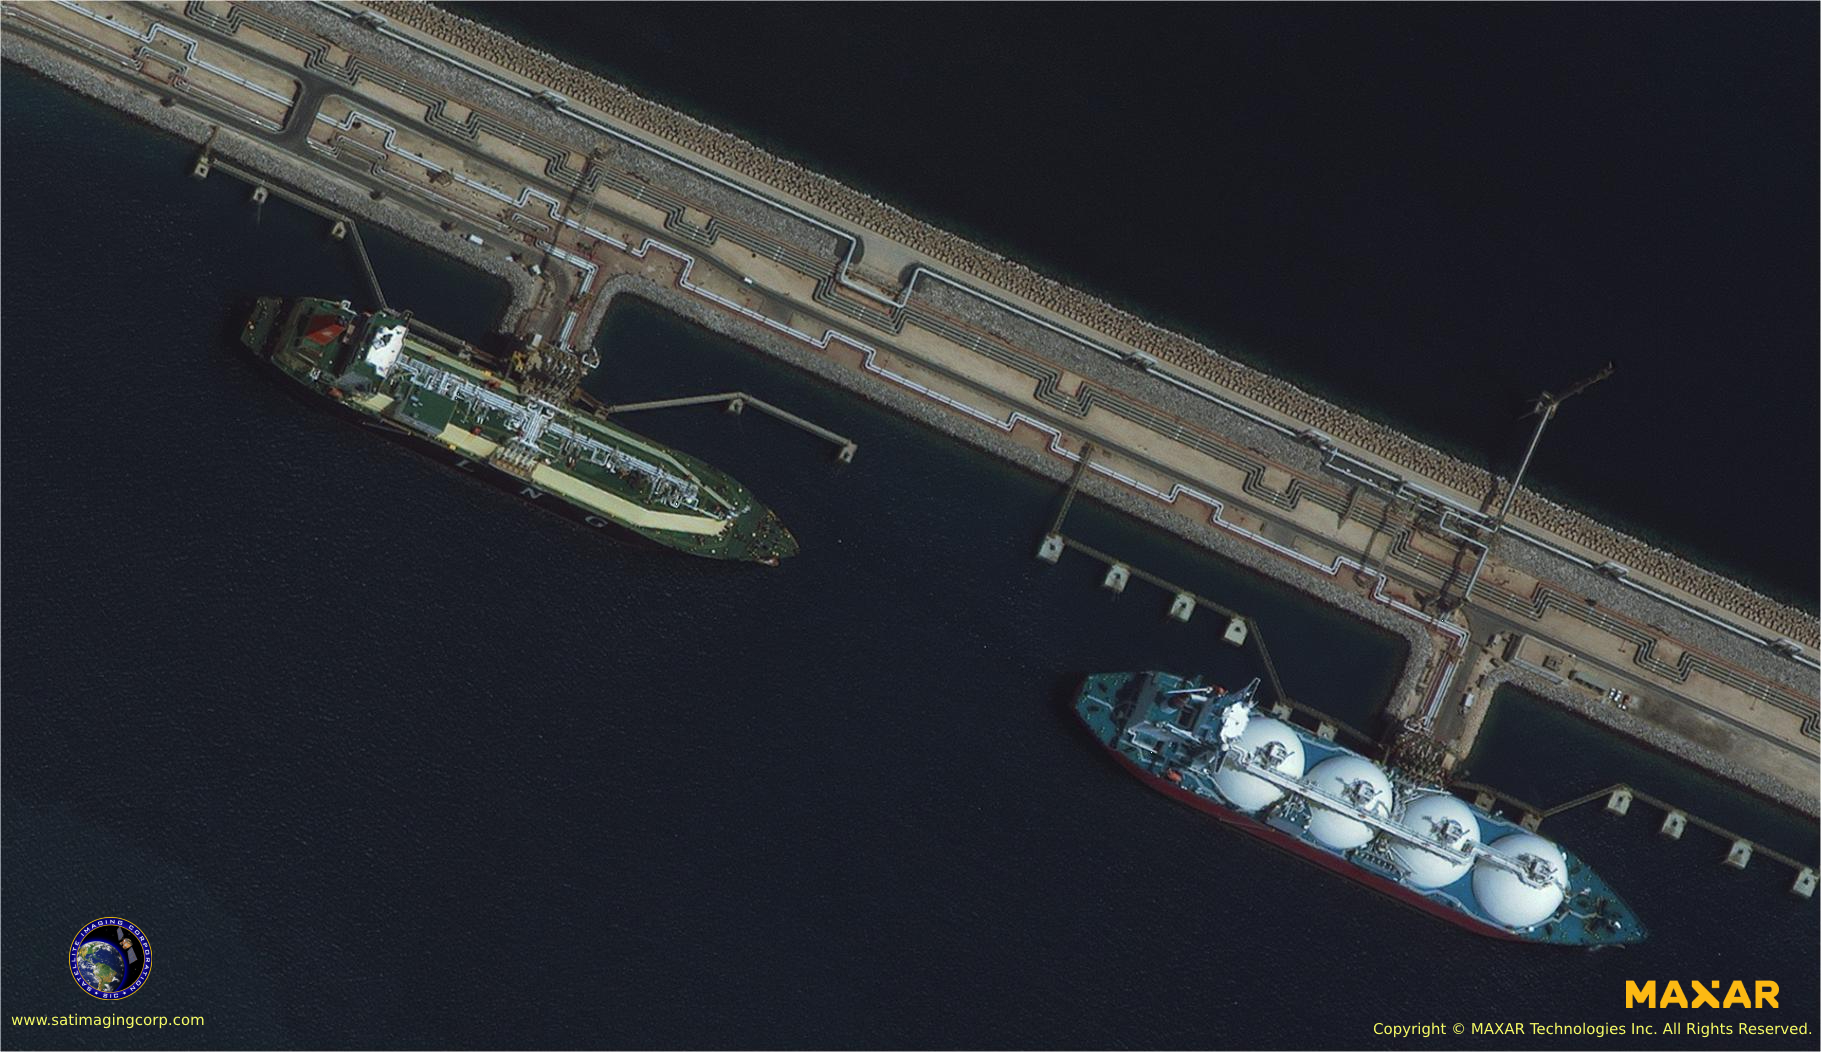
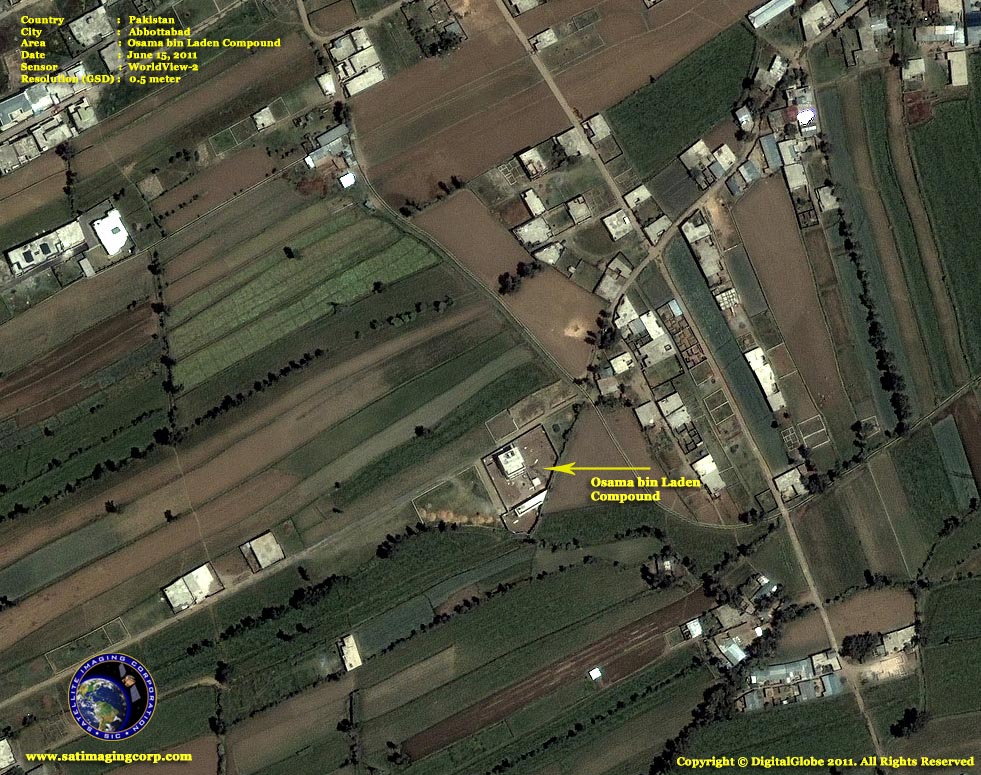
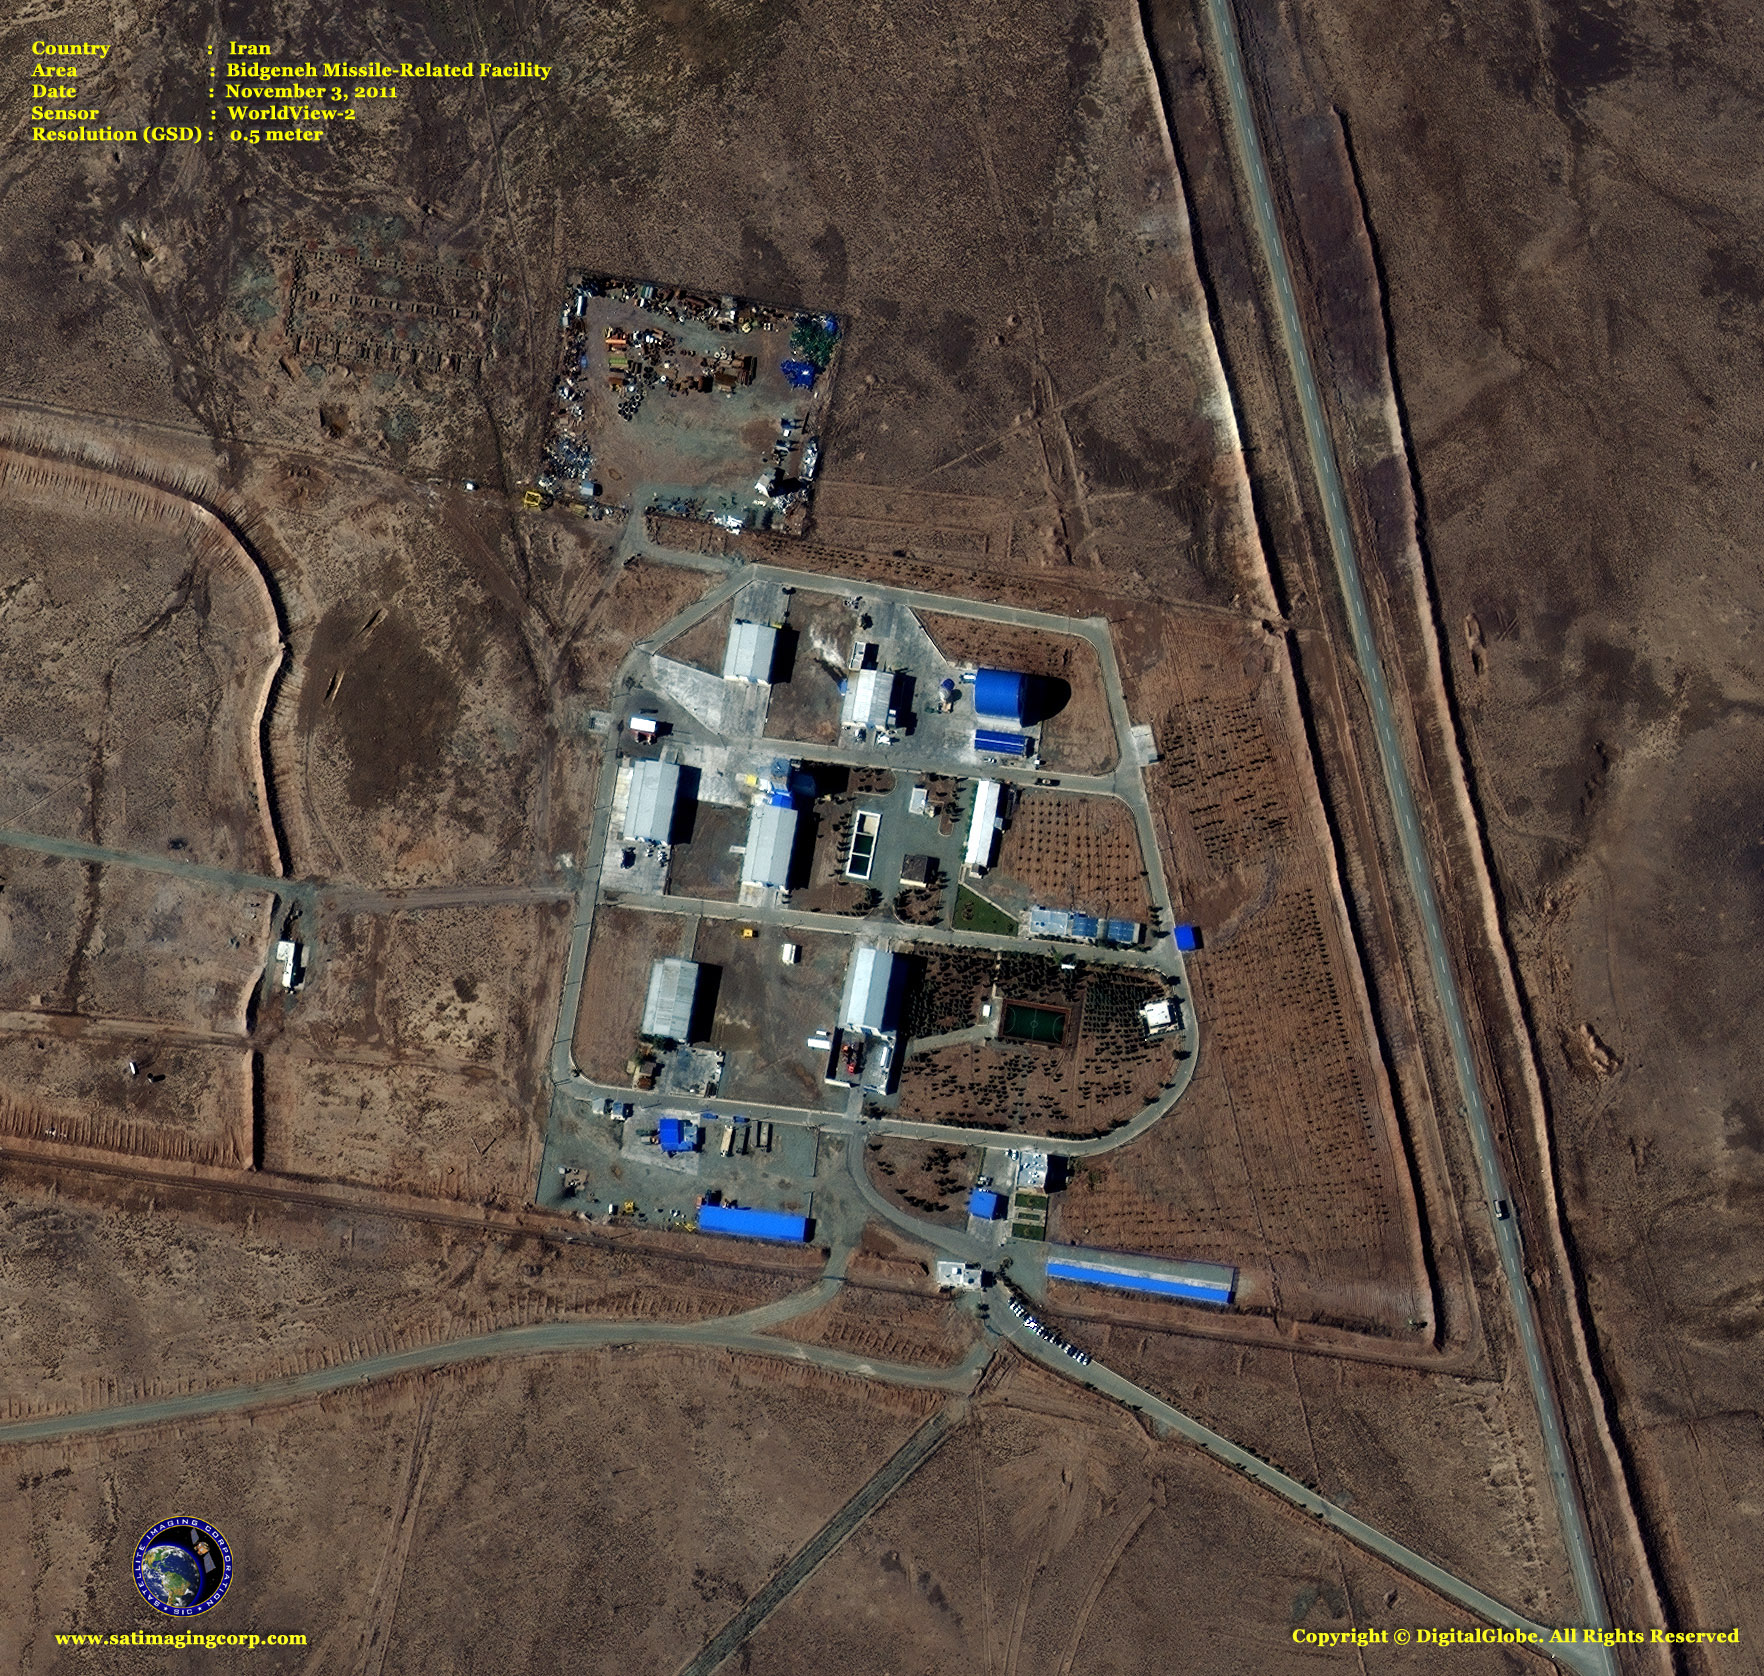
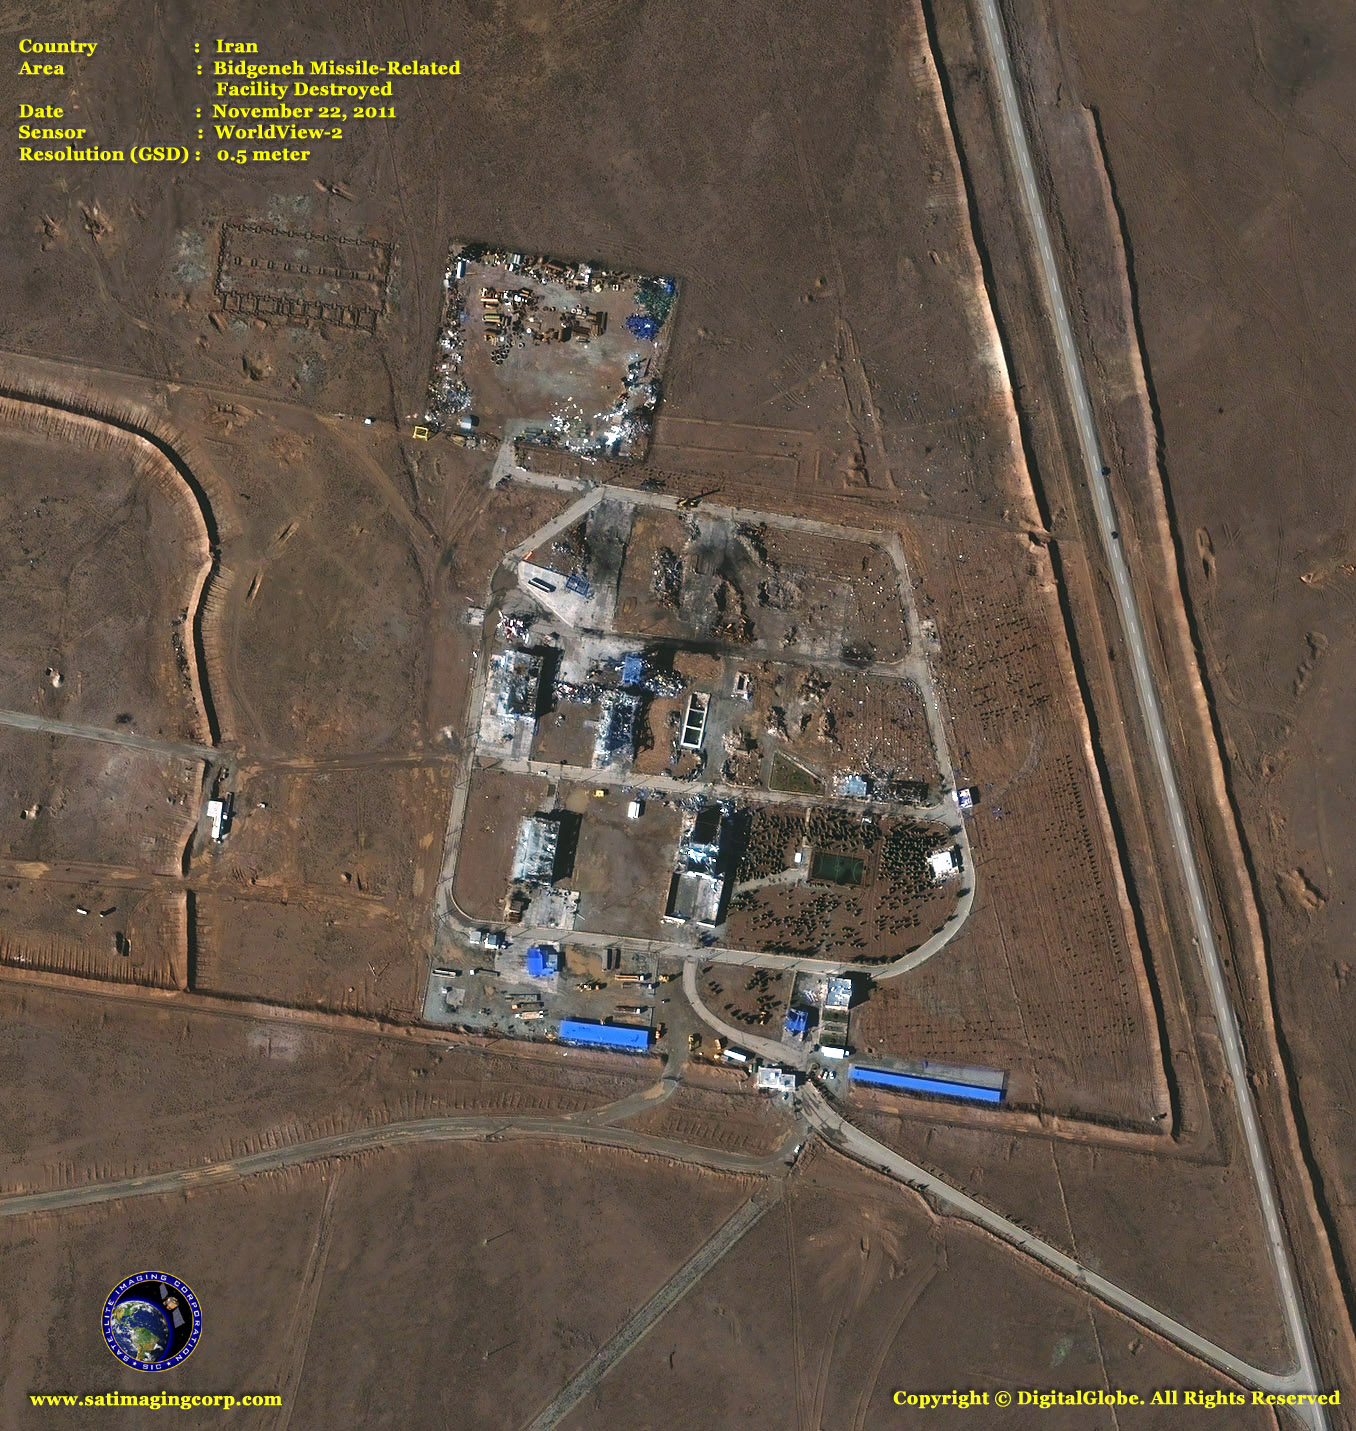
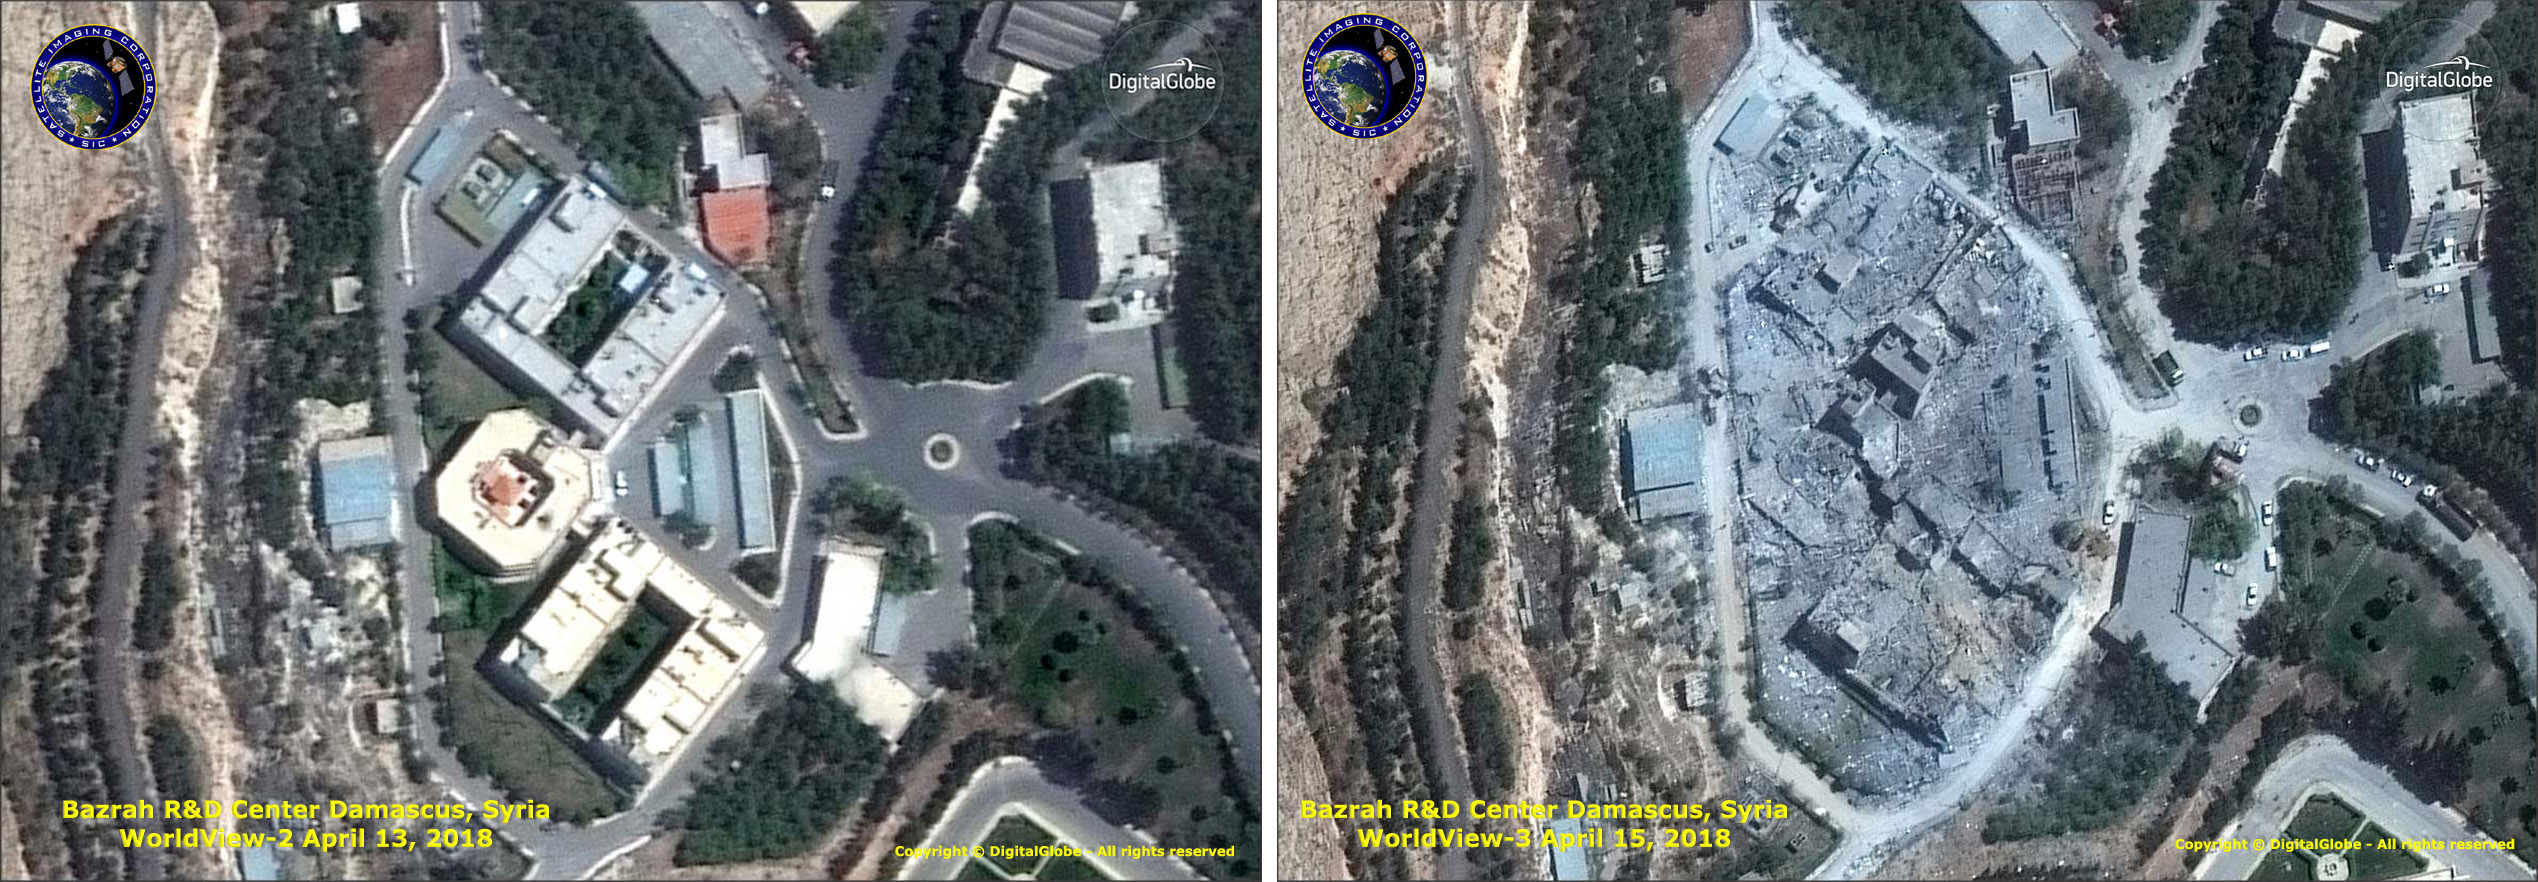
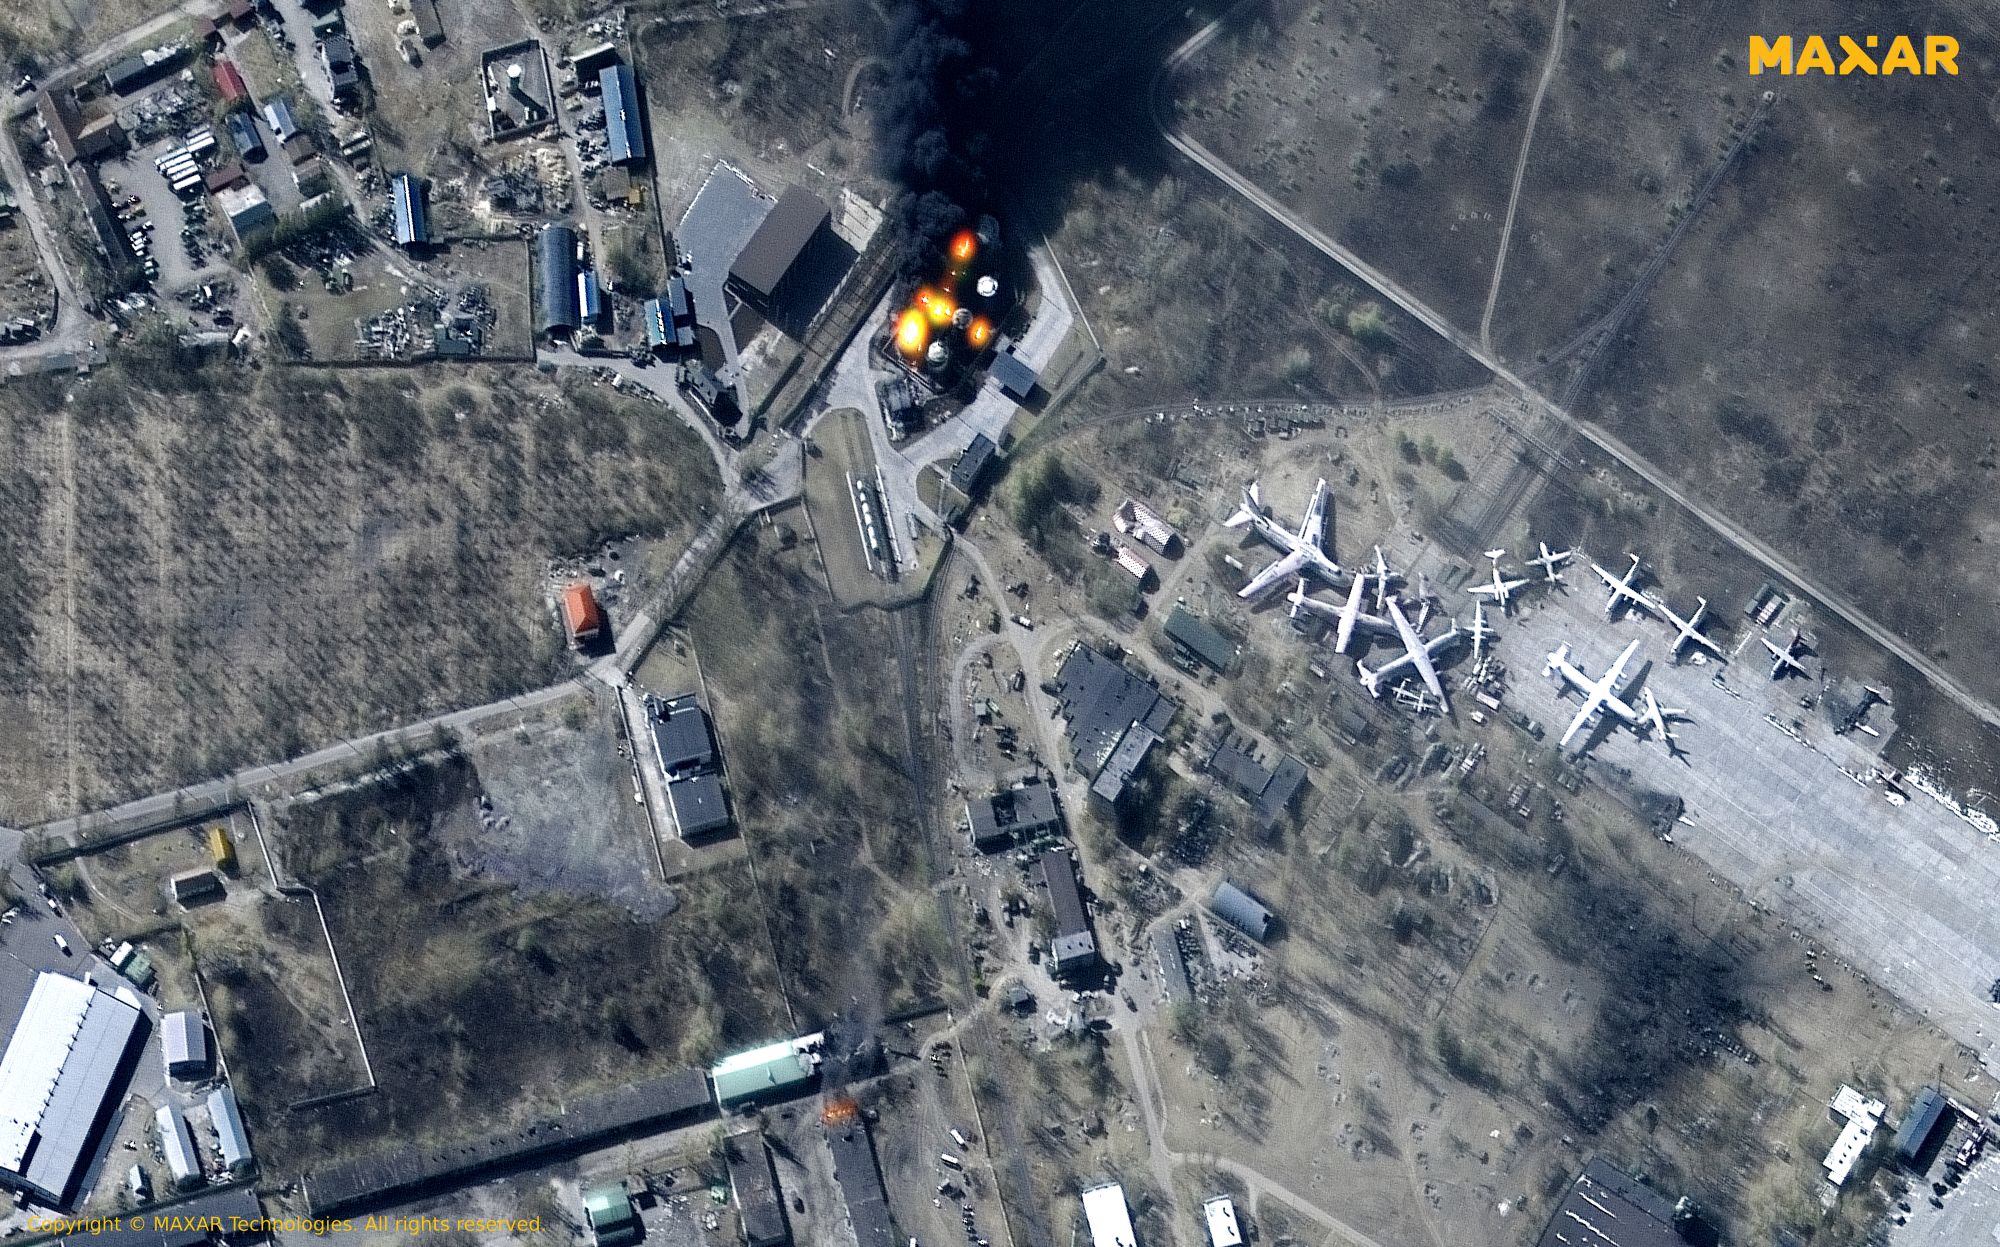
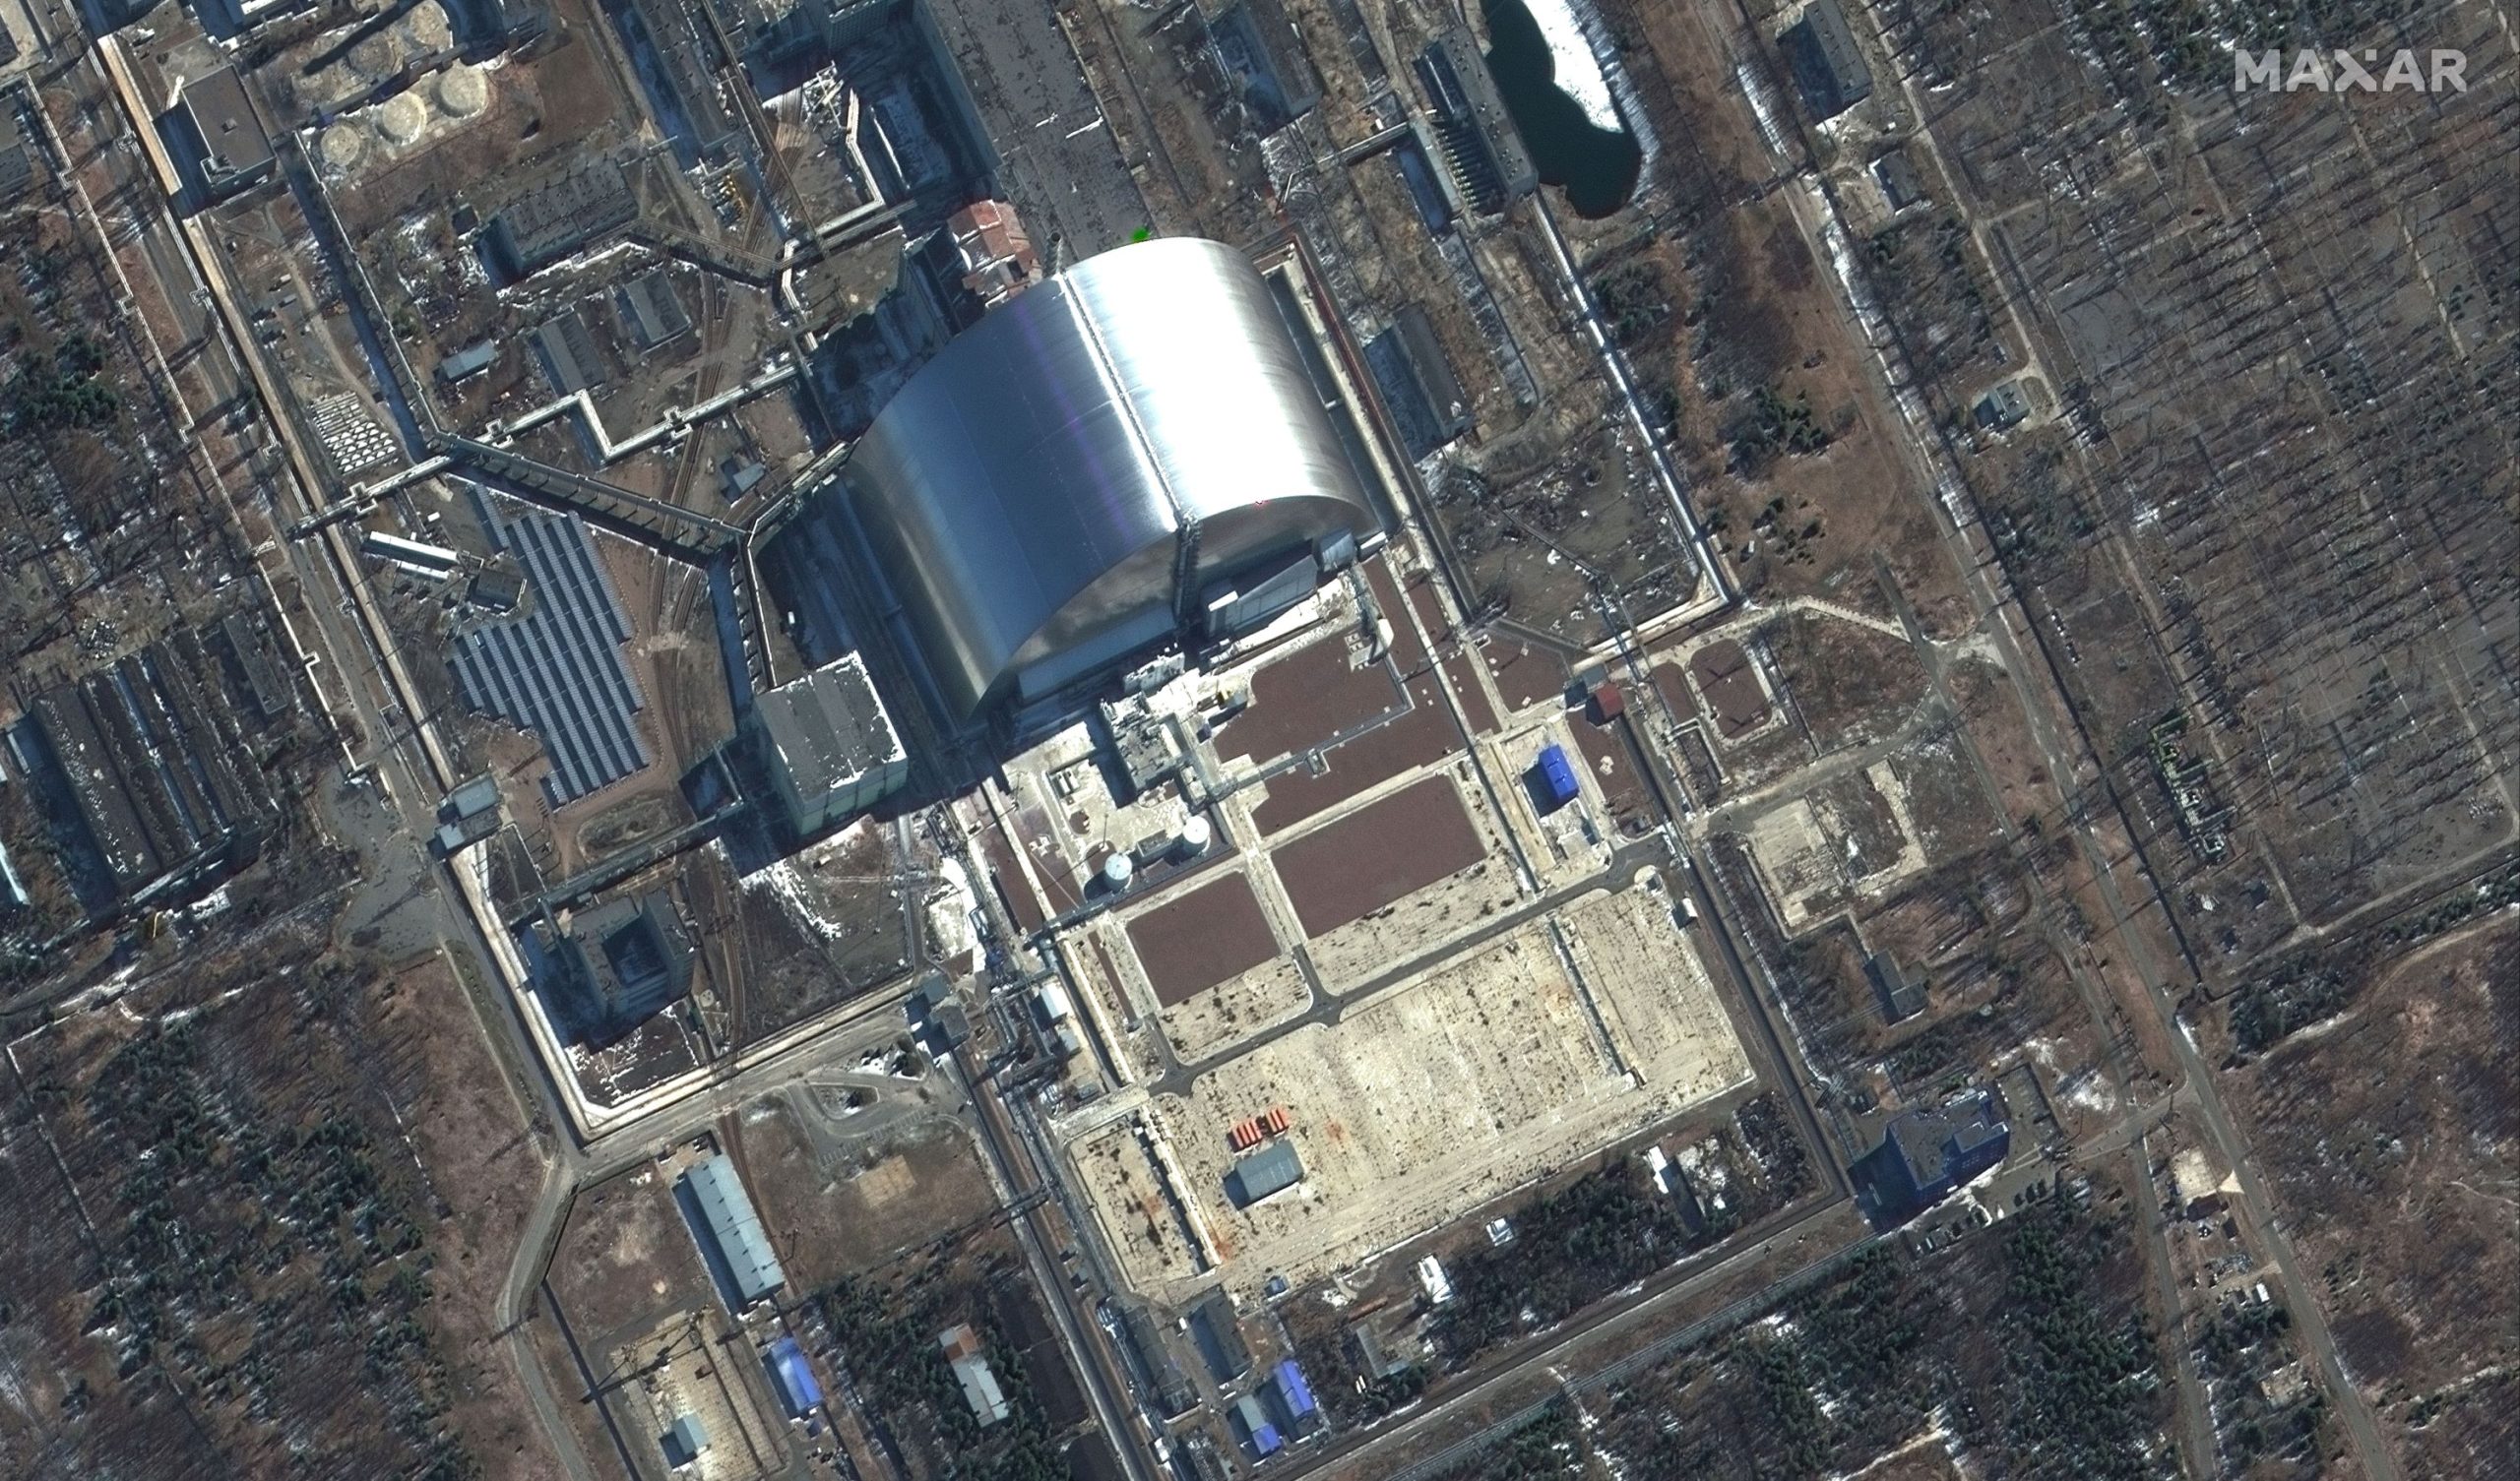
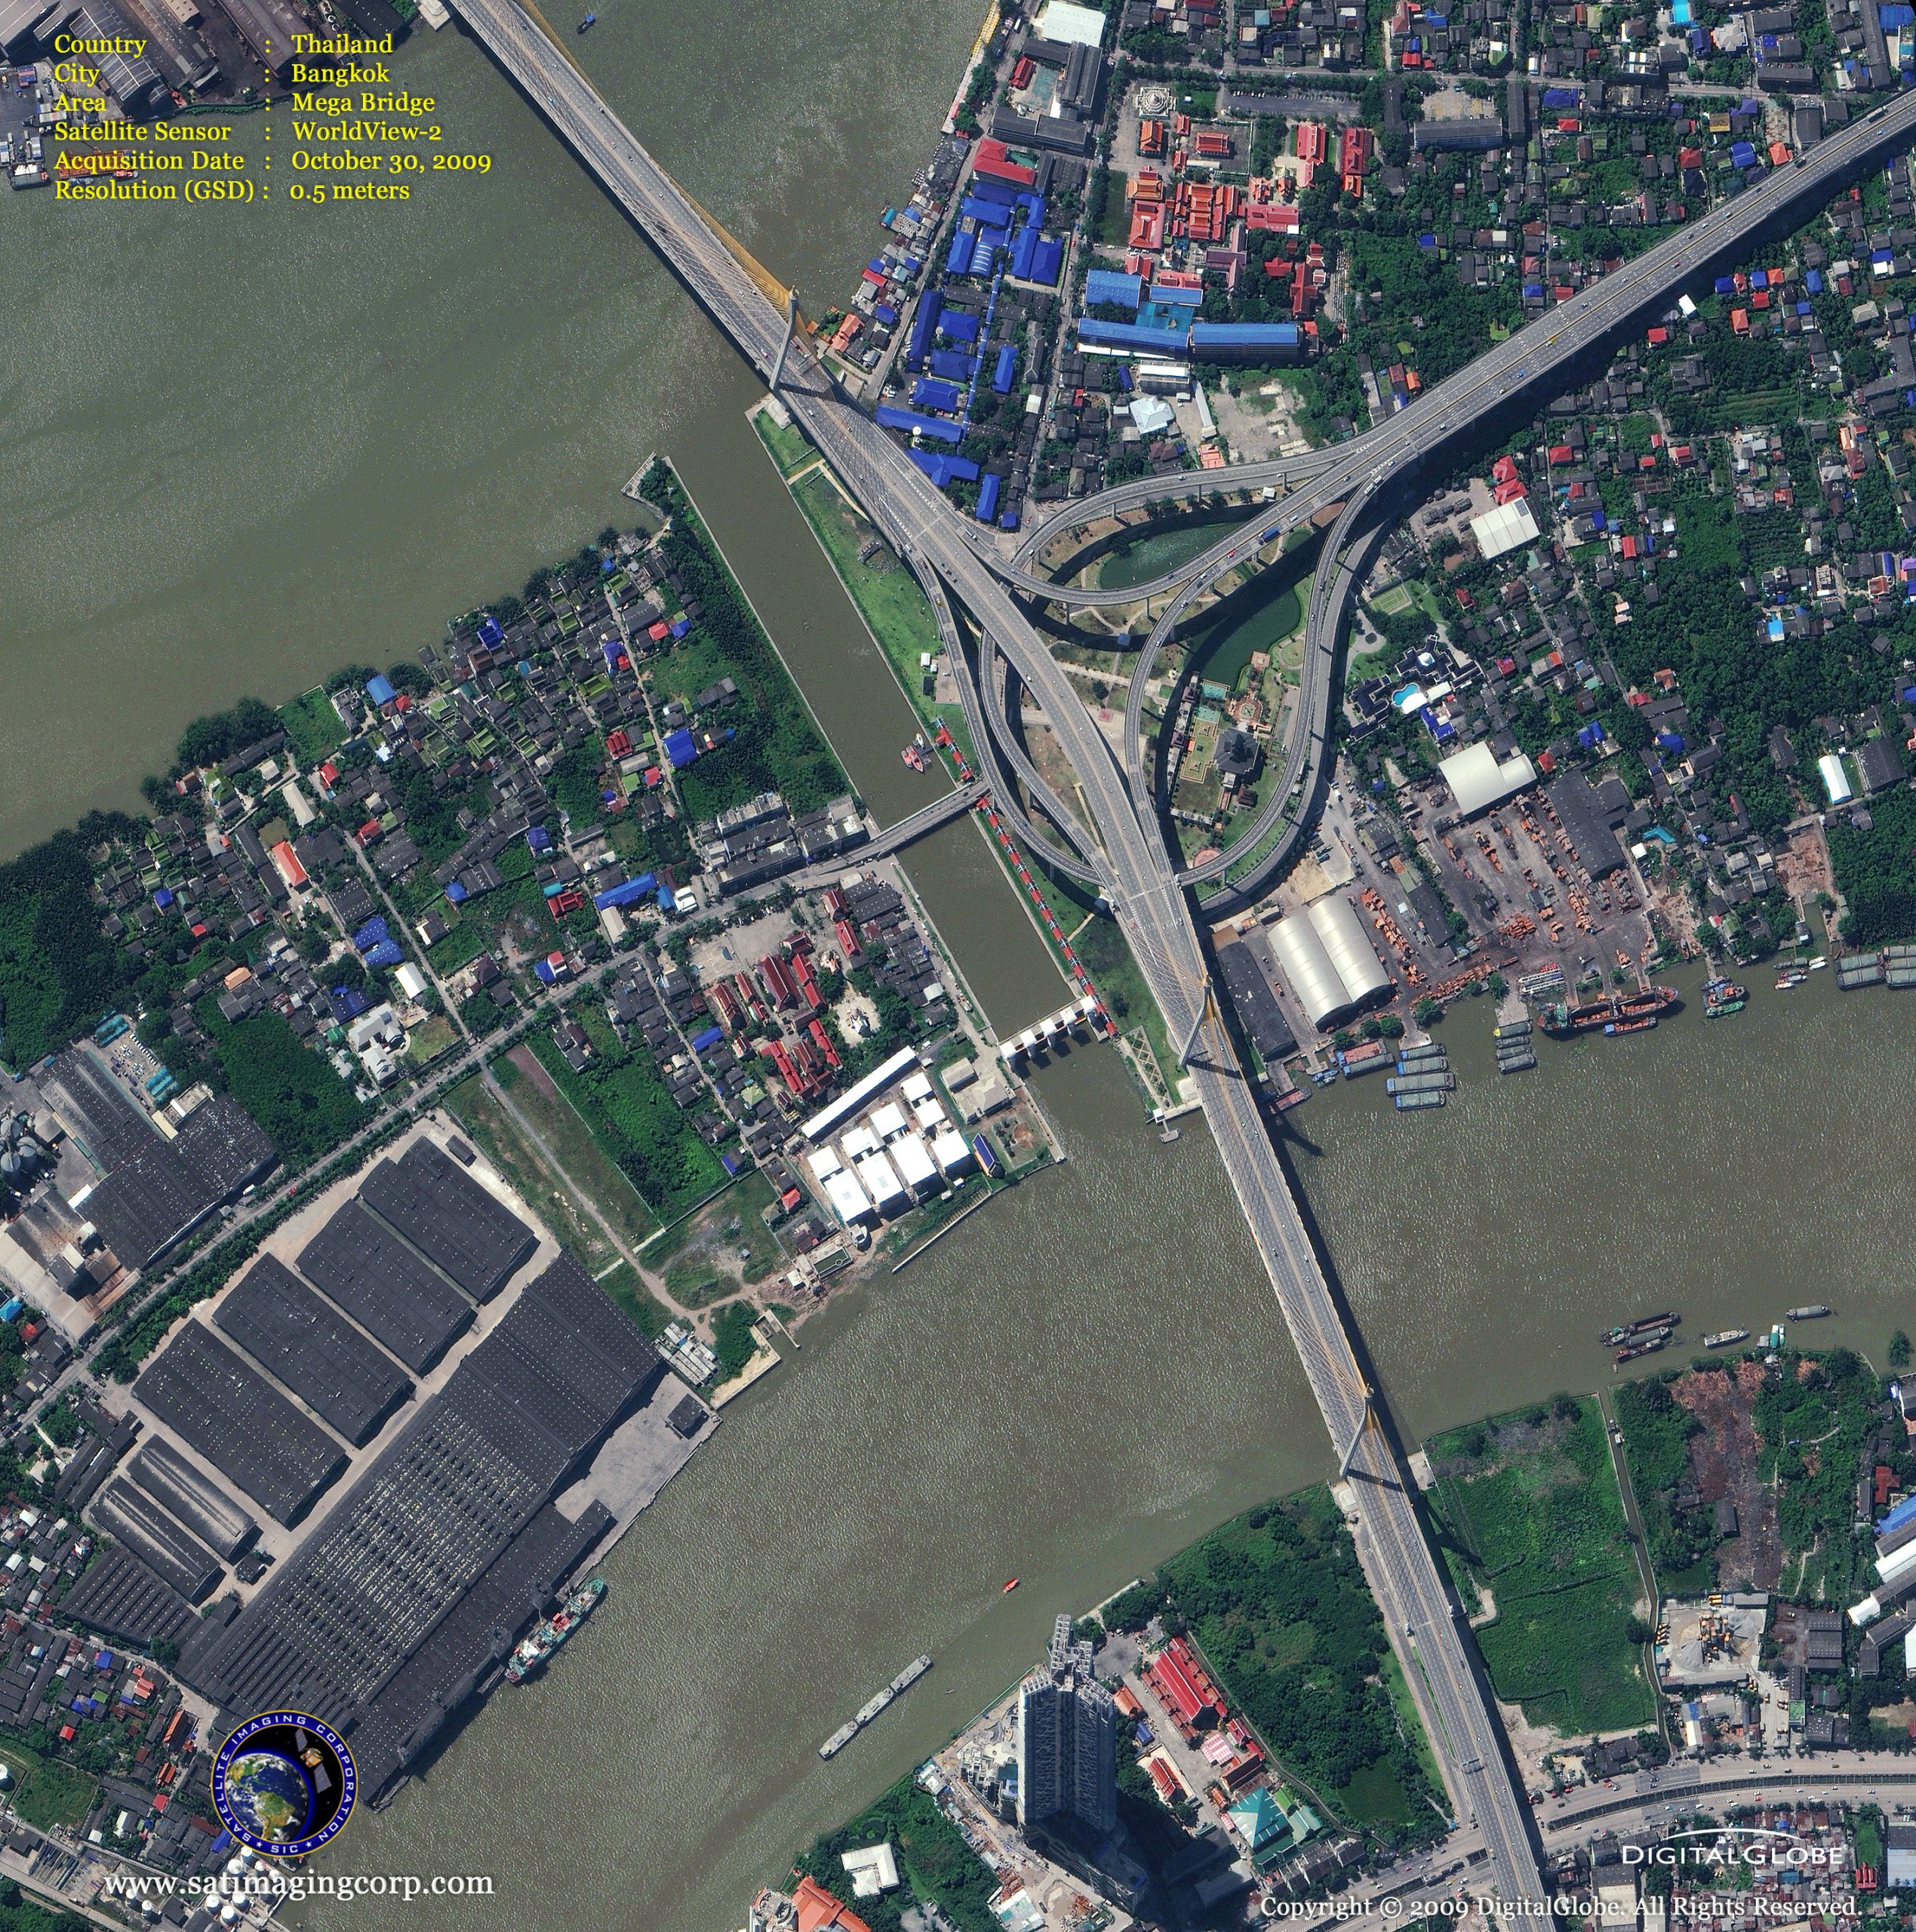
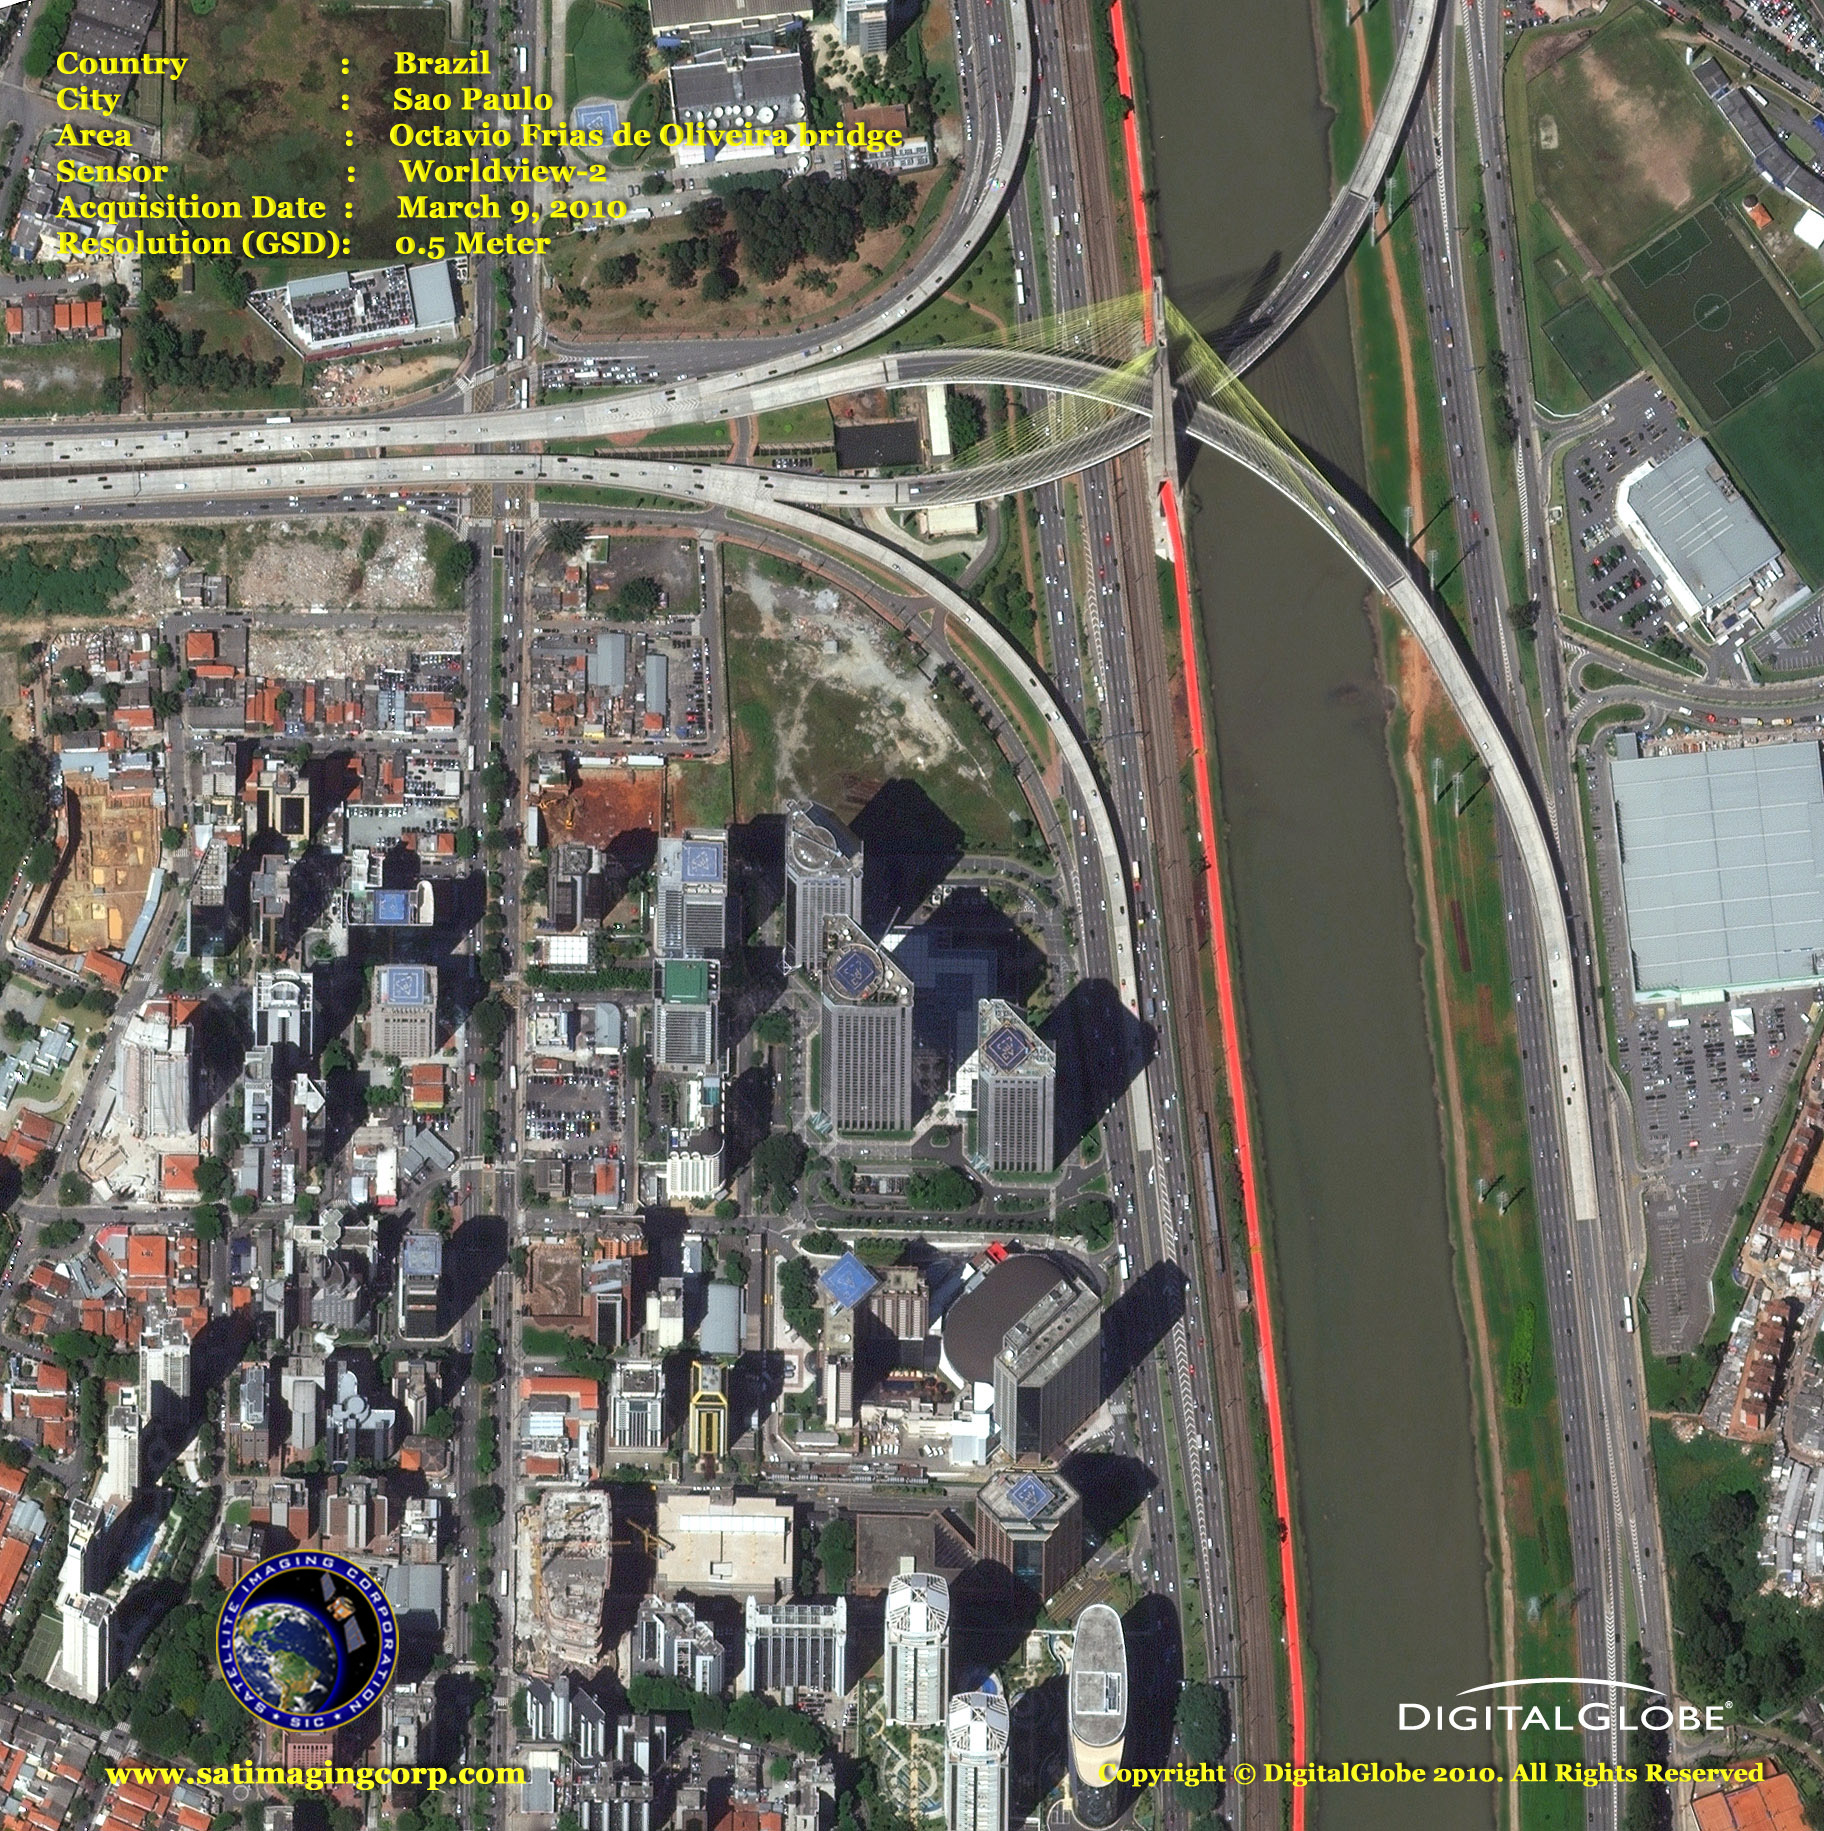
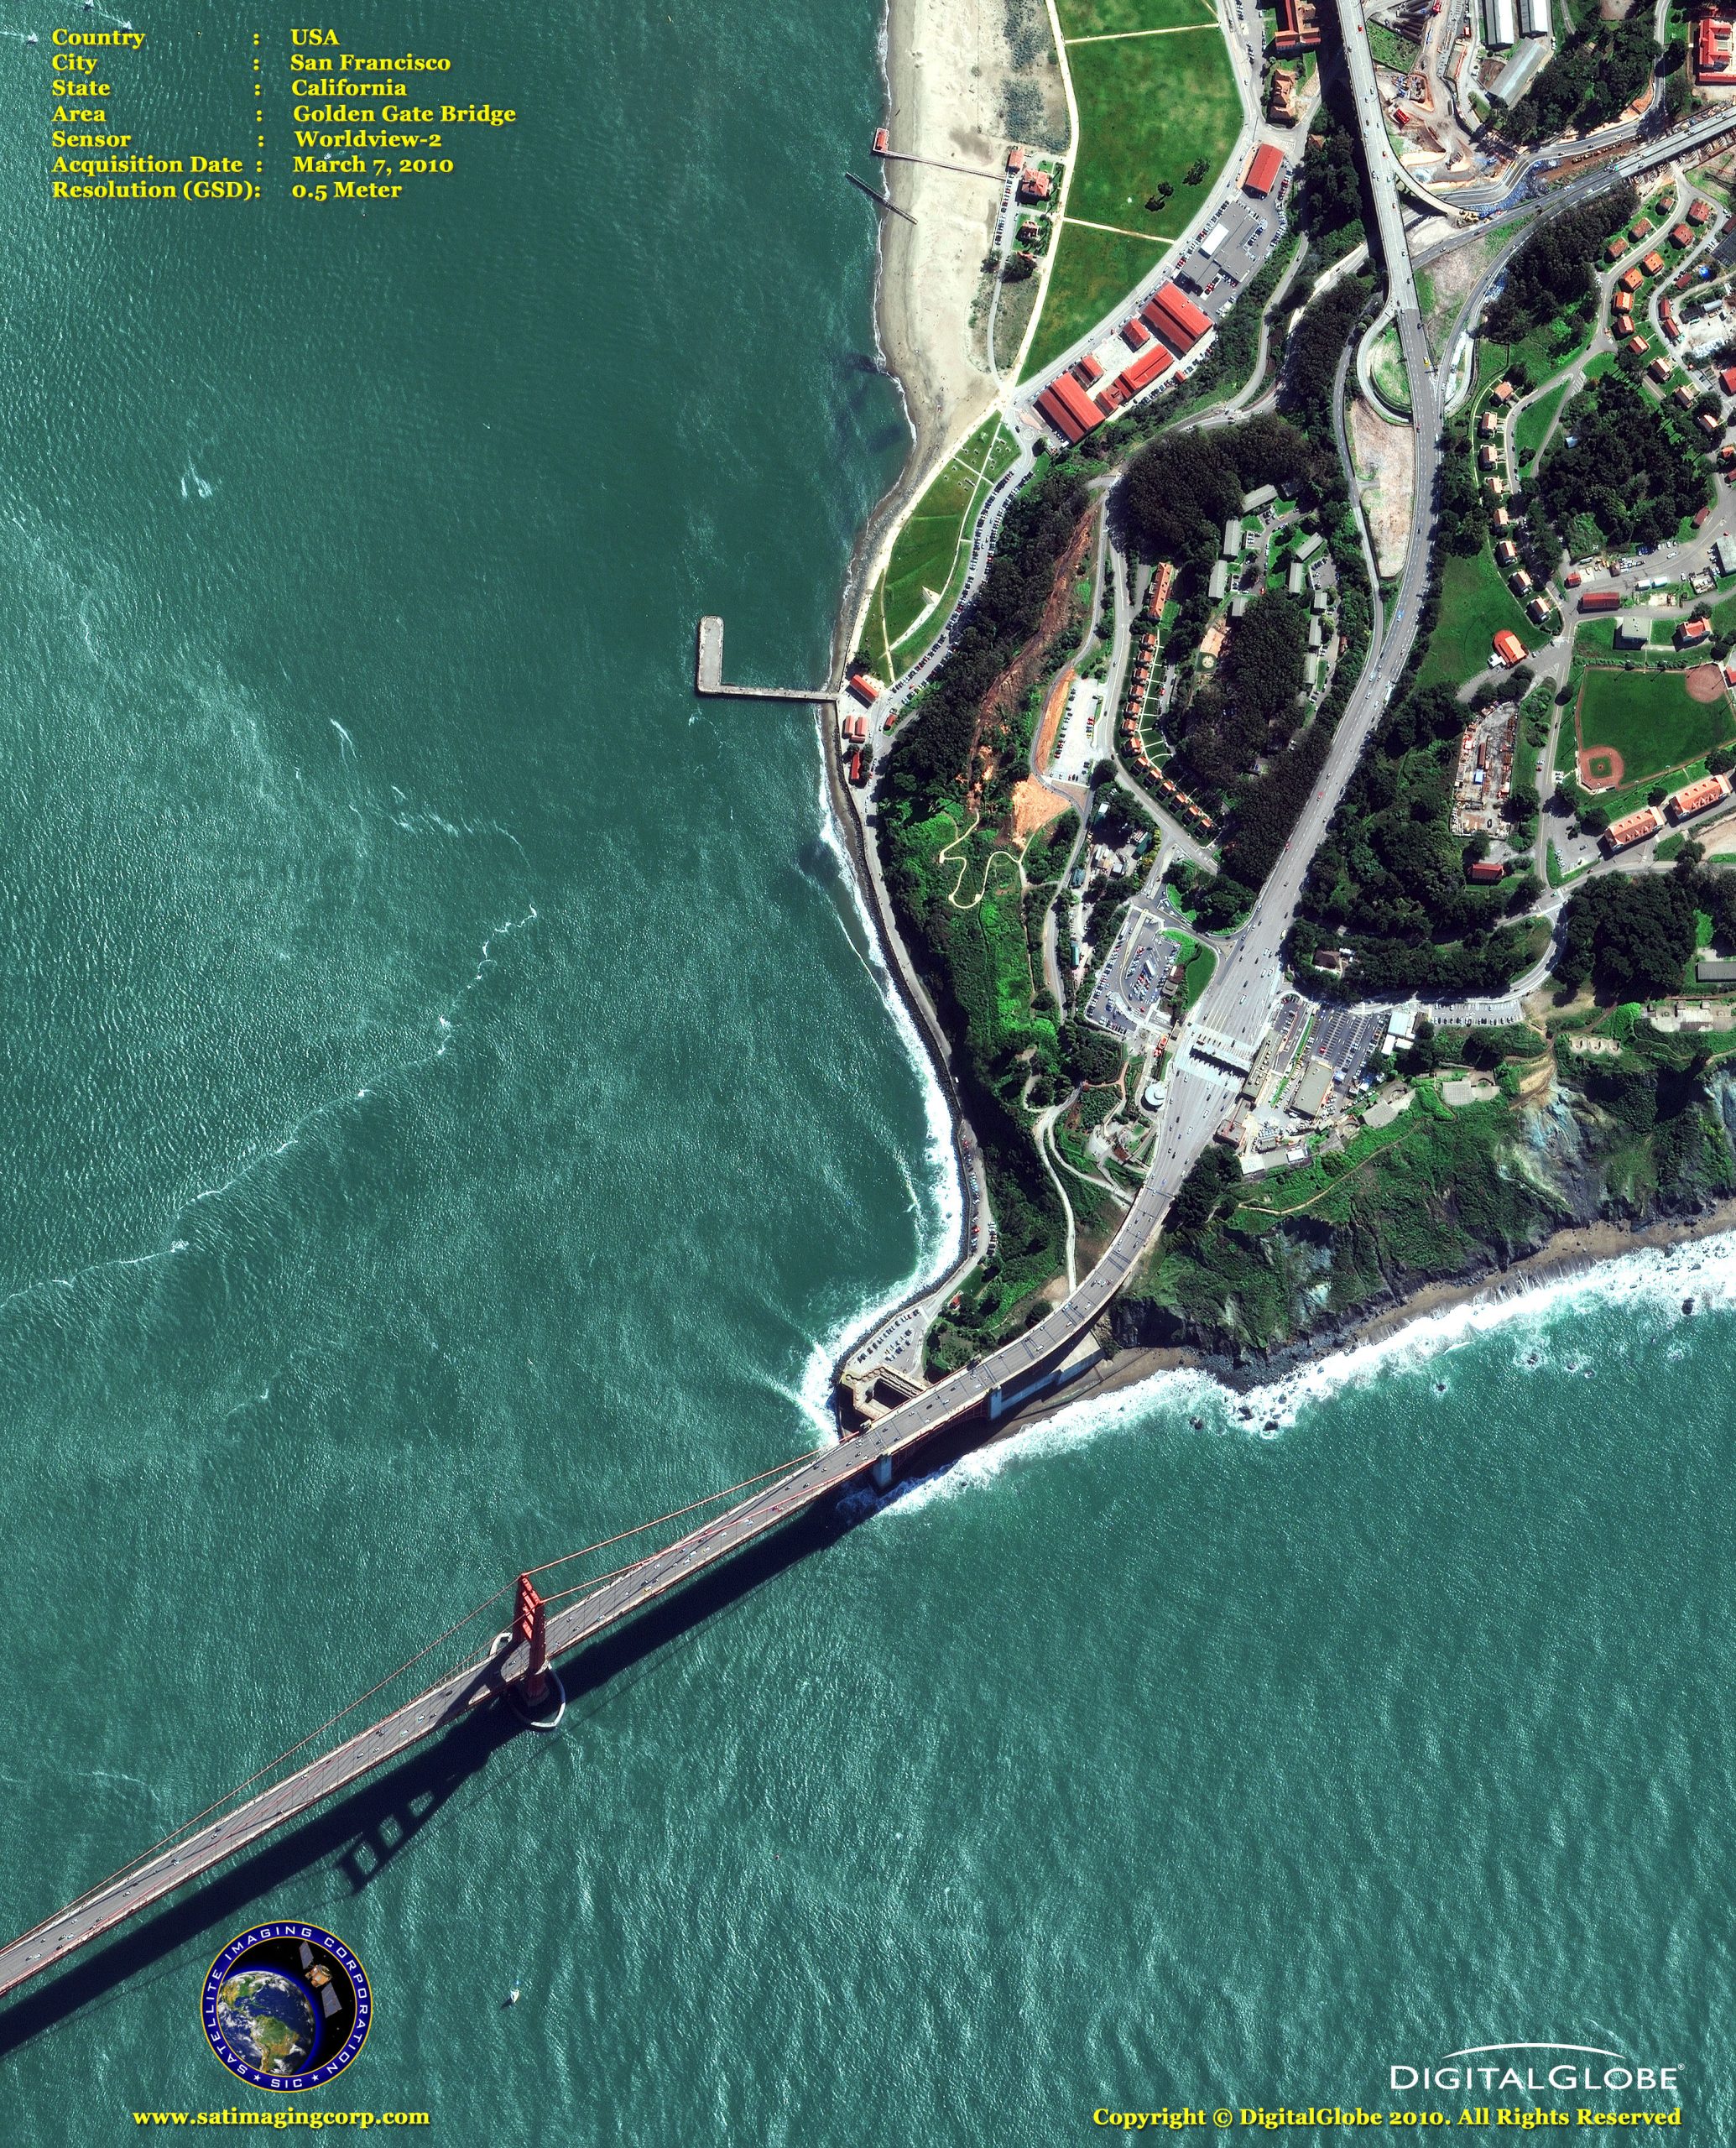
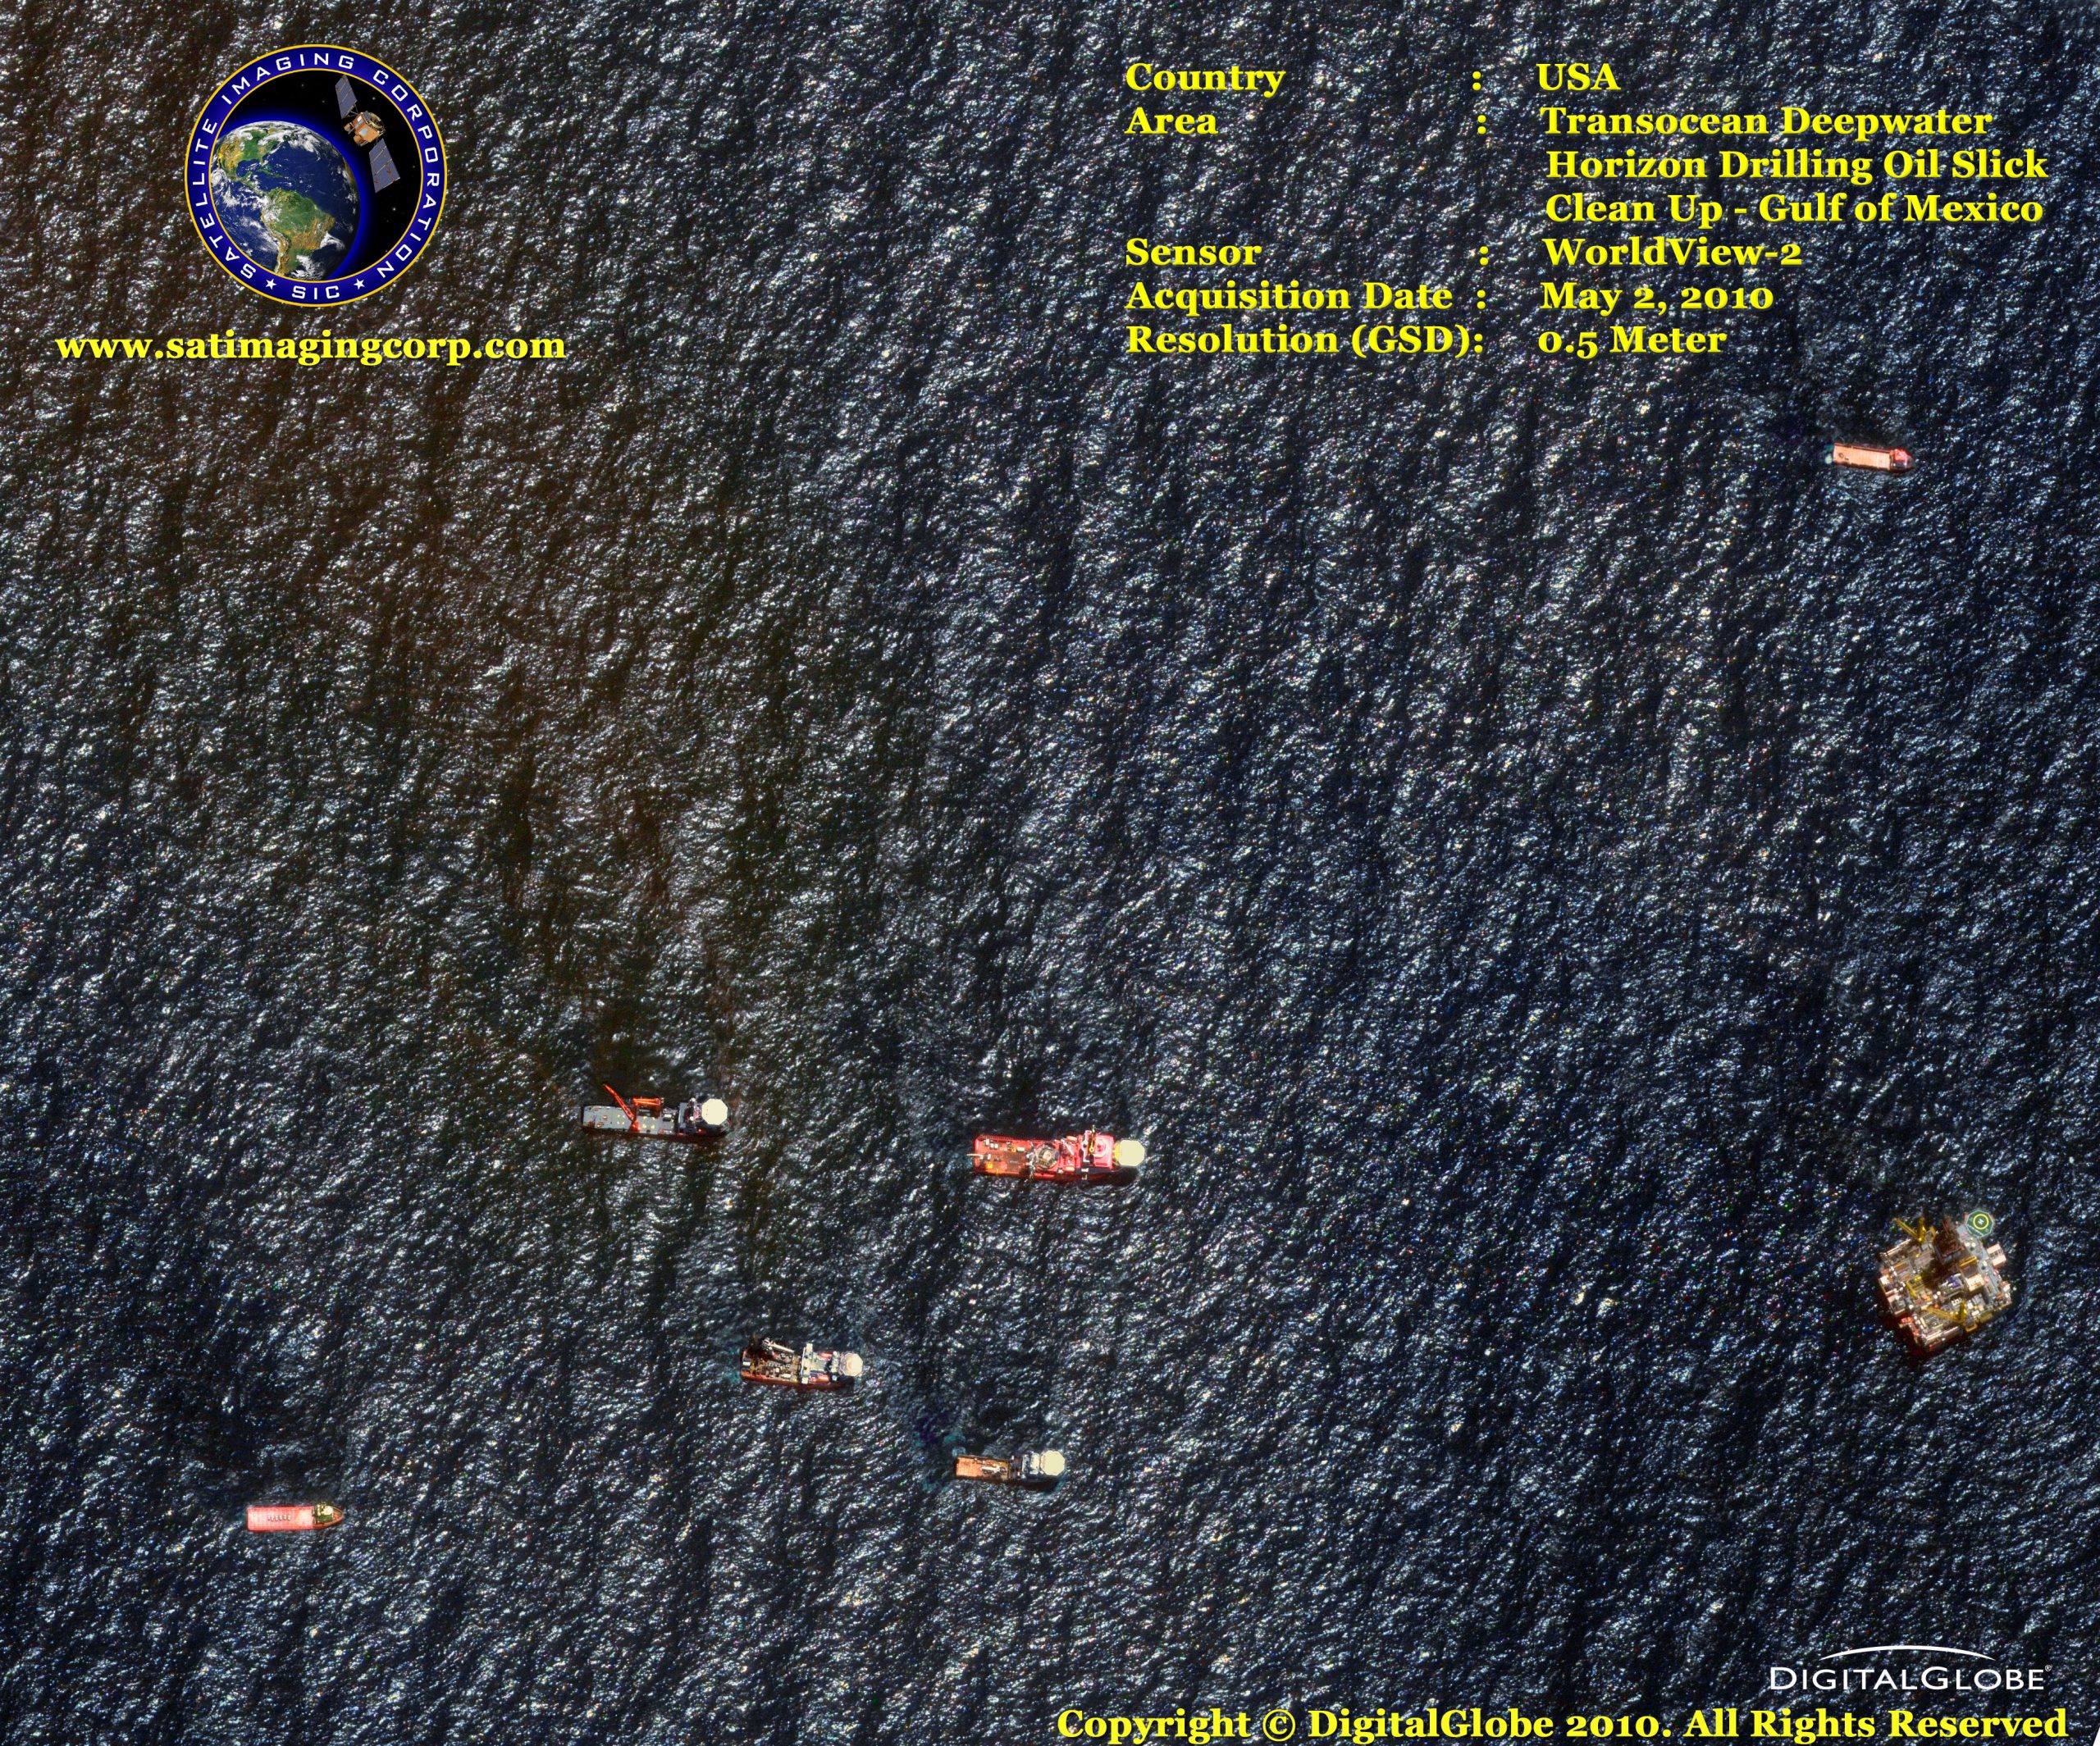
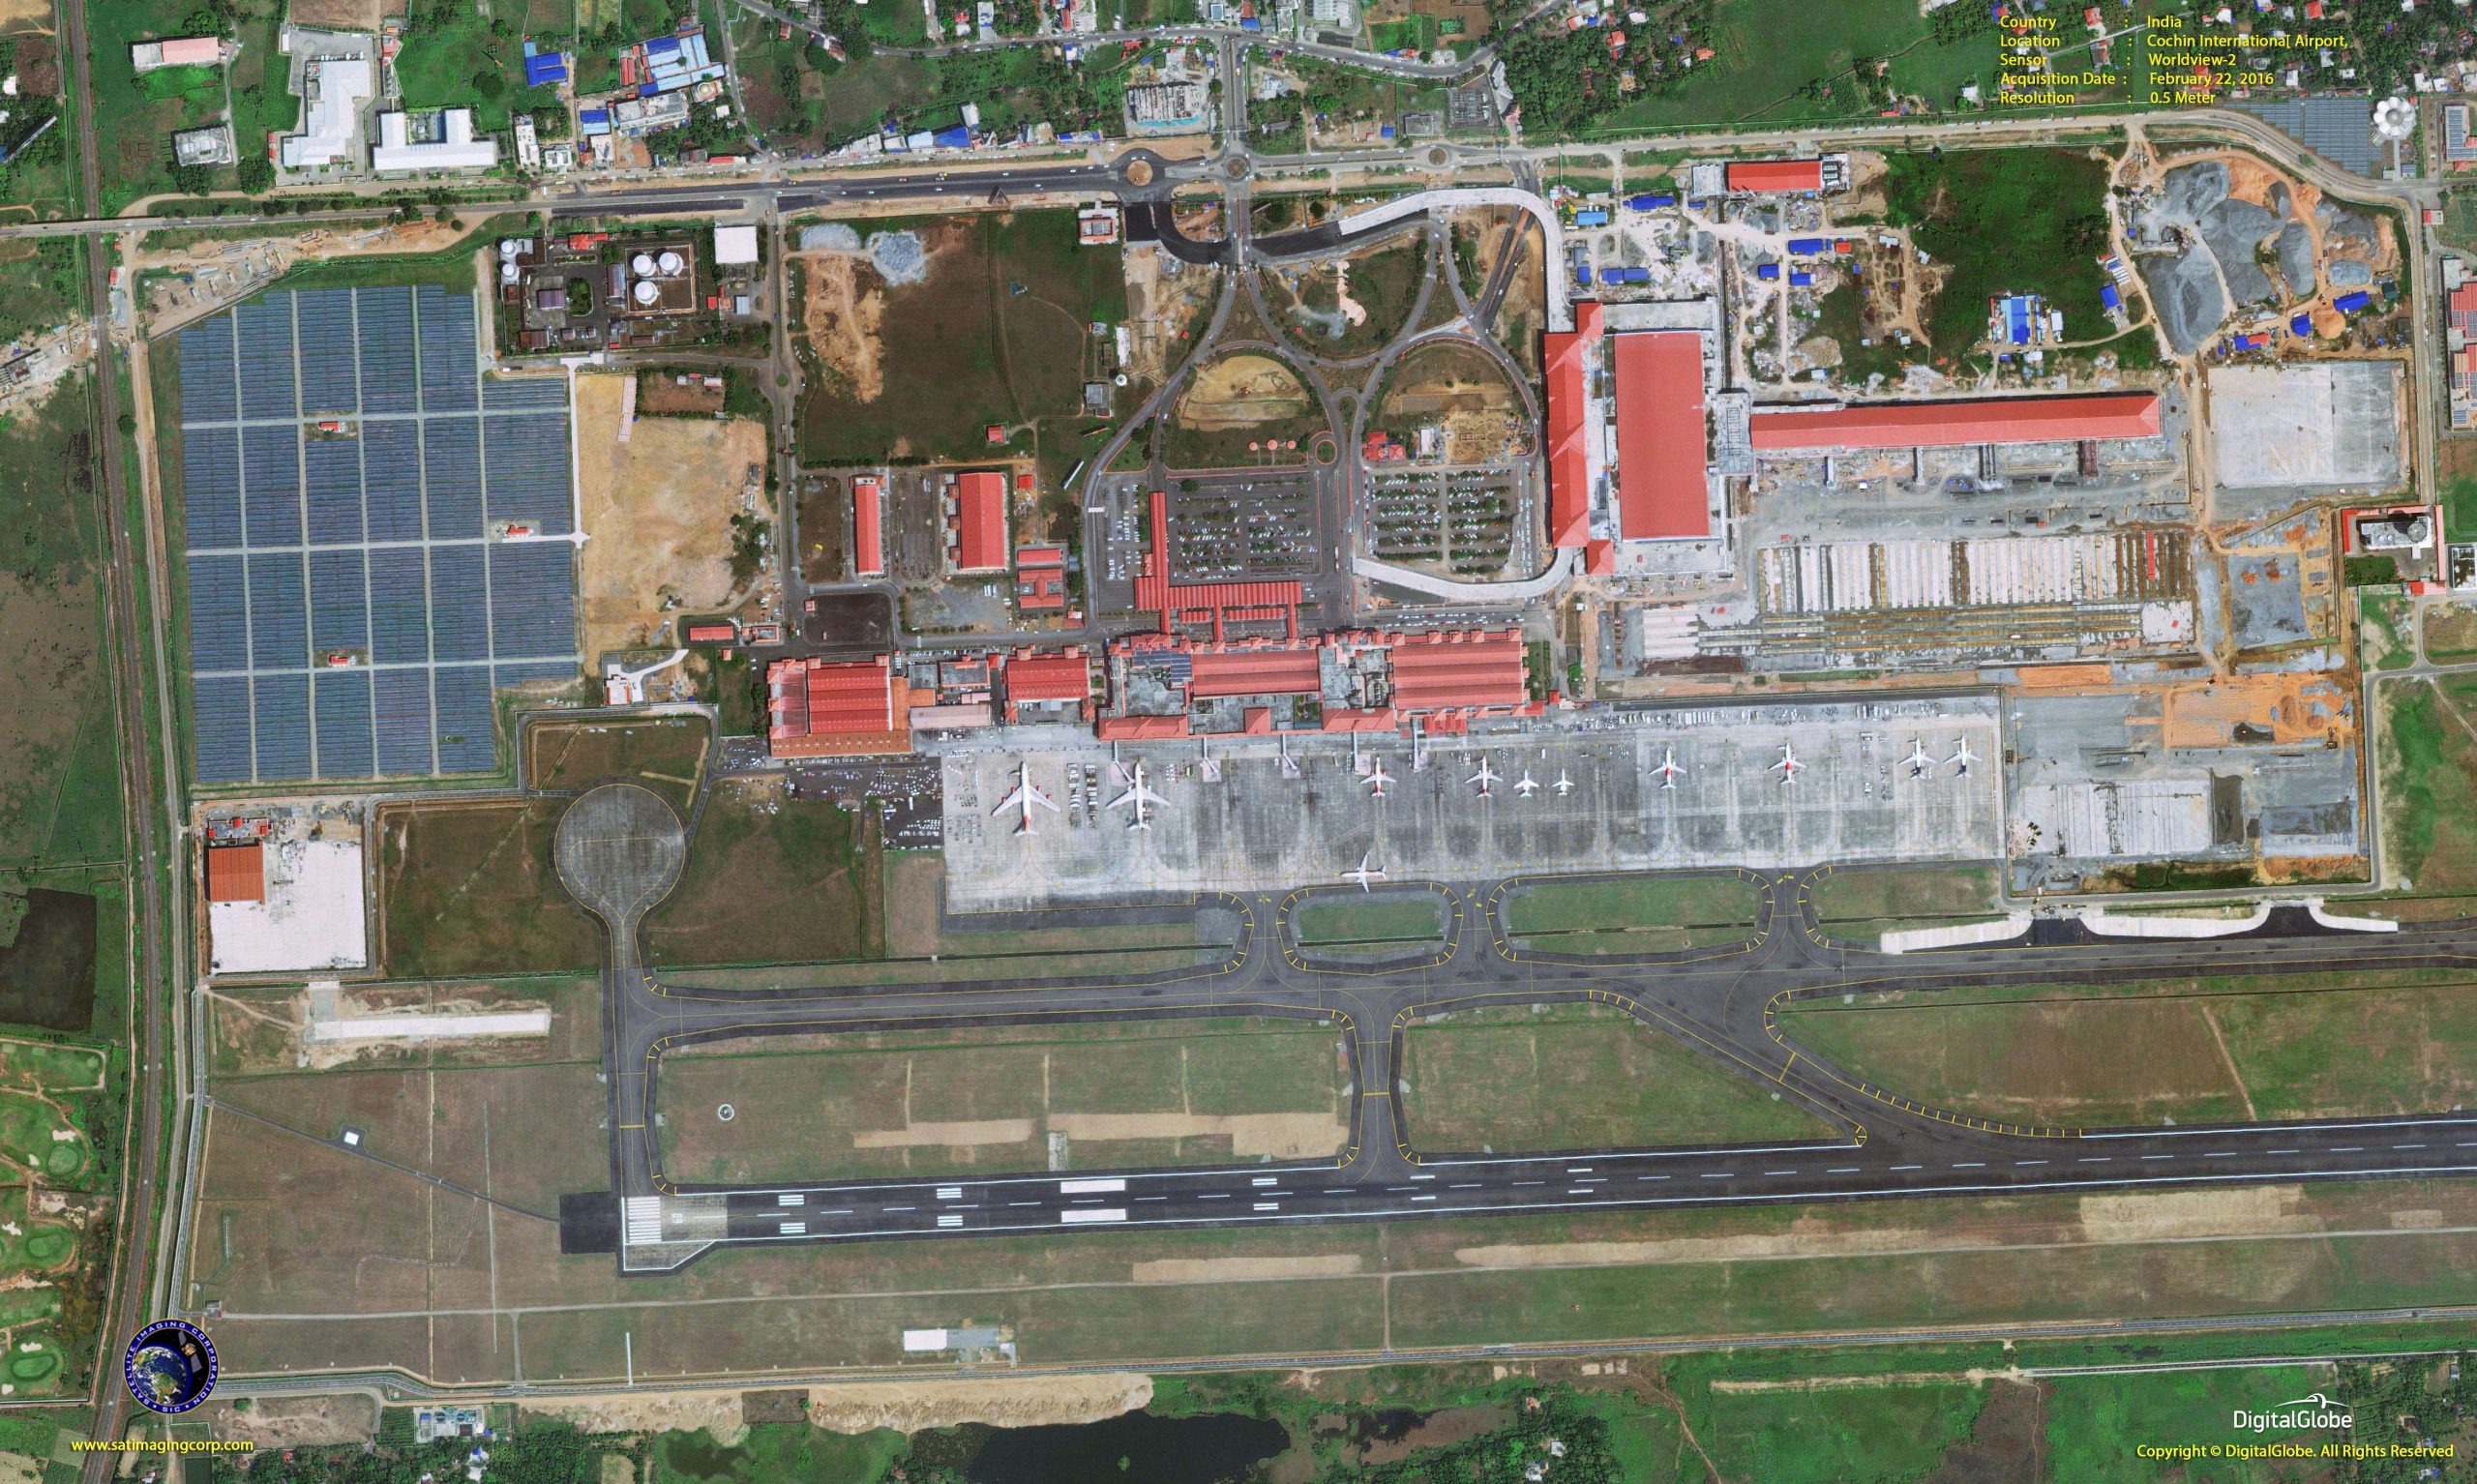
Sample Images
WorldView-2 Satellite Image Gallery
* Click on thumbnail to view in full resolution.
For more information on any of our products and image processing services, please contact us for a complimentary consultation.
WorldView-2 Satellite Sensor Specifications
Launch date
October 8, 2009
Launch vehicle
Delta 7920 (9 strap-ons)
Launch site
Vandenberg Air Force Base
Orbit altitude
770 kilometers
Orbit type
Sun synchronous, 10:30 am (LT) descending Node
Orbit period
100 minutes; 7.25 year mission life, including all consumables and degradables (e.g., propellant)
Spacecraft size, mass, and power
5.7 meters (18.7 feet) tall x 2.5 meters (8 feet) across, 7.1 meters (23 feet) across the deployed solar arrays; 2615 kilograms (5765 pounds); 3.2 kW solar array, 100 Ahr battery
Sensor bands
Panchromatic
8 Multispectral:
Coastal: 400-450 nm Red: 630-690 nm
Blue: 450-510 nm Red Edge: 705-745 nm
Green: 510-580 nm Near-IR1: 770-895 nm
Yellow: 585-625 nm Near-IR2: 860-1040 nm
Sensor resolution
Panchromatic: 0.46 m GSD at nadir, 0.52 m GSD at 20° off-nadir
Multispectral: 1.85 m GSD at nadir, 2.07 m GSD at 20° off-nadir
Dynamic range
11-bits per pixel
Swath width
16.4 km at nadir
Attitude determination and control
3-axis stabilized, Actuators: Control Moment Gyros (CMGs)
Sensors: star trackers, solid state IRU, GPS
Pointing accuracy and knowledge
Accuracy: <500 m at image start and stop
Knowledge: Supports geolocation accuracy below
Retargeting agility
Time to slew 200km: 10 seconds
Onboard storage
2199 GB solid state with EDAC
Agility Acceleration
1.5 deg/s/s
Rate: 3.5 deg/s
Time to slew 300 kilometers: 9 seconds
Communications
Image and ancillary data: 800 mbps X-band
Housekeeping: 4, 16 or 32 kbps real-time, 524 kbps stored, X-band
Command: 2 or 64 kbps S-band
Max Contiguous Area
Collected in a Single Pass
(30 degrees off-nadir
angle)
Mono: 138×112 km (8 strips)
Stereo: 63×112 km (4 pairs)
Mono: 138×112 km (8 strips)
Stereo: 63×112 km (4 pairs)
Command
2 or 64 kbps S-band
Revisit frequency
1.1 days at 1 m GSD or less
3.7 days at 20 degrees off-nadir or less (0.52 m GSD)
Geolocation accuracy (CE90)
Demonstrated <3.5 m CE90 without ground control
Capacity
1 million sq km per day


