Mining and Satellite Imagery
Satellite imagery and aerial photography have proven to be important tools in support of mineral exploration projects. The tools are used in a variety of ways. Firstly, they provide geologists and field crews with the location of tracks, roads, fences, and inhabited areas. This is important for mapping out potential access corridors for exploration areas and considering the environmental impact af large project. The satellite map data is also useful for mapping outcrops and regolith systematics and vegetation cover across exploration blocks and over regional areas.
Satellite images can also benefit geologists, scientists, and exploration managers due to the multiple bands that the satellites carry that allow the interpretation of wavelengths that cannot be seen by the human eye. Near-infrared, short wave infrared, and thermal infrared can be used to identify the difference in structural features of the earth’s surface.
Multispectral imaging and thematic mapping allow researchers to collect reflection data and absorption properties of soils, rock, and vegetation. This data could be utilized by trained photogeologists to interpret surface lithologies, identify clays, oxides, and soil types from satellite imagery.
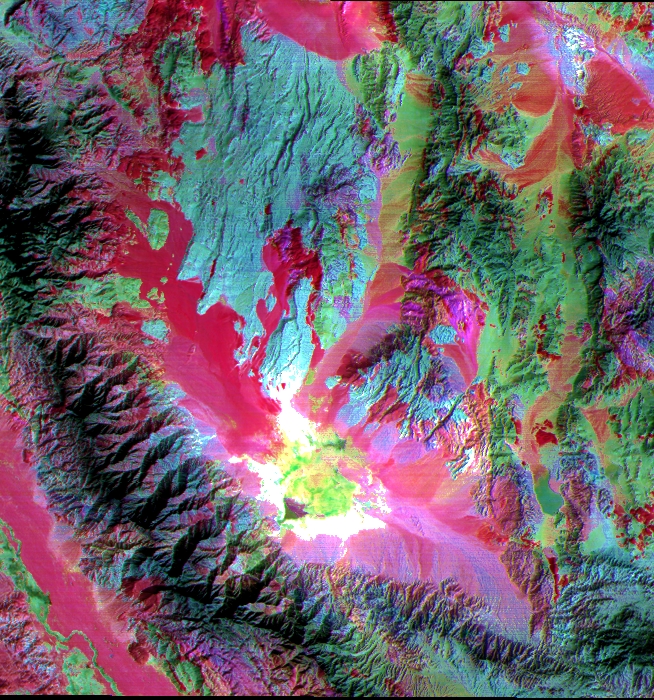
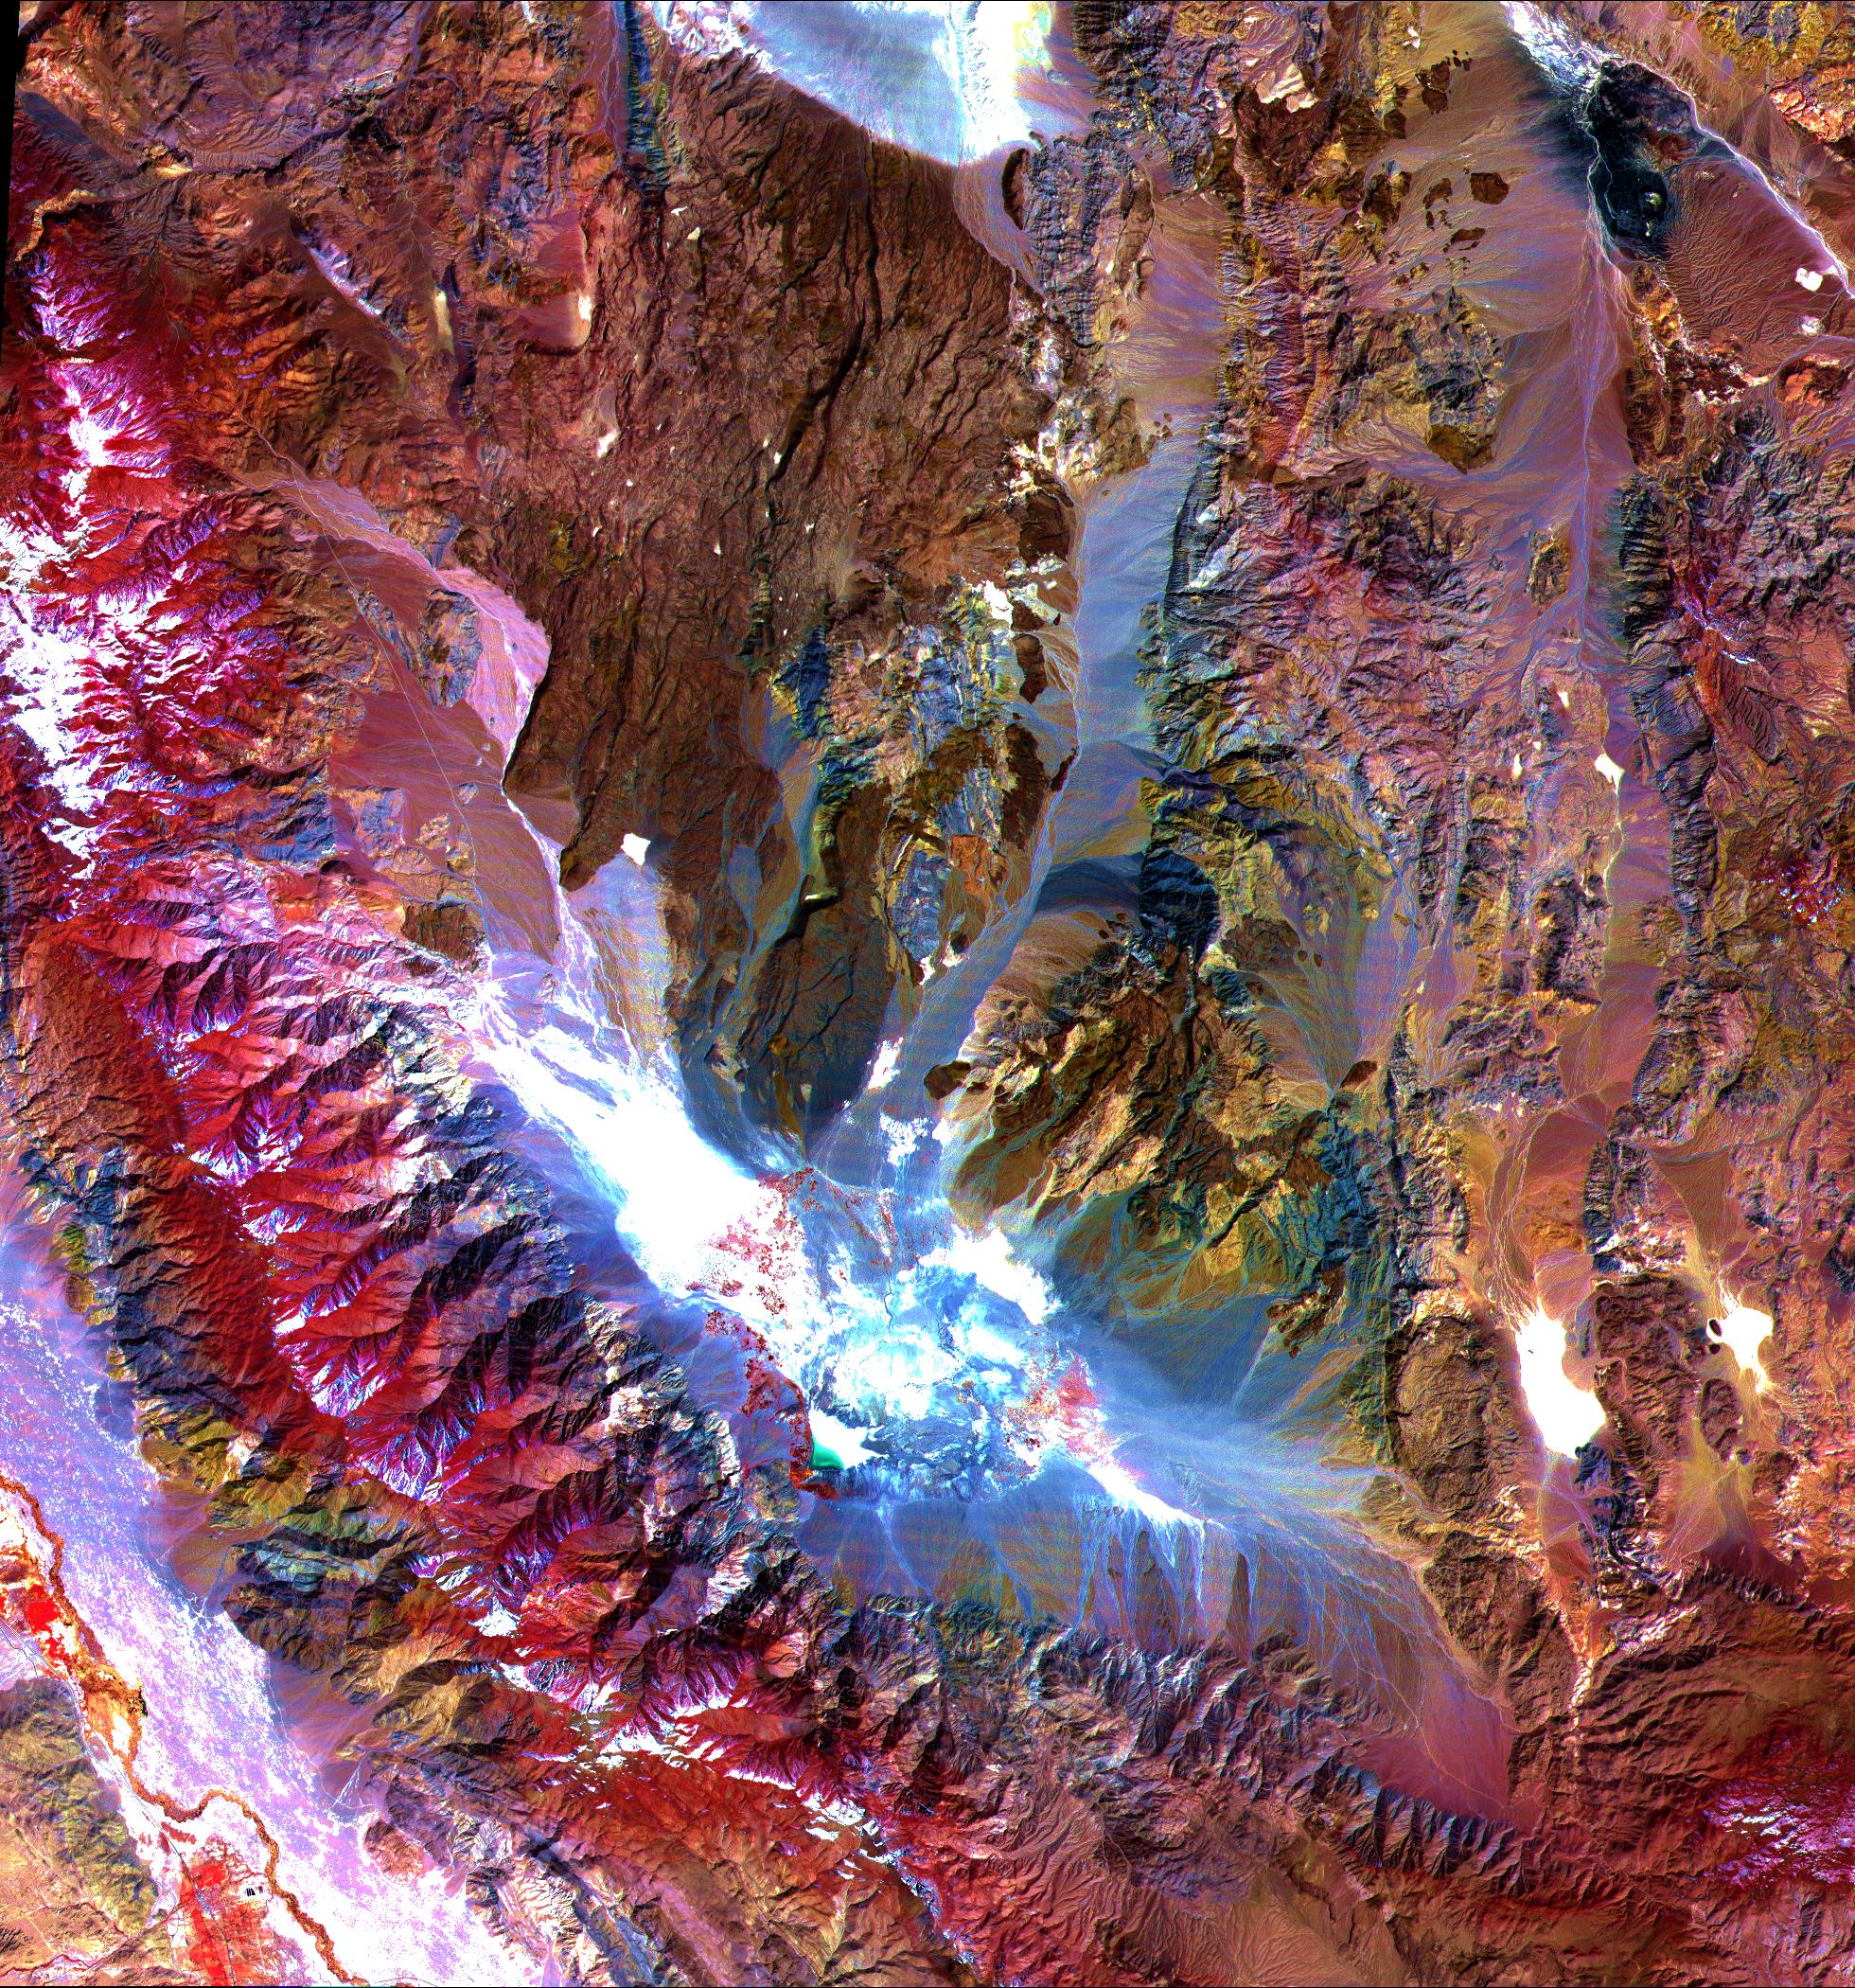
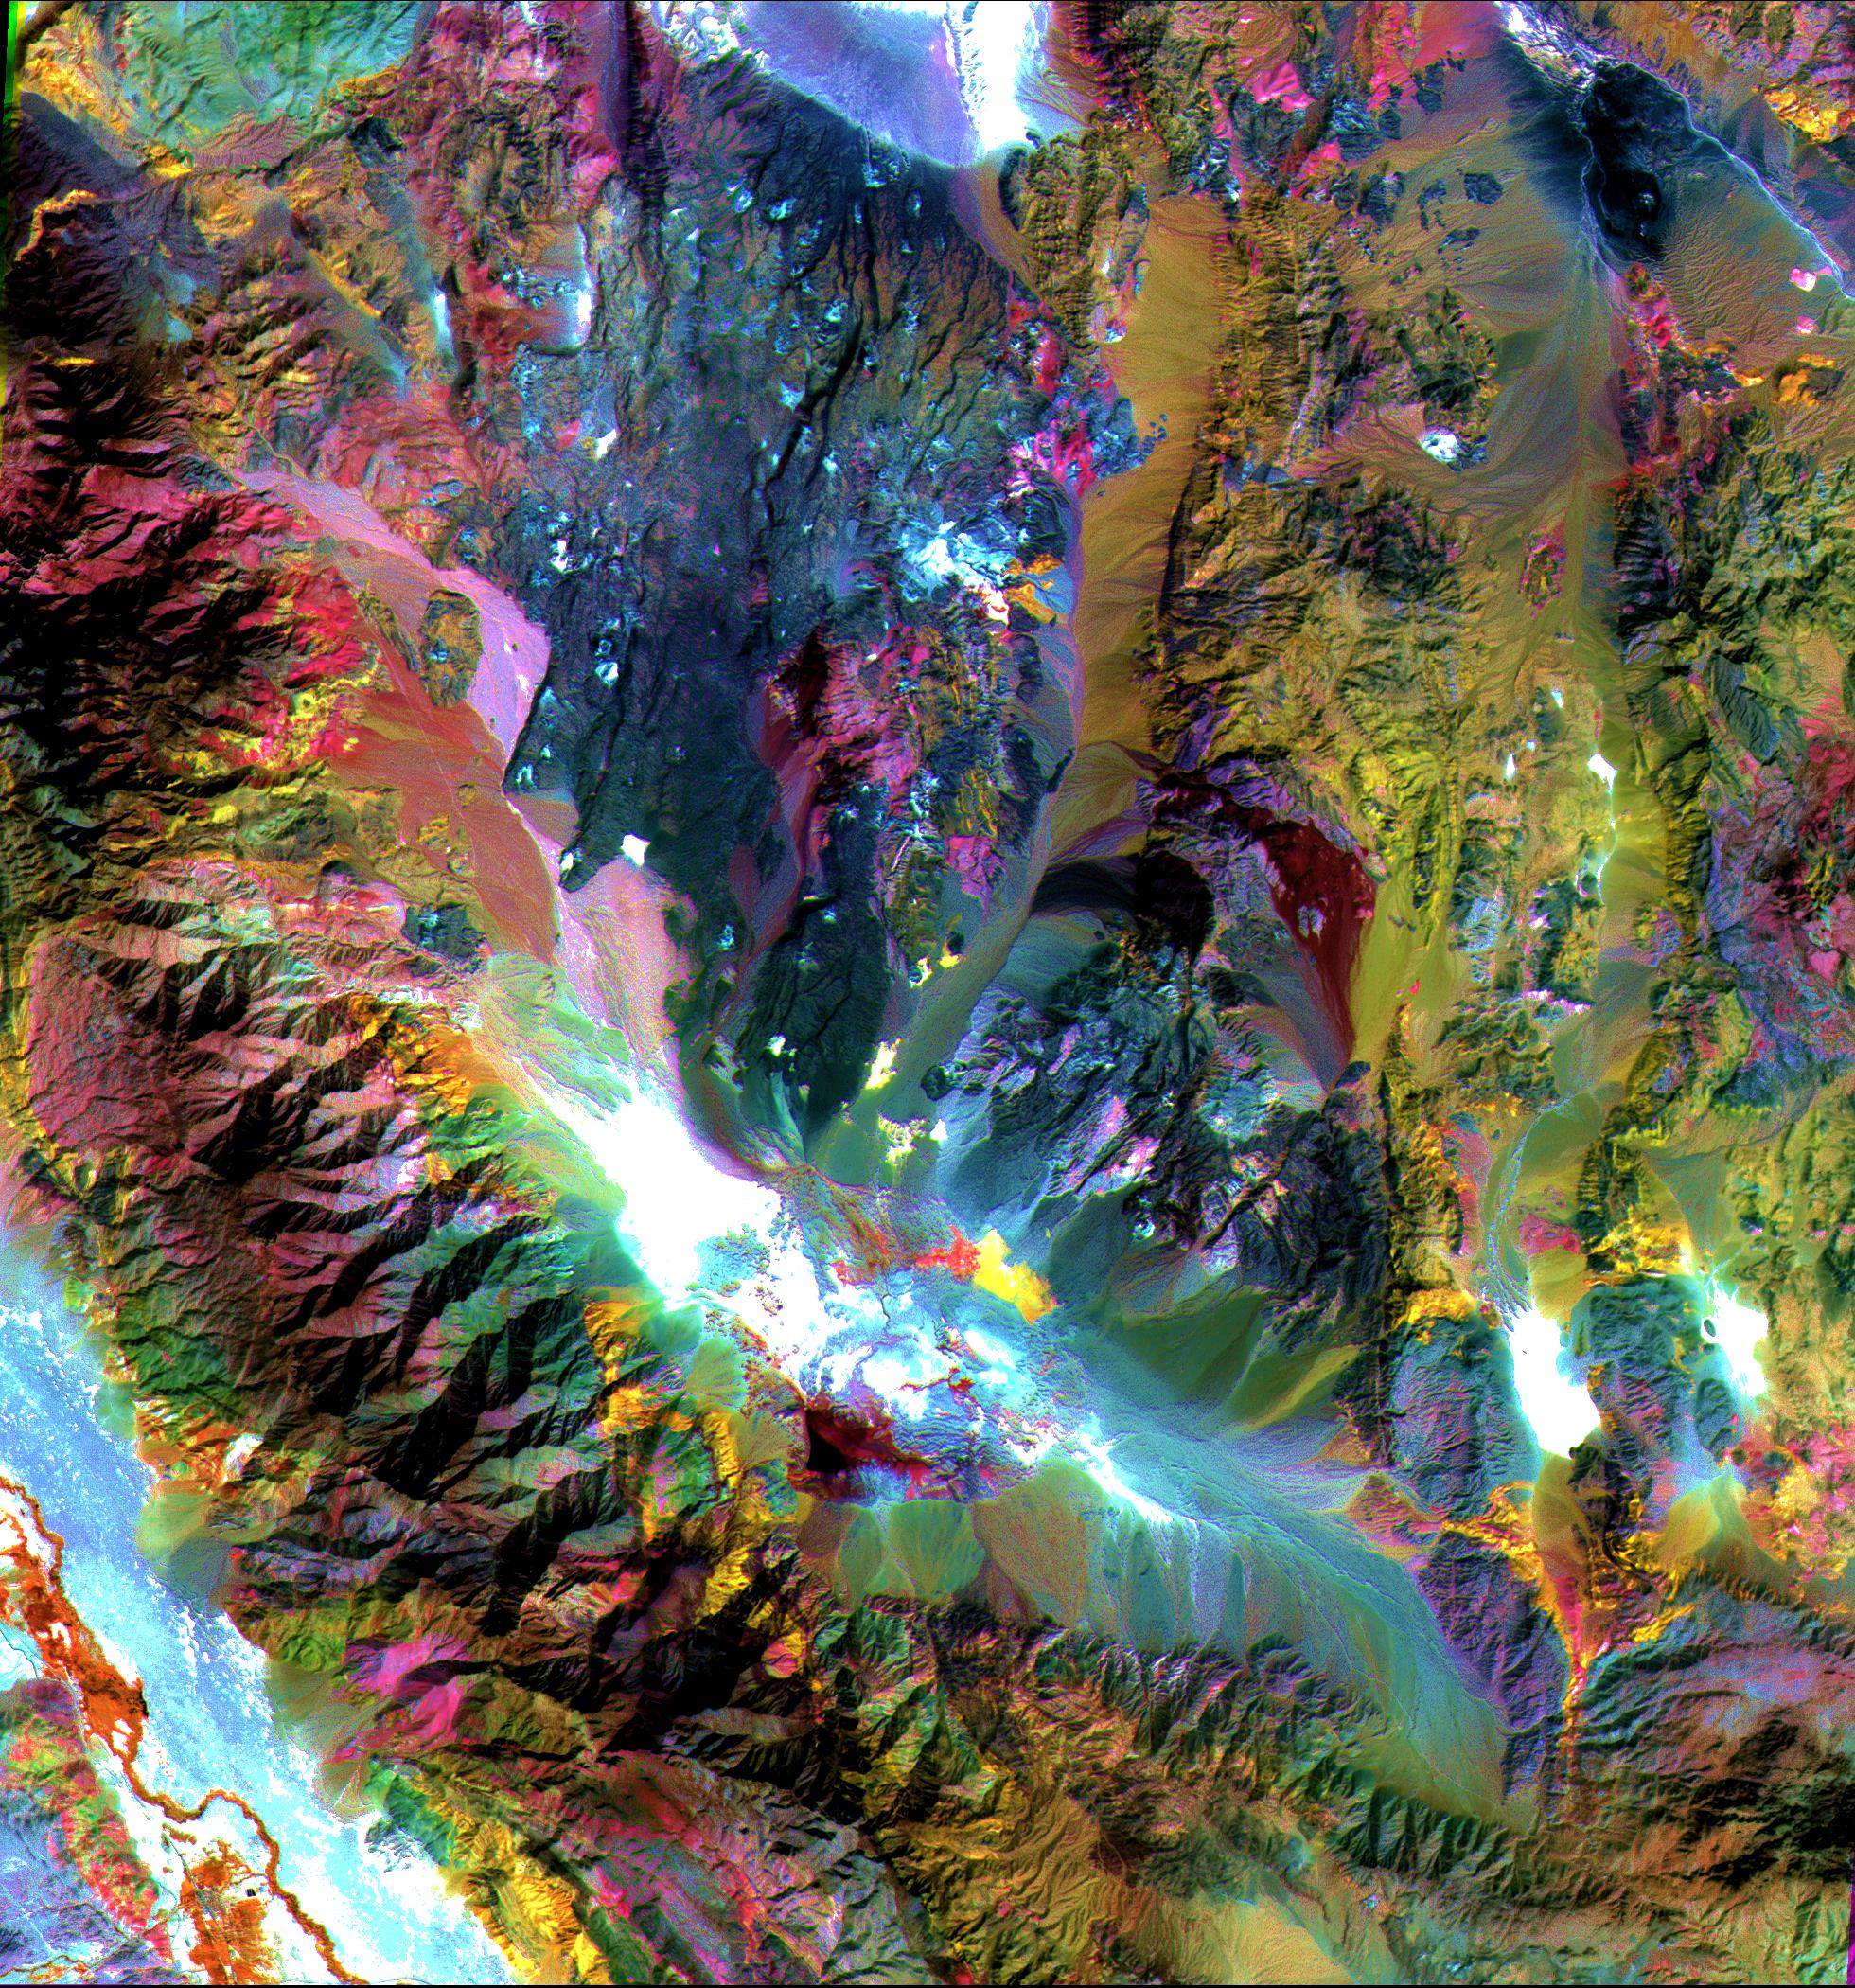
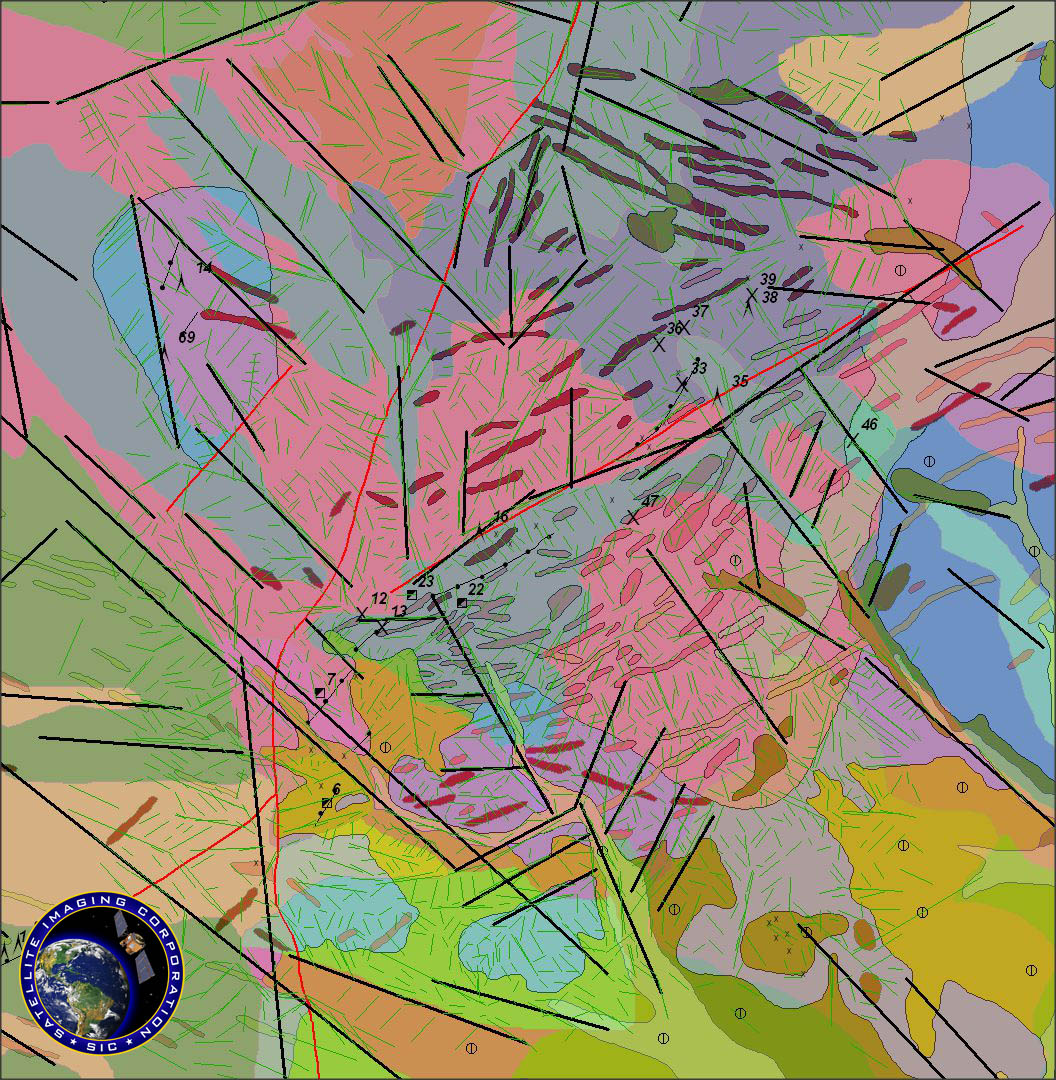
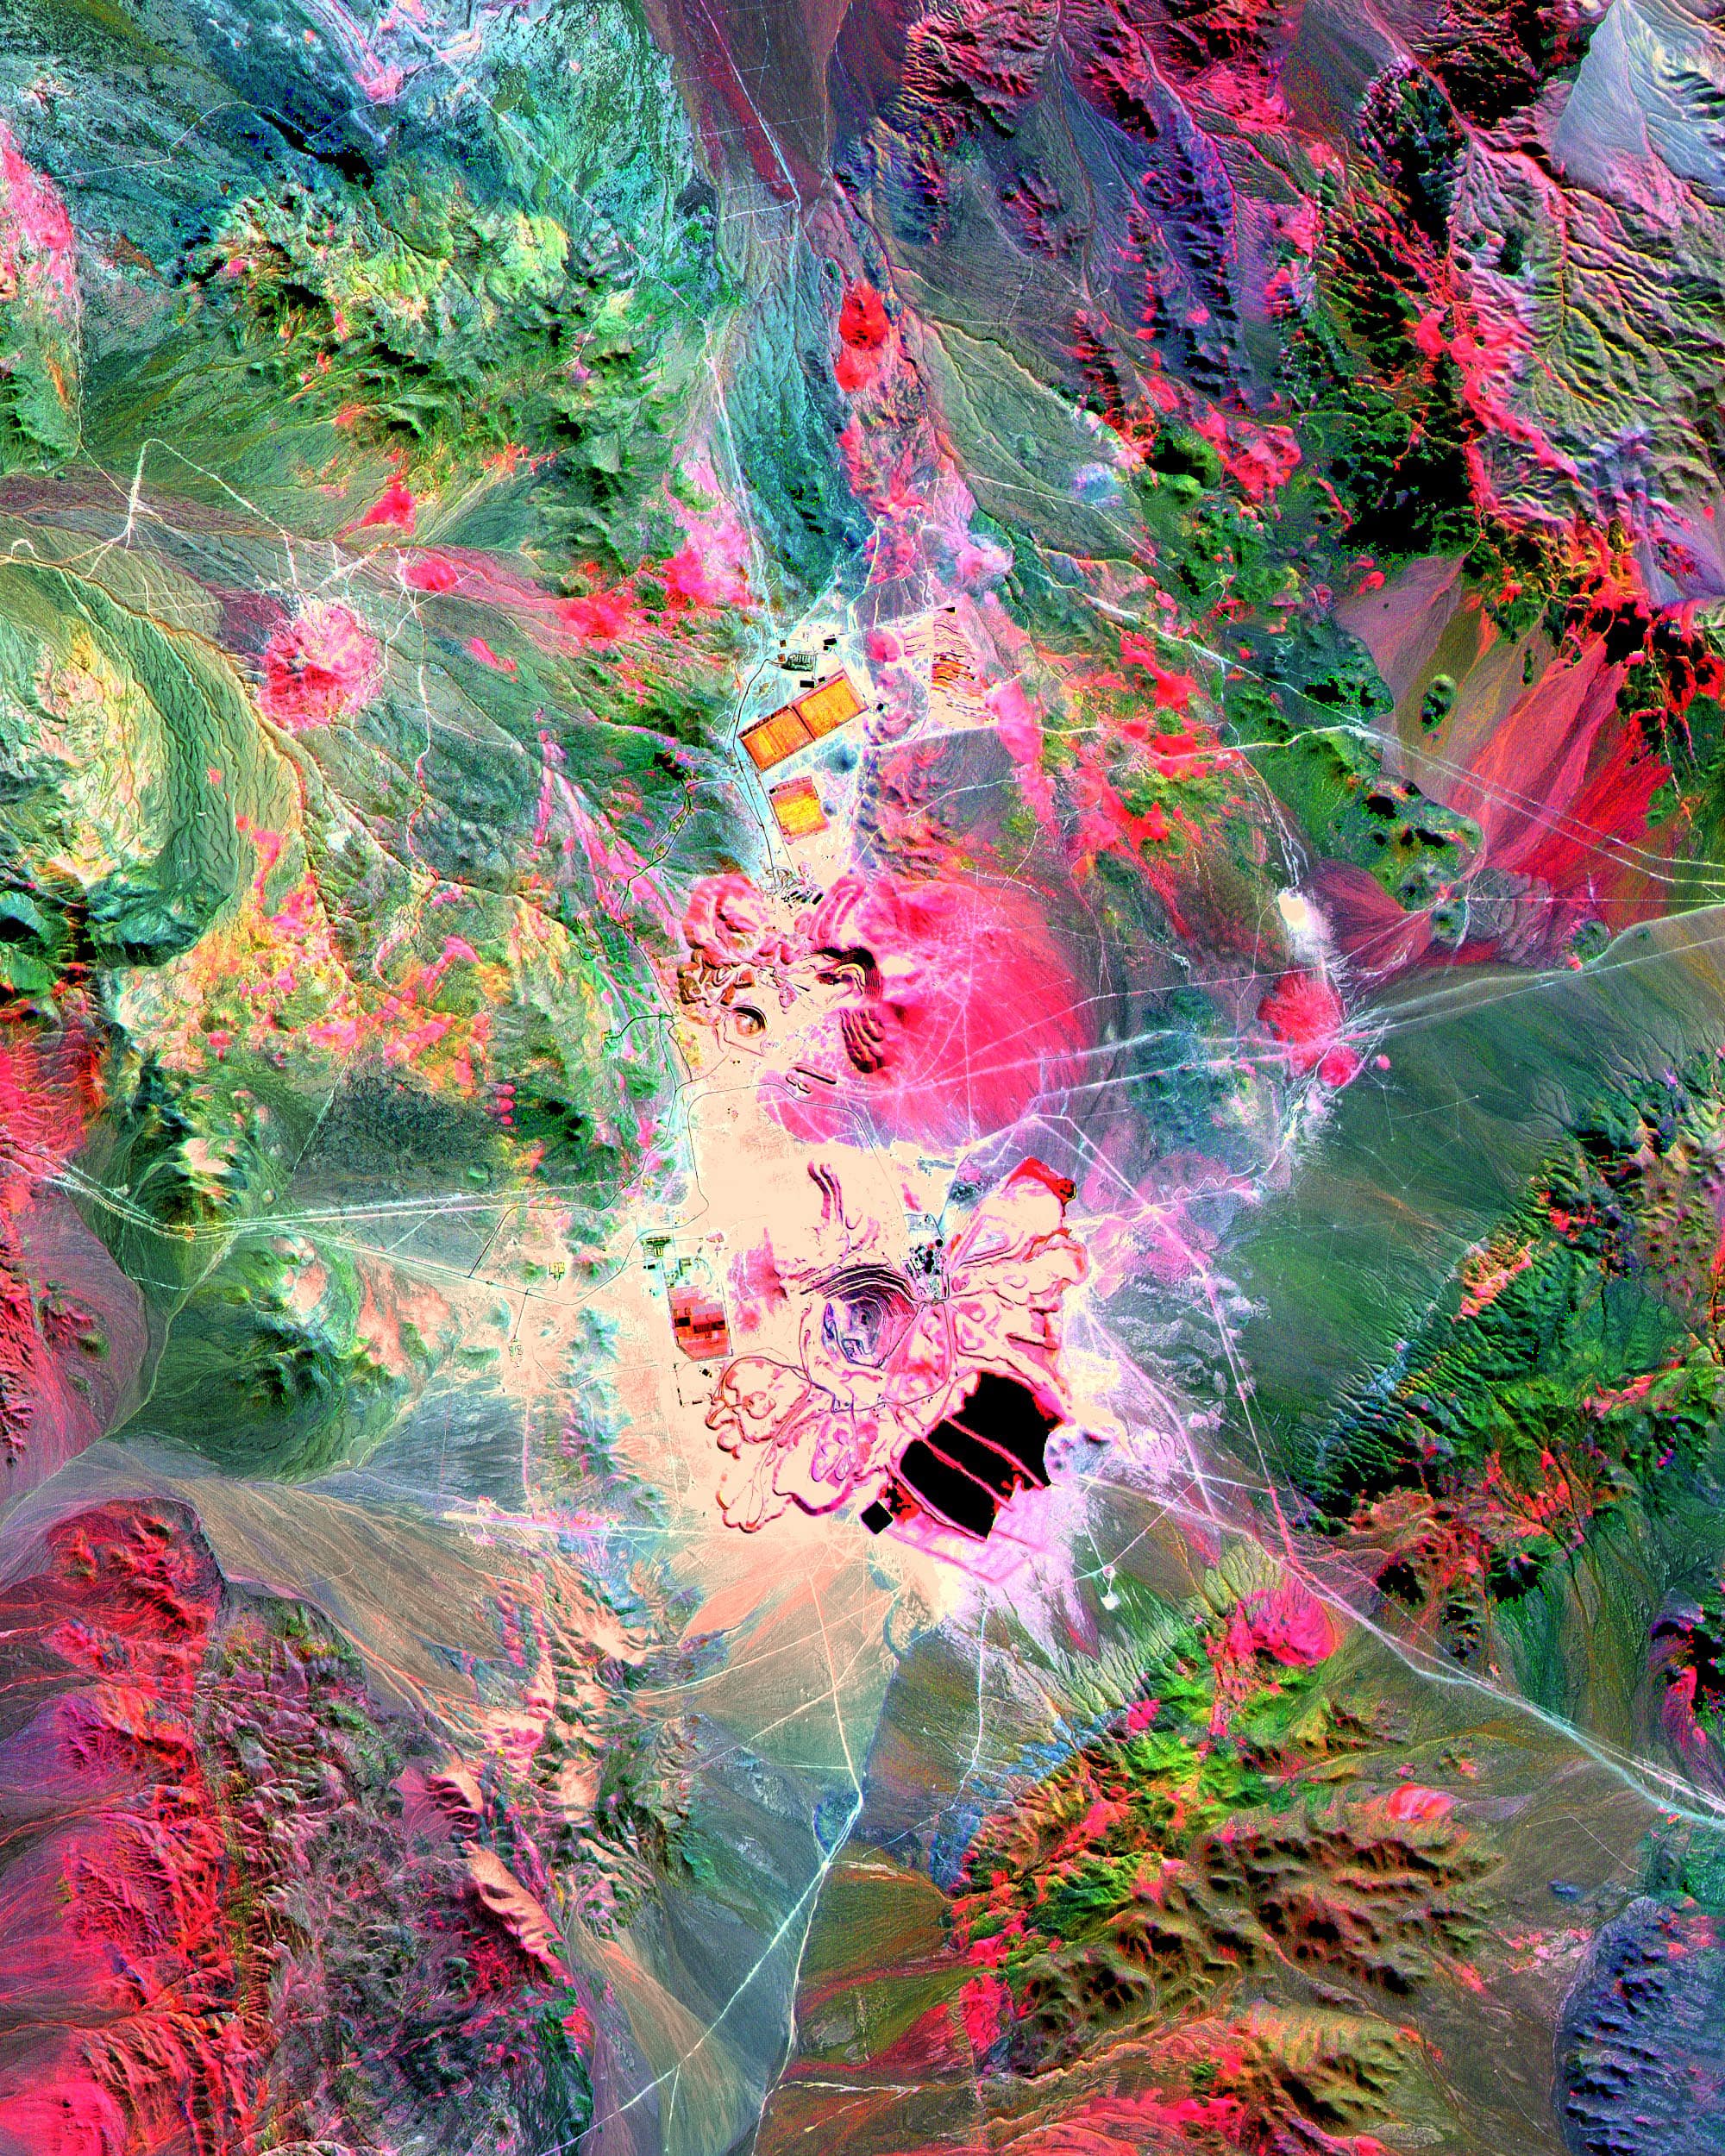
Mine in
Saline, California
ASTER (15m) Satellite Images
n the example above, the left image displays visible and near-infrared bands 3, 2, and 1 in red, green, and blue (RGB). Vegetation appears red, snow and dry salt lakes are white, and exposed rocks are brown, gray, yellow, and blue. Rock colors may reflect the presence of iron minerals, and variations in albedo. The middle image displays short wavelength infrared bands 4, 6, and 8 as RGB. In this wavelength region, clay, carbonate, and sulfate minerals have diagnostic absorption features, resulting in distinct colors on the image. For example, limestones are yellow-green, and purple areas are kaolinite-rich. The right image displays thermal infrared bands 13, 12, and 10 as RGB. In this wavelength region, variations in quartz content appear as more or less red; carbonate rocks are green, and mafic volcanic rocks are purple.
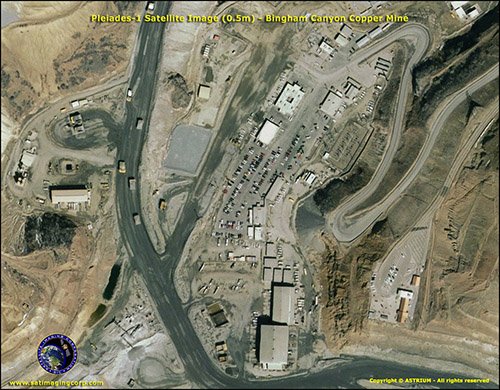
Pleiades-1A (0.5m) Satellite Image
Bingham Canyon Copper Mine, Utah, USA
Image Copyright © AIRBUS Defence & Space. All rights reserved.
Bingham Canyon Copper Mine, Utah, USA
ArcScene 3D View
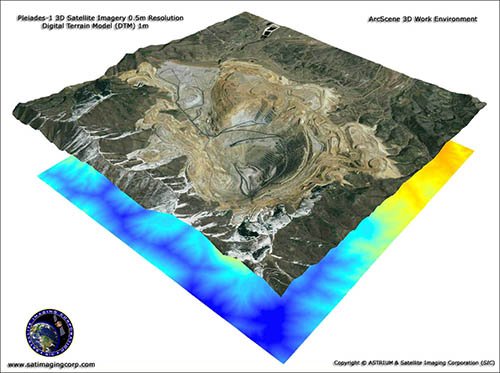
Image Copyright © AIRBUS Defence & Space/Processed by Satellite Imaging Corporation. All rights reserved.
Satellite Imaging Corporation (SIC) provides high-resolution satellite maps for analysis and mapping applications such as Geographic Information System (GIS). Our imaging, Geographic Information System (GIS), Global Positioning System (GPS), and geodesy experts are highly experienced in image processing, orthorectification, georeferencing, feature extraction, and mosaicing for your specific project needs.
In addition, we work with trained geological consultants and can leverage their expertise to interpret the image data for several different mining and geological applications.
If you have a particular mining or geologic project we would be happy to review your requirements and give you an estimate of what we can provide in support of your project.
Sample Images
Mineral Exploration, Classification, and Interpretation
* Click on thumbnail to view in full resolution.
For many image requests, a matching image can be located in our global archives of satellite imagery. If no satellite map data is available in the archives, new satellite image data can be acquired through a satellite tasking process. Besides providing image data, Satellite Imaging Corporation performs many tasks in the background to ensure that we meet customer specifications and time schedules.
- Negotiate the attainment of images
- Process imagery, including orthorectification, DSM, DTM, and raster-to-vector conversions
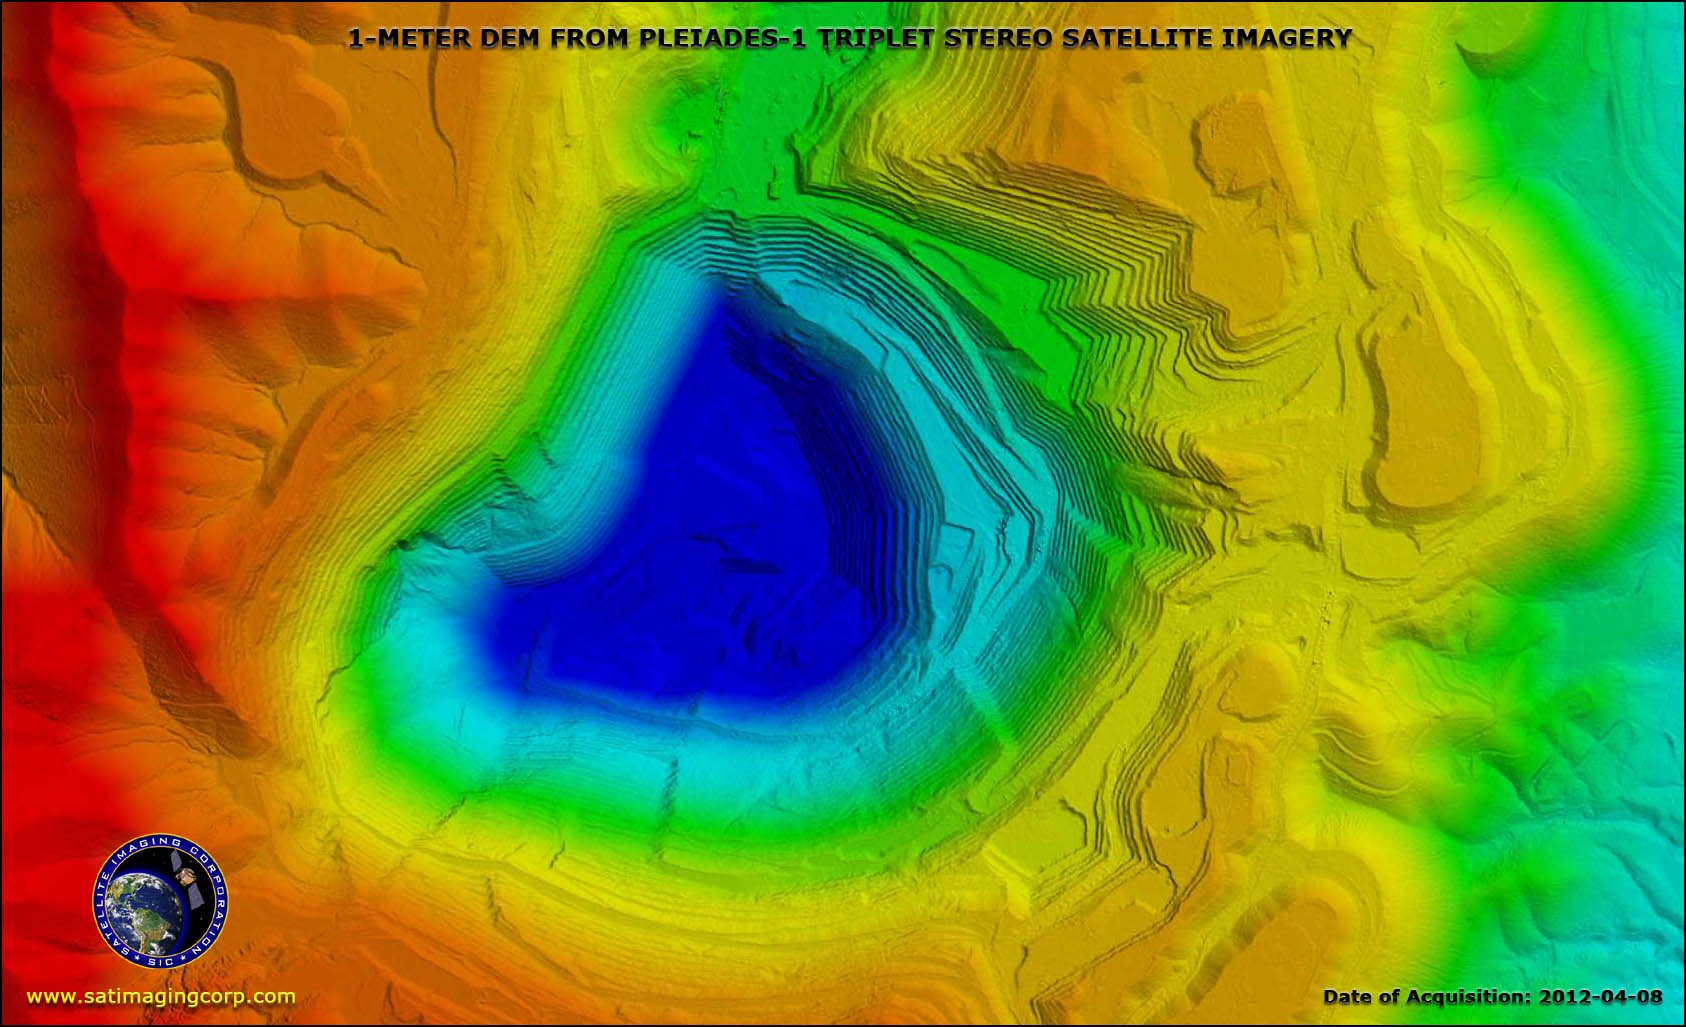
- Provide 3D Digital Terrain Models and modeling for project planning and support
- Incorporate the third-party USA and international GIS data
- Consult on band combinations most appropriate to bring out the geographical and geological features that are most pertinent to your project
- Perform spectral analysis for land cover use classifications and environmental impact changes
Satellite image data has been used by government, commercial, industrial, civilian, and educational communities throughout the world. The data is used to support a wide range of applications in such areas as global change research, agriculture, forestry, geology, resource management, geography, mapping, hydrology, and oceanography.


